The Ultimate Homemade Lemon Loaf Recipe: Perfectly Moist, Zesty, & Better Than Starbucks!
Prepare to fall in love with a slice of pure sunshine! This homemade lemon loaf recipe is not just good; it’s truly exceptional, often hailed by many as even better than the beloved version from Starbucks. Imagine a quick bread that’s incredibly moist, tender, and infused with an invigorating burst of fresh, bright citrus flavor. Made with simple pantry staples and fresh lemons, this recipe transforms basic ingredients into a comforting treat that fills your kitchen with the most delightful aroma as it bakes. For an extra touch of sweetness and tangy perfection, we’ll crown it with a simple, creamy lemon glaze.
This versatile lemon loaf is a delightful companion for any time of day. Serve a generous slice with a warm, cozy white chocolate mocha to kickstart your morning or elevate your brunch spread. As the warmer months approach, imagine pairing it with a refreshing passion tea lemonade – a truly sublime summer treat. It’s the kind of comforting, satisfying bake that you’ll want to make again and again, whether for a special occasion or just a sweet everyday indulgence.

I stand by this statement: this homemade lemon loaf genuinely surpasses its Starbucks counterpart. The beauty of this recipe lies in its simplicity. As a quick bread, it’s remarkably easy to prepare, requiring no yeast or lengthy rising times, making it accessible even for novice bakers. Each bite delivers a moist, tender, and buttery texture that melts in your mouth, while the sweet, fresh lemon scent permeates your home, creating an inviting atmosphere. The crowning glory is a simple, silky lemon glaze that elevates this bread to taste like a luxurious cake – the best kind of cake you can even enjoy for breakfast!
Why You’ll Fall in Love with This Glazed Lemon Loaf Recipe
- Better (and more affordable) than the drive-thru. Recreating your favorite coffee house treats at home isn’t just budget-friendly; it’s a rewarding experience that often yields superior results. When you bake this lemon loaf yourself, you control the quality of ingredients, ensuring the freshest lemons and purest flavors, resulting in a loaf that tastes undeniably better and costs a fraction of the price of a store-bought slice.
- Effortless Quick Bread Perfection. If you’re craving something delicious but find yourself short on time, quick breads are your ideal solution. This lemon loaf recipe skips the yeast and lengthy proofing, meaning you can whip up the batter and have it in the oven in no time. It’s perfect for busy weeknights, last-minute gatherings, or whenever a sweet craving strikes without the commitment of traditional baking.
- Versatile for Any Occasion. This tender lemon loaf is wonderfully versatile, making it perfect for slicing and serving across a variety of occasions. It’s an excellent choice for a hearty breakfast, an elegant brunch centerpiece, a delightful afternoon snack, or a light dessert. Plus, it transports exceptionally well, making it ideal for holiday brunches, potlucks, bake sales, or as a thoughtful homemade gift. Expect to be asked for the recipe!
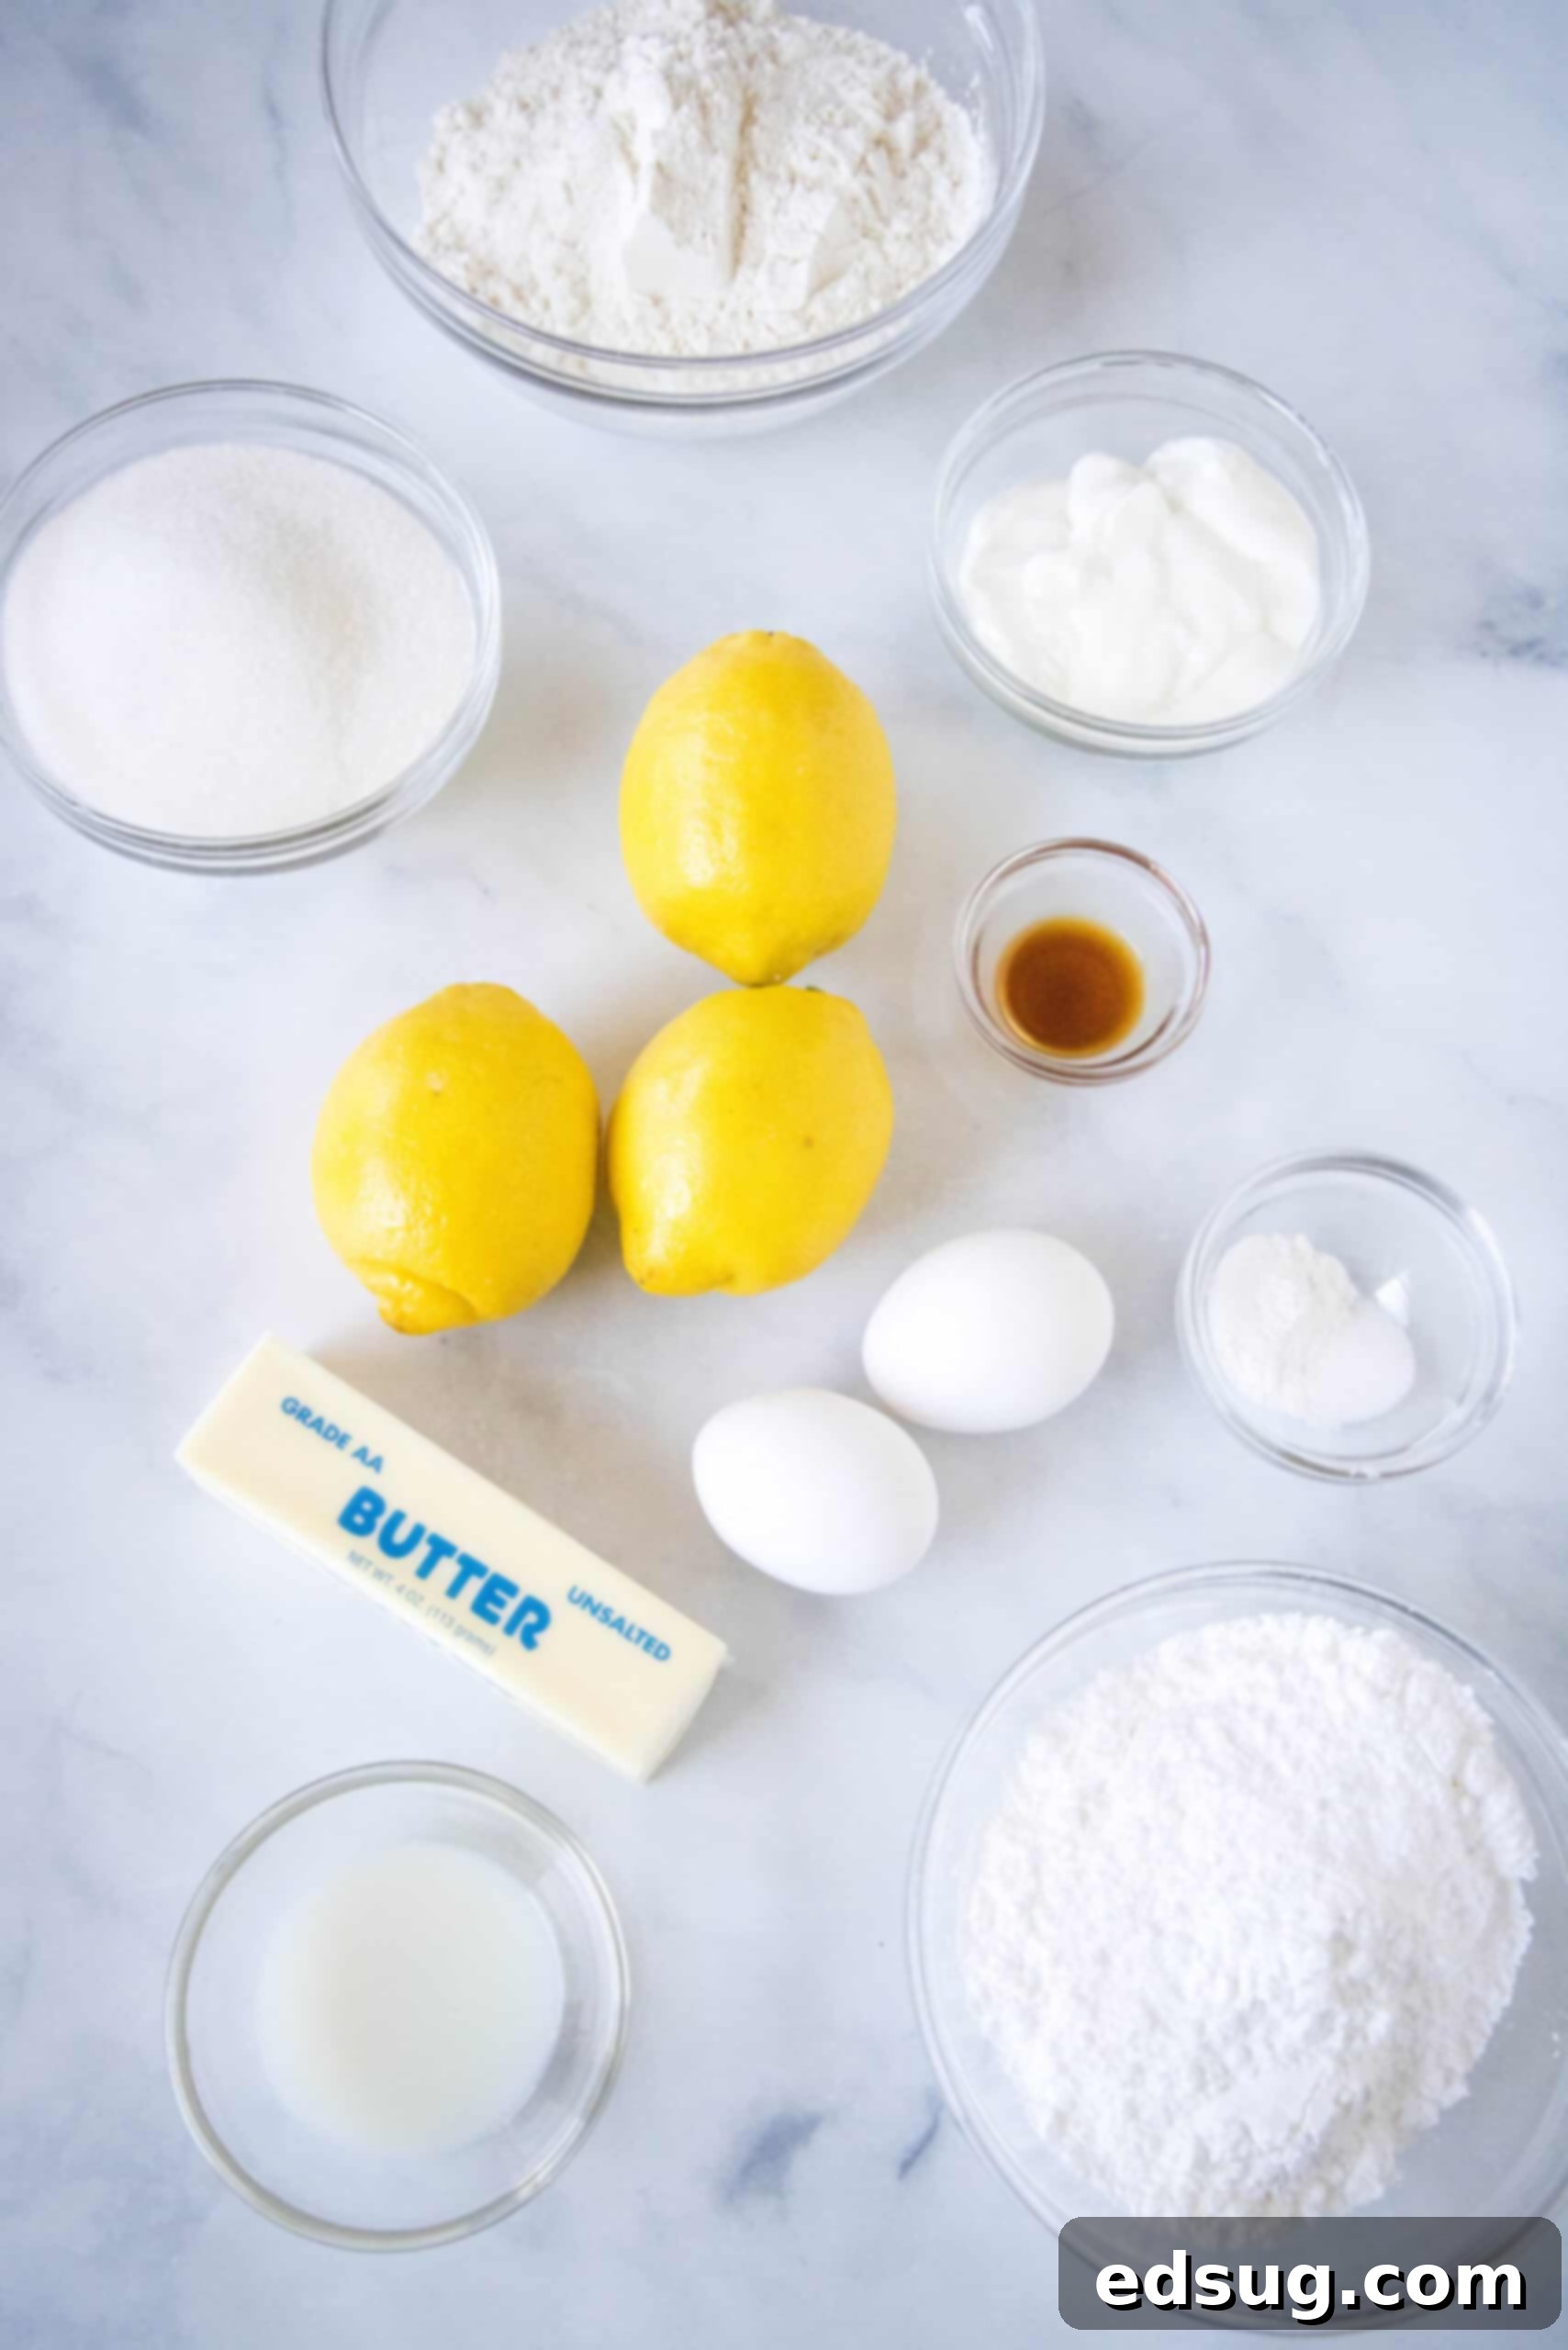
Essential Ingredients for Your Zesty Lemon Loaf
Crafting a soft, buttery, Starbucks-style lemon loaf from scratch requires a few key ingredients. Below, I’ve highlighted the important components and provided some helpful notes. For the full, printable list of ingredients with exact amounts, please refer to the recipe card located further down the post.
- Dry Ingredients: You’ll need all-purpose flour for structure, baking powder to give our loaf its beautiful rise and lightness, and salt to balance and enhance all the flavors. Always check the expiration date on your baking powder; old baking powder can lead to a flat loaf.
- Unsalted Butter: Using unsalted butter allows you to control the overall saltiness of your bread. It’s crucial that your butter is softened to room temperature before you begin. This ensures it creams properly with the sugar, creating a light and fluffy base for your batter. If you forget to take it out, a quick trick is to cover it with a warm bowl for 10-15 minutes (pour boiling water into a glass bowl, wait 5 minutes, then dump it out and place the warm bowl over the butter).
- Fresh Lemons: This is the star of our show and what truly distinguishes this homemade lemon loaf. For an unparalleled bright, tangy, and aromatic flavor, there is no substitute for fresh lemon zest and juice. Bottled lemon juice or artificial extracts simply lack the vibrant brightness and complex notes that fresh lemons provide. Opt for organic lemons if possible, especially when zesting.
- Eggs and Vanilla Extract: Like butter, eggs should also be at room temperature. This helps them emulsify better with the other ingredients, resulting in a smoother, more uniform batter and a finer crumb in the finished loaf. If your eggs are cold, place them in a bowl of warm (not hot) water for a few minutes. Vanilla extract adds a wonderful depth of flavor that complements the lemon beautifully.
- Plain Yogurt: I highly recommend using full-fat plain or Greek yogurt. Yogurt is a secret weapon in quick breads, contributing immense moisture, tenderness, and a slight tang that enhances the lemon flavor. It also interacts with the baking powder, aiding in leavening. Again, room temperature is best here. If you don’t have yogurt, full-fat sour cream makes an excellent substitute.
- Powdered Sugar and Lemon Juice (for the Glaze): These two simple ingredients are all you need to create a luscious, pourable lemon glaze. While the glaze is optional, I find it truly boosts the overall lemon flavor and adds a beautiful, sweet finish that makes the loaf feel extra special, almost like a cake.
Tools You’ll Need for Baking
To ensure a smooth baking process, gathering your essential tools beforehand is always a good idea. You won’t need anything fancy, just standard kitchen equipment:
- Loaf Pan: A standard 9×5 inch loaf pan is perfect for this recipe.
- Mixing Bowls: At least two, one for dry ingredients and one for wet.
- Whisk: For combining dry ingredients and light mixing.
- Electric Mixer: A stand mixer or hand mixer is ideal for creaming butter and sugar effectively.
- Rubber Spatula: For scraping down bowls and gently folding batter.
- Measuring Cups and Spoons: For accurate ingredient measurements.
- Lemon Zester/Grater: Essential for getting that fragrant lemon zest.
- Lemon Juicer: Makes extracting fresh lemon juice quick and easy.
- Wire Rack: For cooling the loaf evenly.
- Parchment Paper: Optional, but highly recommended for easy loaf removal.
How to Bake Your Perfect Lemon Loaf
Follow these straightforward steps to whip up a quick, vibrant citrus batter and bake it to golden perfection before applying the delightful glaze. Remember to scroll down to the recipe card for the complete, step-by-step directions and precise measurements.
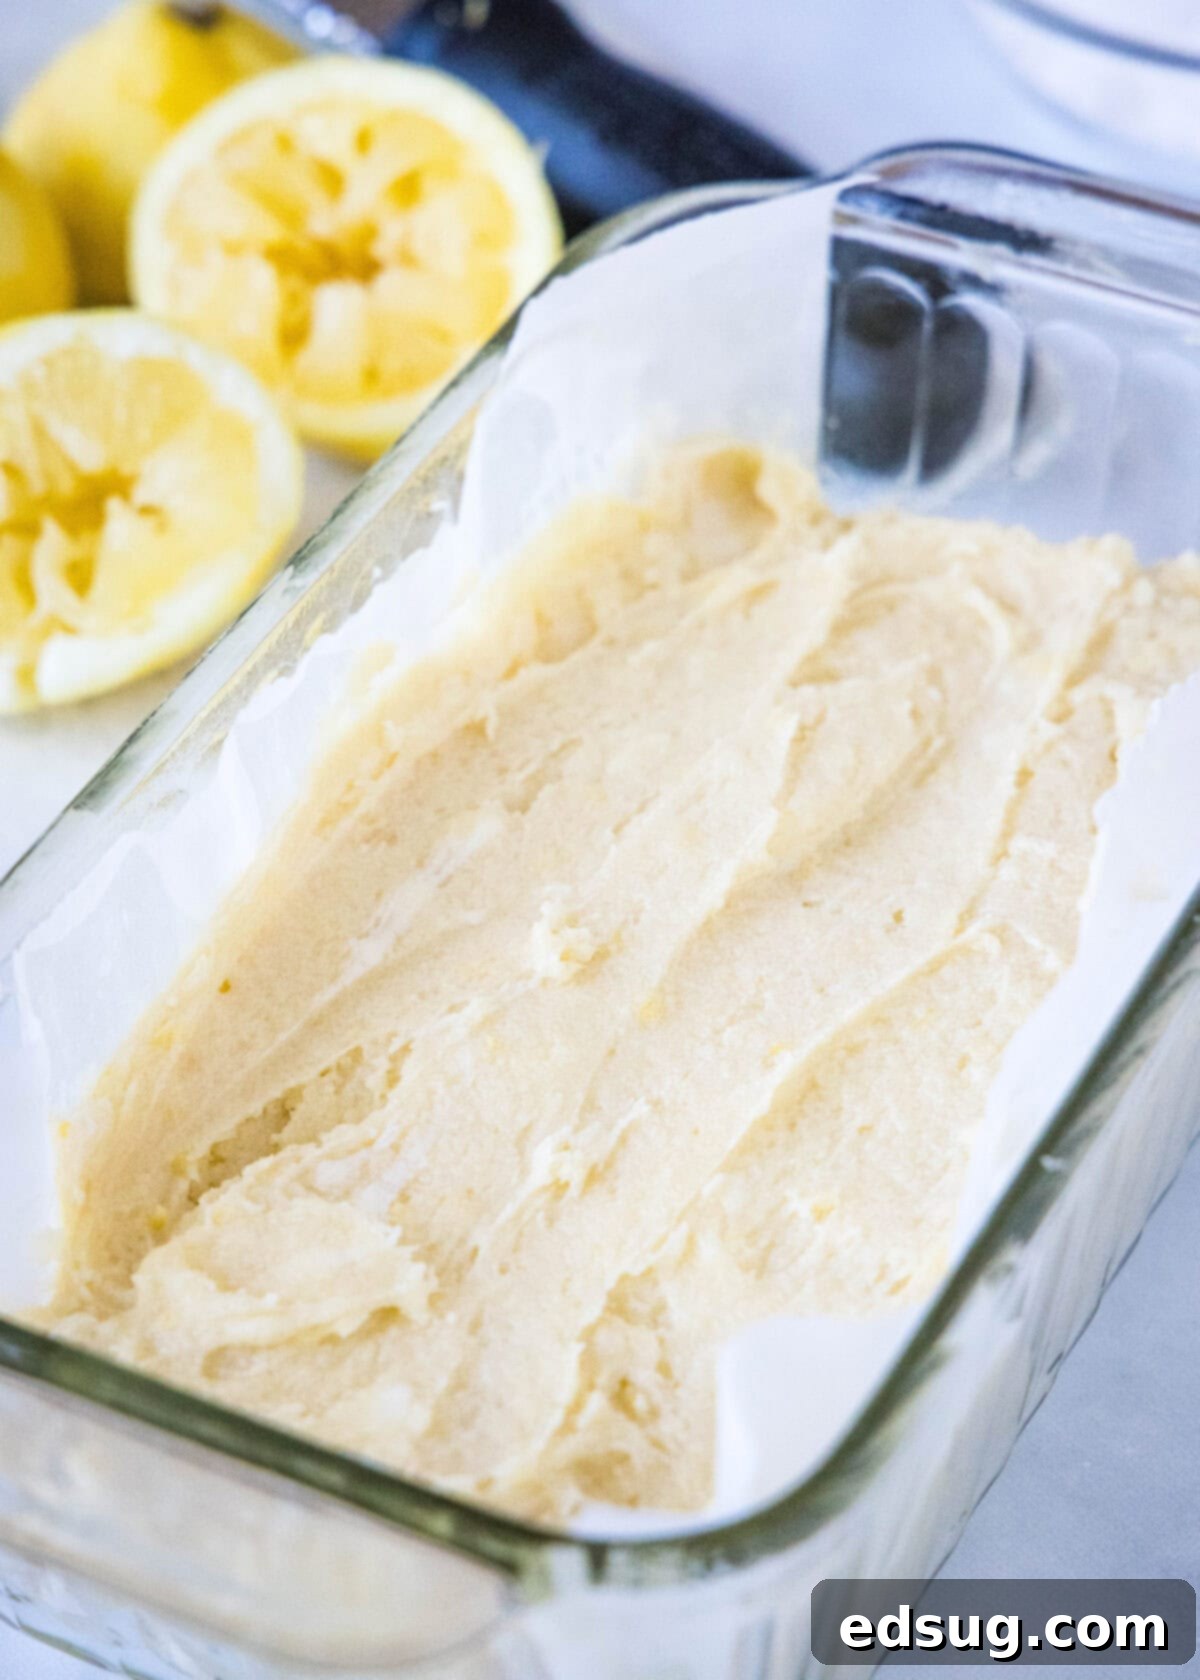

- Prep the Pan and Preheat Oven: Start by preheating your oven to 350ºF (175ºC). Generously grease a standard loaf pan or, for effortless removal, line it with parchment paper, leaving an overhang on the sides to use as “handles.” This simple step ensures your beautiful loaf comes out perfectly intact.
- Combine Dry and Wet Ingredients Separately: In one medium bowl, whisk together the all-purpose flour, baking powder, and salt until thoroughly combined. In a separate, larger bowl (preferably of a stand mixer), cream together the softened unsalted butter, granulated sugar, and fragrant lemon zest for 2-3 minutes. Beat until the mixture is visibly light, fluffy, and pale yellow. This creaming process incorporates air, contributing to the loaf’s tender texture. Then, beat in the room temperature eggs one at a time, followed by the fresh lemon juice and vanilla extract, mixing until everything is well combined and smooth. Don’t forget to scrape down the sides of the bowl to ensure all ingredients are incorporated.
- Form the Batter: With the mixer on low speed, slowly begin adding the dry ingredient mixture to the wet batter, alternating with the plain yogurt. Start and end with the dry ingredients. Mix until just combined – it’s crucial not to overmix the batter at this stage! Overmixing can develop the gluten in the flour too much, leading to a tough and dense loaf. A few lumps are perfectly fine.
- Bake and Cool: Transfer the lovingly prepared batter into your greased and/or parchment-lined loaf pan, spreading it evenly. Bake in the preheated oven for 45-55 minutes. The loaf is done when it’s beautifully golden brown on top and a wooden skewer or toothpick inserted into the center comes out mostly clean, with only a few moist crumbs attached. Once baked, remove the pan from the oven and let the loaf cool in the pan for about 10-15 minutes. This allows it to firm up before you gently lift it out (using the parchment paper handles, if applicable) to finish cooling completely on a wire rack.
The Signature Lemon Glaze
This final step is entirely optional, but I highly recommend it for an extra layer of lemon flavor and a beautiful, sweet finish. The creamy two-ingredient glaze truly transforms the loaf into a dessert-like experience. It’s essential to wait until the loaf has cooled completely before applying the glaze; otherwise, it will simply melt off. For an elegant touch, grate some fresh lemon zest over the top of the glazed loaf!
- Mix: In a small bowl, whisk together the powdered sugar and fresh lemon juice. Start with 2 tablespoons of lemon juice and add more in small increments (half a teaspoon at a time) until you achieve a smooth, pourable consistency that is thick enough to coat the back of a spoon but still flows easily.
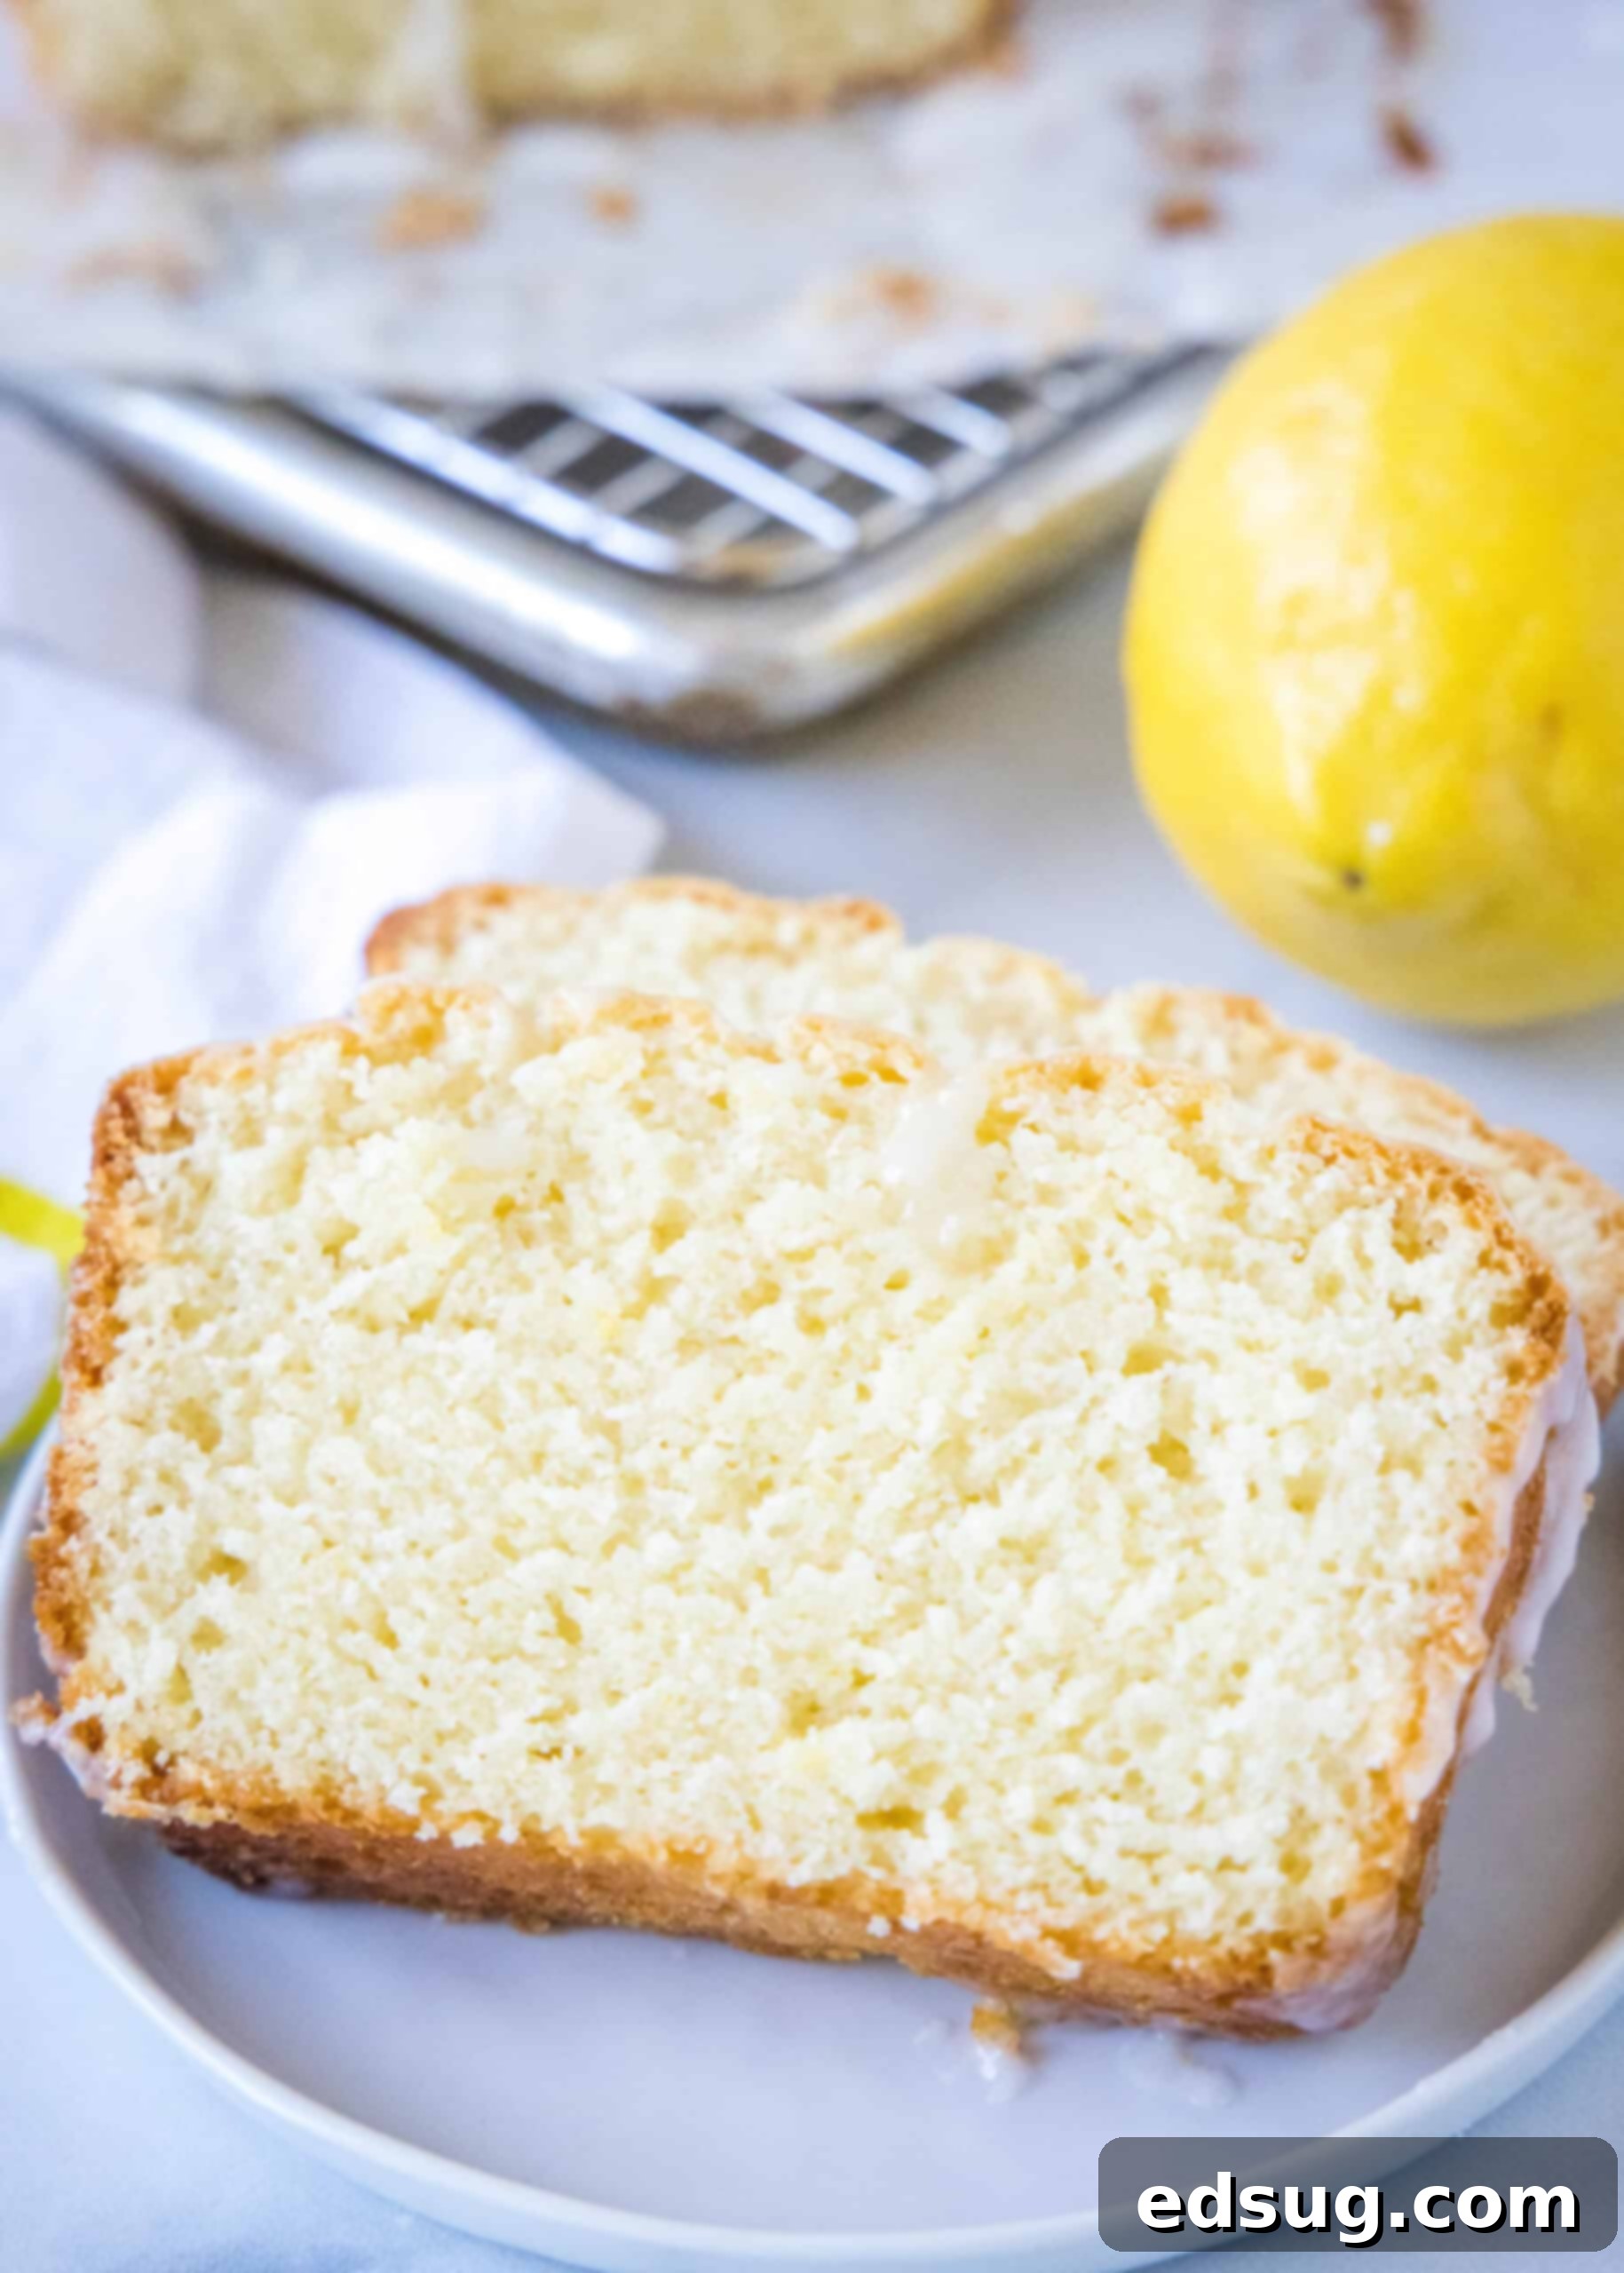
- Pour: Once your lemon loaf is completely cool, artfully drizzle the prepared glaze evenly over the top, letting it cascade down the sides. Allow the glaze to set for about 15-20 minutes before slicing and serving.
There’s also the equally delicious no-glaze option! If you prefer a simpler approach or plan on toasting your lemon loaf slices, skipping the glaze is perfectly fine. In this case, serve the warm, crispy slices drizzled with a touch of golden honey, or generously smothered with softened butter. Or, why not both for the ultimate indulgence?

Expert Tips for a Flawless Lemon Loaf
- Don’t Overmix the Batter: This is arguably the most crucial tip for any quick bread. Overmixing develops the gluten in the flour too much, resulting in a dense, tough, and chewy loaf rather than a light, tender, and cakey one. Mix until the ingredients are just combined, and a few small lumps are perfectly acceptable.
- Confirm Doneness with a Toothpick: To ensure your loaf is perfectly baked through, insert a wooden toothpick or a thin skewer into the very center of the loaf towards the end of the baking time. If it comes out mostly clean, with only moist crumbs attached (no wet batter), your bread is done. If it comes out wet, continue baking for a few more minutes and re-test.
- Allow Proper Cooling in the Pan: Timing is everything when removing your loaf from the pan. This lemon bread is easiest to remove after it has cooled in the pan for about 10-15 minutes. If you try to remove it too soon, it might be too fragile and could break apart. Conversely, if you wait until the bread is completely cold in the pan, it’s more likely to stick, making removal difficult.
- Adjust Glaze Consistency as Needed: The ideal glaze consistency should be pourable but thick enough to coat the loaf nicely. If your glaze appears too runny, gradually whisk in a little more powdered sugar, a tablespoon at a time, until it thickens. If it’s too thick, add a tiny bit more lemon juice (half a teaspoon at a time) until it reaches the perfect drizzling consistency.
- Embrace Fresh Lemons: For the most authentic and vibrant lemon flavor, always use freshly squeezed lemon juice and fresh zest. The bright, aromatic oils in fresh lemon zest and the tangy juice are truly what set this homemade loaf apart, delivering a superior taste that bottled alternatives simply cannot replicate.
Make Lemon Muffins Instead!
This incredibly versatile lemon loaf batter isn’t just for loaves! Just like with a delicious banana bread batter, you can easily adapt this recipe to create delightful lemon muffins. Simply prepare a muffin tin by lining it with paper liners. Fill each muffin cup about two-thirds full with the prepared lemon batter. While the baking time will differ, you can follow similar guidelines to my popular lemon poppyseed muffins: bake at 350ºF (175ºC) for approximately 18-20 minutes, or until a toothpick inserted into the center of a muffin comes out clean. This makes a fantastic grab-and-go breakfast or snack!
How to Store Your Lemon Loaf
Proper storage is key to keeping your lemon loaf moist and fresh for as long as possible. Here’s how to best store your delicious creation:
- At Room Temperature: This lemon loaf boasts an impressive shelf life! Once it has completely cooled, store the loaf in an airtight container or wrap it tightly in plastic wrap at room temperature. It will remain wonderfully soft and moist for up to 5 days, making it perfect for enjoying throughout the week.
- Freezing for Longer Enjoyment: For extended freshness, this lemon loaf freezes beautifully, whether glazed or unglazed, whole or pre-sliced. Wrap the cooled loaf (or individual slices) tightly in plastic wrap, then again in aluminum foil. It can be frozen for up to 1 month. When you’re ready to enjoy, simply thaw the bread at room temperature. I particularly love packing frozen slices into lunchboxes; they’ll be perfectly thawed by mid-morning, ready for a delightful coffee break!
Try These Other Quick Bread Recipes
If you’ve enjoyed the ease and deliciousness of this lemon loaf, you’ll love exploring other quick bread recipes from my collection:
- Fresh Orange Bread – A bright and citrusy twist.
- Peanut Butter Banana Bread – A comforting and rich flavor combination.
- Lemon Poppy Seed Bread – Another zesty classic with a delightful texture.
- Strawberry Bread – Sweet and fruity, perfect for spring.
- Cranberry Orange Bread – A festive and flavorful pairing.

⭐
⭐
⭐
⭐
Lemon Loaf
Erin Sellin
10
55
1 5
10 servings
Rate Recipe
Print Recipe
Ingredients
- 1 ½ cups all-purpose flour
- 1 ½ teaspoons baking powder
- ½ teaspoon salt
- ½ cup unsalted butter, softened
- 1 cup granulated sugar
- 1 Tablespoon lemon zest
- 2 whole large eggs
- 2 Tablespoons fresh lemon juice
- 1 teaspoon vanilla extract
- ½ cup plain yogurt, or sour cream
Glaze (Optional)
- 1 ½ cup powdered sugar
- 2-3 Tablespoons fresh lemon juice
Instructions
-
Preheat oven to 350º F (175ºC). Prepare a loaf pan with non-stick spray or line it with parchment paper for easy removal.
-
In a medium bowl, whisk together the flour, baking powder, and salt. Set aside.1 ½ cups all-purpose flour, 1 ½ teaspoons baking powder, ½ teaspoon salt
-
In a stand mixer (or using a hand mixer), cream together the softened butter, granulated sugar, and lemon zest until the mixture is light, fluffy, and pale in color. This process should take about 2-3 minutes to achieve the right consistency.½ cup unsalted butter, 1 cup granulated sugar, 1 Tablespoon lemon zest
-
Add the room temperature eggs one at a time, mixing well after each addition. Then, stir in the fresh lemon juice and vanilla extract. Mix until truly well combined, scraping down the sides of the bowl as necessary to ensure all ingredients are incorporated.2 whole large eggs, 2 Tablespoons fresh lemon juice, 1 teaspoon vanilla extract
-
With the mixer on low speed, slowly alternate adding the dry flour mixture with the plain yogurt into the wet ingredients. Begin and end with the dry ingredients. Mix only until the batter just comes together and is combined. Be very careful not to overmix, as this can lead to a tough loaf. A few small lumps are fine.½ cup plain yogurt
-
Pour and spread the batter evenly into the prepared loaf pan. Bake for 45-55 minutes, or until the top is golden brown and a wooden skewer or toothpick inserted into the center comes out mostly clean. Remove the loaf from the oven and let it stand in the pan for 10-15 minutes before carefully removing it to a wire rack to cool completely.
-
To prepare the glaze, combine powdered sugar and fresh lemon juice in a small bowl. Whisk until smooth and the consistency is easy to drizzle over the lemon loaf. Start with 2 tablespoons of lemon juice and add more in small increments if needed.1 ½ cup powdered sugar, 2-3 Tablespoons fresh lemon juice
-
Once the lemon loaf is completely cooled, drizzle the prepared glaze generously over the top. Allow the glaze to set for about 15-20 minutes before slicing and serving. Enjoy!
Nutrition
Carbohydrates: 54g |
Protein: 4g |
Fat: 11g |
Saturated Fat: 6g |
Polyunsaturated Fat: 1g |
Monounsaturated Fat: 3g |
Trans Fat: 0.4g |
Cholesterol: 59mg |
Sodium: 137mg |
Potassium: 123mg |
Fiber: 1g |
Sugar: 38g |
Vitamin A: 344IU |
Vitamin C: 3mg |
Calcium: 53mg |
Iron: 1mg
Nutrition information is automatically calculated, so should only be used as an approximation.
Additional Info
Erin Sellin
10
55
1 5
Breakfast, Dessert
American
10 servings
320
lemon loaf
Like this recipe? Leave a comment below!
I created a fun group on Facebook, and I would love for you to join us! It’s a place where you can
share YOUR favorite recipes, ask questions, and see what’s new at Dinners, Dishes and Desserts (so that you never miss a new recipe)!
Be sure to follow me on Instagram and
tag #dinnersdishes so I can see all the wonderful DINNERS, DISHES, AND DESSERTS
recipes YOU make!
Be sure to follow me on my social media, so you
never miss a post!
Facebook | Twitter | Pinterest | Instagram
.
