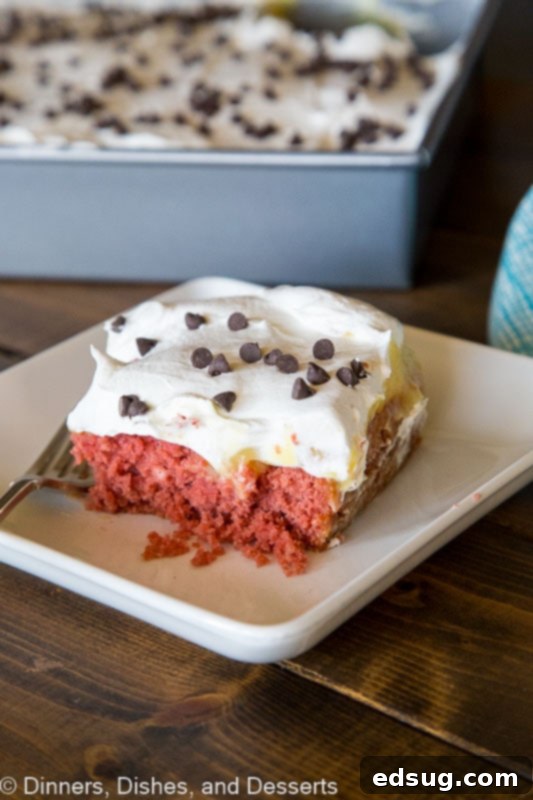
Decadent Beet Red Velvet Poke Cake: A Naturally Colored, Ultra-Moist Dessert Recipe
Indulge in the luscious Beet Red Velvet Poke Cake, a tender, moist, and utterly delicious dessert. This stunning cake achieves its vibrant red hue naturally, using beets instead of artificial food coloring. Crowned with creamy vanilla pudding and airy homemade whipped cream, it’s a show-stopping treat perfect for any celebration or a special weeknight delight!
Red velvet desserts hold a cherished place in many hearts, especially as holidays like Valentine’s Day approach. The mere mention of “red velvet” conjures images of rich, deep red cakes with a hint of cocoa and a signature tangy cream cheese frosting (though ours is topped with luscious whipped cream!). It’s a flavor profile that has spawned countless variations, from cookies like these Red Velvet M&M Cookies to decadent cheesecakes and, of course, classic layer cakes. But for many, the charm of red velvet is often overshadowed by the reliance on artificial food dyes to achieve its iconic color.
The Revolutionary Secret: Harnessing Beets for Natural Red Velvet Color
Imagine enjoying a red velvet cake that boasts a captivating, naturally derived red color. This recipe introduces a game-changing ingredient: beets! Yes, ordinary beets can be transformed into a powerful natural dye, giving your cake a gorgeous, authentic crimson without any artificial additives. By simply pureeing cooked beets and utilizing the bright red liquid from the jar, you unlock a vibrant, healthy color source that will surprise and delight. What’s even better? The subtle earthy notes of the beets are completely imperceptible in the final baked product, leaving you with pure red velvet deliciousness.

From Skeptic to Believer: The Beet Transformation
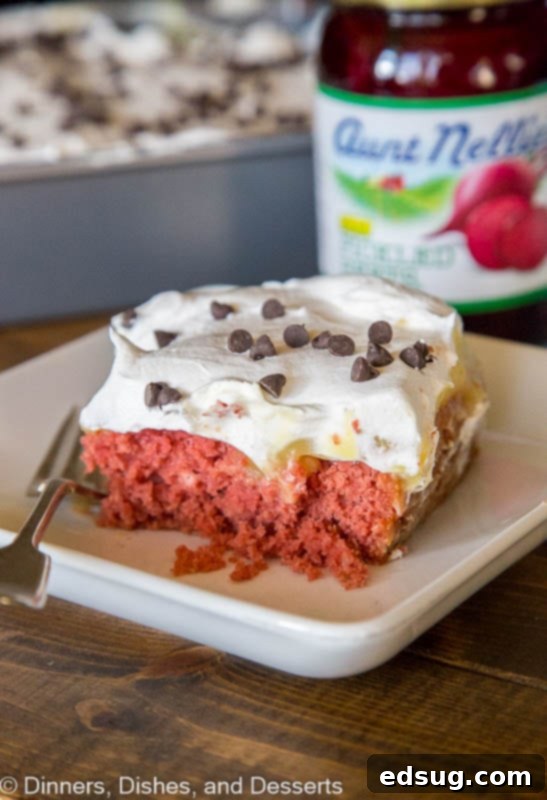
For this naturally colored red velvet cake, we specifically used Aunt Nellie’s Sliced Pickled Beets. It’s perfectly normal to be a skeptic when first considering beets in a dessert; I certainly was! The idea of a vegetable coloring a cake seemed, at first, a culinary experiment fraught with potential pitfalls. However, after rigorous testing and adjustments, the results were astounding. You genuinely cannot taste the beets in this cake. The initial recipes I experimented with sometimes left a noticeable beet flavor, but this perfected version seamlessly integrates the beets for color, leaving no tell-tale taste. It’s all the classic red velvet flavor you adore, now with a wholesome, natural twist.
The Enduring Appeal of Poke Cakes
Poke cakes have an interesting history, first skyrocketing in popularity in the 1970s and now making a triumphant return to modern kitchens. Their enduring appeal stems from their sheer simplicity and incredible adaptability. The concept is straightforward: bake a cake, then literally “poke” holes across its surface after it cools slightly. These holes then become channels for a liquid or creamy filling to seep into, transforming the cake’s texture and infusing it with additional moisture and flavor. This technique guarantees an incredibly tender, moist cake that resists drying out, making it a fantastic choice for gatherings, potlucks, or simply when you want a consistently perfect dessert.

Building Layers of Decadence: How This Poke Cake Comes Together
The foundation of this incredible dessert is a tender red velvet cake, meticulously crafted to incorporate the natural beet coloring. Once baked to a delicate perfection, the cake is cooled just enough to handle. This is the moment for the signature “poke” technique. Using the blunt end of a wooden spoon handle, create a series of evenly spaced holes across the top of the cake. The key is to avoid poking too deep, ensuring that the cake remains structurally sound while still creating ample reservoirs for the next delightful layer. These holes are essential for the cake to absorb the rich vanilla pudding.
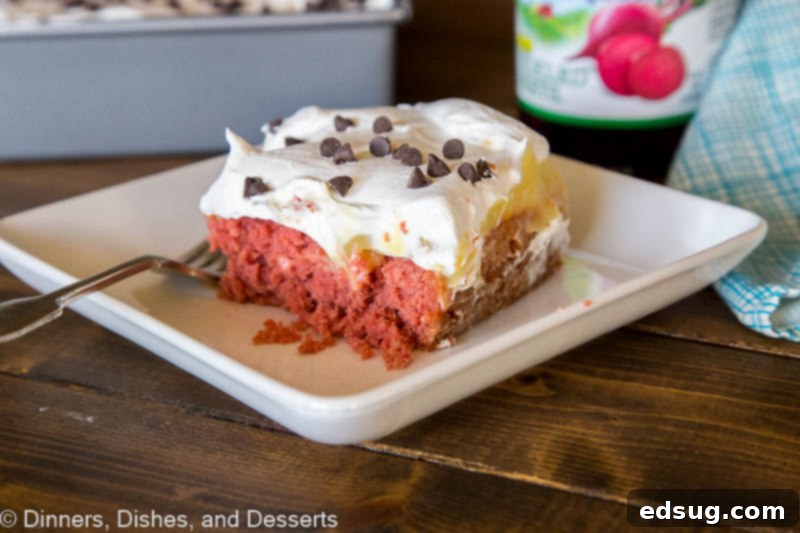
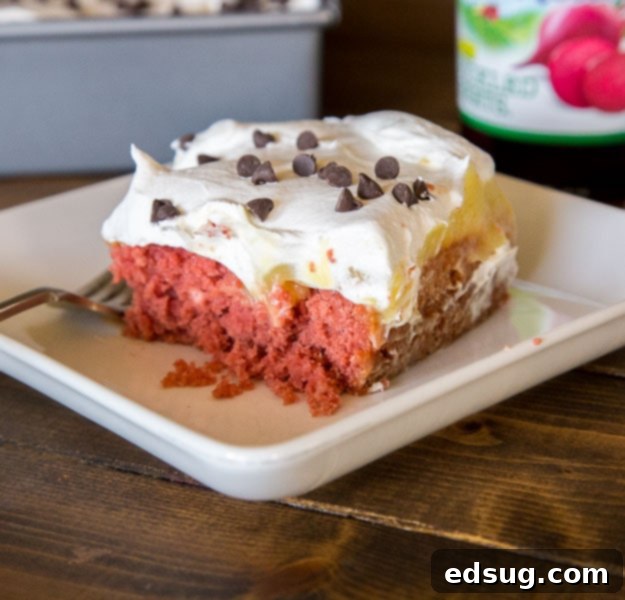
Following the poking, a creamy, smooth vanilla pudding is generously poured over the cake. This allows the pudding to cascade into every single hole, saturating the cake with moisture and a burst of sweet vanilla flavor. This step is pivotal for achieving the ultra-moist and wonderfully tender consistency that poke cakes are famous for. The pudding not only adds a new flavor dimension but also acts as an internal moisturizing agent, keeping the cake fresh and decadent. To complete this masterpiece, the cake is crowned with a cloud of homemade whipped cream – light, fluffy, and perfectly sweet. For an extra touch of festivity or chocolatey goodness, you can sprinkle on some mini chocolate chips or colorful sprinkles. This combination of a naturally vibrant cake, creamy pudding, and fresh whipped cream makes for a truly irresistible dessert, perfect for Valentine’s Day or any occasion that calls for a special touch.

Why This Beet Red Velvet Poke Cake is a Must-Try
This year, elevate your dessert game and make your loved ones feel truly special with this Beet Red Velvet Poke Cake. It’s more than just a dessert; it’s a statement that shows you’ve invested time and care into creating something both delicious and thoughtfully prepared. You’ll delight in offering a dessert that not only looks stunning with its natural, vibrant color but also delivers an unforgettable taste experience. The rich, moist texture combined with the creamy pudding and light whipped cream creates a harmonious blend that is simply irresistible. This recipe is a fantastic way to enjoy a classic flavor with a healthy, natural twist.
Tips for Achieving Poke Cake Perfection
- Choosing Your Cake Mix: A white or yellow cake mix provides a neutral base, allowing the beet color and cocoa flavor to shine. Ensure it’s a good quality mix for optimal results.
- Beet Preparation is Key: Draining and pureeing the pickled beets with some of their liquid is crucial for a smooth batter and even color. Don’t skip blending until it’s perfectly smooth. The reserved beet liquid, combined with water, helps maintain the right batter consistency.
- Poke with Purpose: Use the back of a wooden spoon or a similar blunt object to create consistent holes. Aim for holes about 1 inch apart and ensure they are deep enough to hold the pudding but not so deep that they compromise the cake’s structure.
- Chill for Maximum Moisture: The chilling time in the refrigerator is essential. It allows the pudding to fully set and seep into every part of the cake, making it incredibly moist and flavorful. Patience here is rewarded!
- Homemade Whipped Cream: While convenient, canned whipped topping doesn’t compare to the fresh, airy texture and delicate sweetness of homemade whipped cream. It truly elevates the entire dessert.
- Storage: Always store any leftover poke cake in an airtight container in the refrigerator. This ensures it stays fresh, moist, and delicious for several days.
Explore More Delicious Dessert Recipes
If you loved this naturally colored poke cake and are eager to discover more delectable treats, you’re in the right place! Our collection of dessert recipes is continually growing with options for every craving and occasion. Here are a few more favorites you might enjoy:
- Raspberry Lemon Cupcakes: A delightful fusion of tart lemon and sweet raspberries, perfect for spring or summer.
- Nutella Crepes: Light, delicate crepes filled with the rich, chocolate-hazelnut goodness of Nutella – an indulgent breakfast or dessert.
- Olive Oil Brownies: An unexpected twist that yields incredibly fudgy, moist, and sophisticated chocolate brownies.
- Oreo Cheesecake Bites: Creamy, dreamy mini cheesecakes with an Oreo crust, perfect for portion control or parties.
- Peanut Butter Bars: A classic no-bake dessert, packed with irresistible peanut butter flavor and a chocolate topping.
- Oreo Brownies: The ultimate treat for chocolate and Oreo enthusiasts, combining two favorites into one fudgy delight.

Beet Red Velvet Poke Cake
Erin Sellin
20 minutes
30 minutes
50 minutes
20
Pin Recipe
Rate Recipe
Print Recipe
Video Tutorial
Essential Equipment
-
13×9 Baking Dish
-
Blender or Food Processor
-
Whisks
-
Mixing Bowls
-
Measuring Cups and Spoons
Ingredients
For the Red Velvet Cake
-
1
15.25 oz box white or yellow cake mix -
1
Tablespoon
unsweetened cocoa powder
-
2
large eggs
-
3
Tablespoons
vegetable oil
-
1
16 oz jar Aunt Nellie’s Sliced Pickled Beets (undrained) -
Water (as needed)
For the Pudding Layer
-
2
3.4 oz boxes vanilla instant pudding mix -
4
cups
skim milk
For the Topping
-
1 1/2
cups
heavy cream
-
1/3
cup
powdered sugar
-
1
teaspoon
vanilla extract
-
1/4
cup
semi-sweet mini chocolate chips (optional, for garnish)
Instructions
-
Preheat your oven to 350°F (175°C). Prepare a 13x9x2 inch baking pan by thoroughly spraying it with nonstick baking spray or by greasing and flouring it. Set this prepared pan aside.
-
Carefully drain the entire jar of Aunt Nellie’s Sliced Pickled Beets, ensuring you reserve all of the beet liquid. Place the drained beet slices into a food processor or blender. Add 1/4 cup of the reserved beet liquid to the processor. Blend until the beets are completely smooth and free of any chunks. Then, add enough water to the remaining beet liquid to make a total of 1 cup of combined liquid.
-
In a large mixing bowl, thoroughly combine the dry cake mix and the unsweetened cocoa powder. Next, add the beet puree, the 1 cup of beet liquid mixture, the eggs, and the vegetable oil to the dry ingredients. Beat the mixture for exactly 2 minutes on medium speed using an electric mixer until it is smooth, uniform, and beautifully red.
-
Pour the vibrant red cake batter evenly into your prepared baking pan. Bake for 25-30 minutes, or until a wooden skewer or toothpick inserted into the center of the cake comes out clean. Once baked, remove the cake from the oven and let it cool in the pan on a wire rack for approximately 20 minutes.
-
Once the cake has slightly cooled, take the back of a wooden spoon (or a similar round-ended utensil) and carefully poke holes evenly across the entire top surface of the cake. Aim for holes about 1 inch apart, being mindful not to poke all the way through to the bottom of the pan.
-
In another large bowl, whisk together the vanilla instant pudding mix and skim milk until the mixture is smooth and begins to thicken. Immediately pour this creamy pudding mixture over the poked cake, making sure it spreads into all the holes and covers the entire surface evenly.
-
Transfer the cake to the refrigerator and allow it to chill for a minimum of 2 hours. This crucial step allows the pudding to fully set and be absorbed by the cake, creating its signature moist and delicious texture.
-
Prepare the homemade topping by combining the heavy cream, powdered sugar, and vanilla extract in a chilled bowl. Beat with an electric mixer until stiff peaks form. Once the cake has sufficiently chilled, spread this fluffy whipped cream generously over the cake. For extra flair, top with mini chocolate chips or festive sprinkles if desired.
-
Slice the cake into individual servings and serve immediately. Store any leftover Beet Red Velvet Poke Cake covered tightly in the refrigerator for up to 3-4 days to maintain its freshness and moisture.
Nutrition Information
Serving Size:
1
slice
|
Calories:
229
kcal
|
Carbohydrates:
29
g
|
Protein:
4
g
|
Fat:
11
g
|
Saturated Fat:
5
g
|
Polyunsaturated Fat:
5
g
|
Cholesterol:
40
mg
|
Sodium:
246
mg
|
Fiber:
1
g
|
Sugar:
18
g
Nutrition information is automatically calculated and is an approximation based on the ingredients and serving size provided. Actual values may vary.
Additional Recipe Information
Erin Sellin
20 minutes
30 minutes
50 minutes
Dessert Recipes, Cake
American
20
229
red velvet cake, beet cake, poke cake, natural food coloring, dessert, easy cake recipe, moist cake, vanilla pudding, whipped cream
Like this recipe? Leave a comment below!
Join Our Vibrant Culinary Community! I’ve created a fantastic group on Facebook, and I would be absolutely thrilled for you to become a part of it! It’s a warm and welcoming space where you can confidently share your favorite recipes, ask any cooking-related questions you might have, and stay completely up-to-date with all the exciting new recipes and content from Dinners, Dishes and Desserts. Don’t miss out on connecting with fellow food lovers!
Make sure to follow me on Instagram and tag your culinary creations with #dinnersdishes. I love seeing all the wonderful DINNERS, DISHES, AND DESSERTS recipes YOU bring to life in your own kitchens!
Never miss a post, recipe, or update! Be sure to follow me on all my social media platforms:
Facebook |
Twitter |
Pinterest |
Instagram
** This post is proudly sponsored by Aunt Nellie’s. All thoughts, opinions, and delicious recipes shared are 100% my own and reflect my honest experience with their wonderful products.
