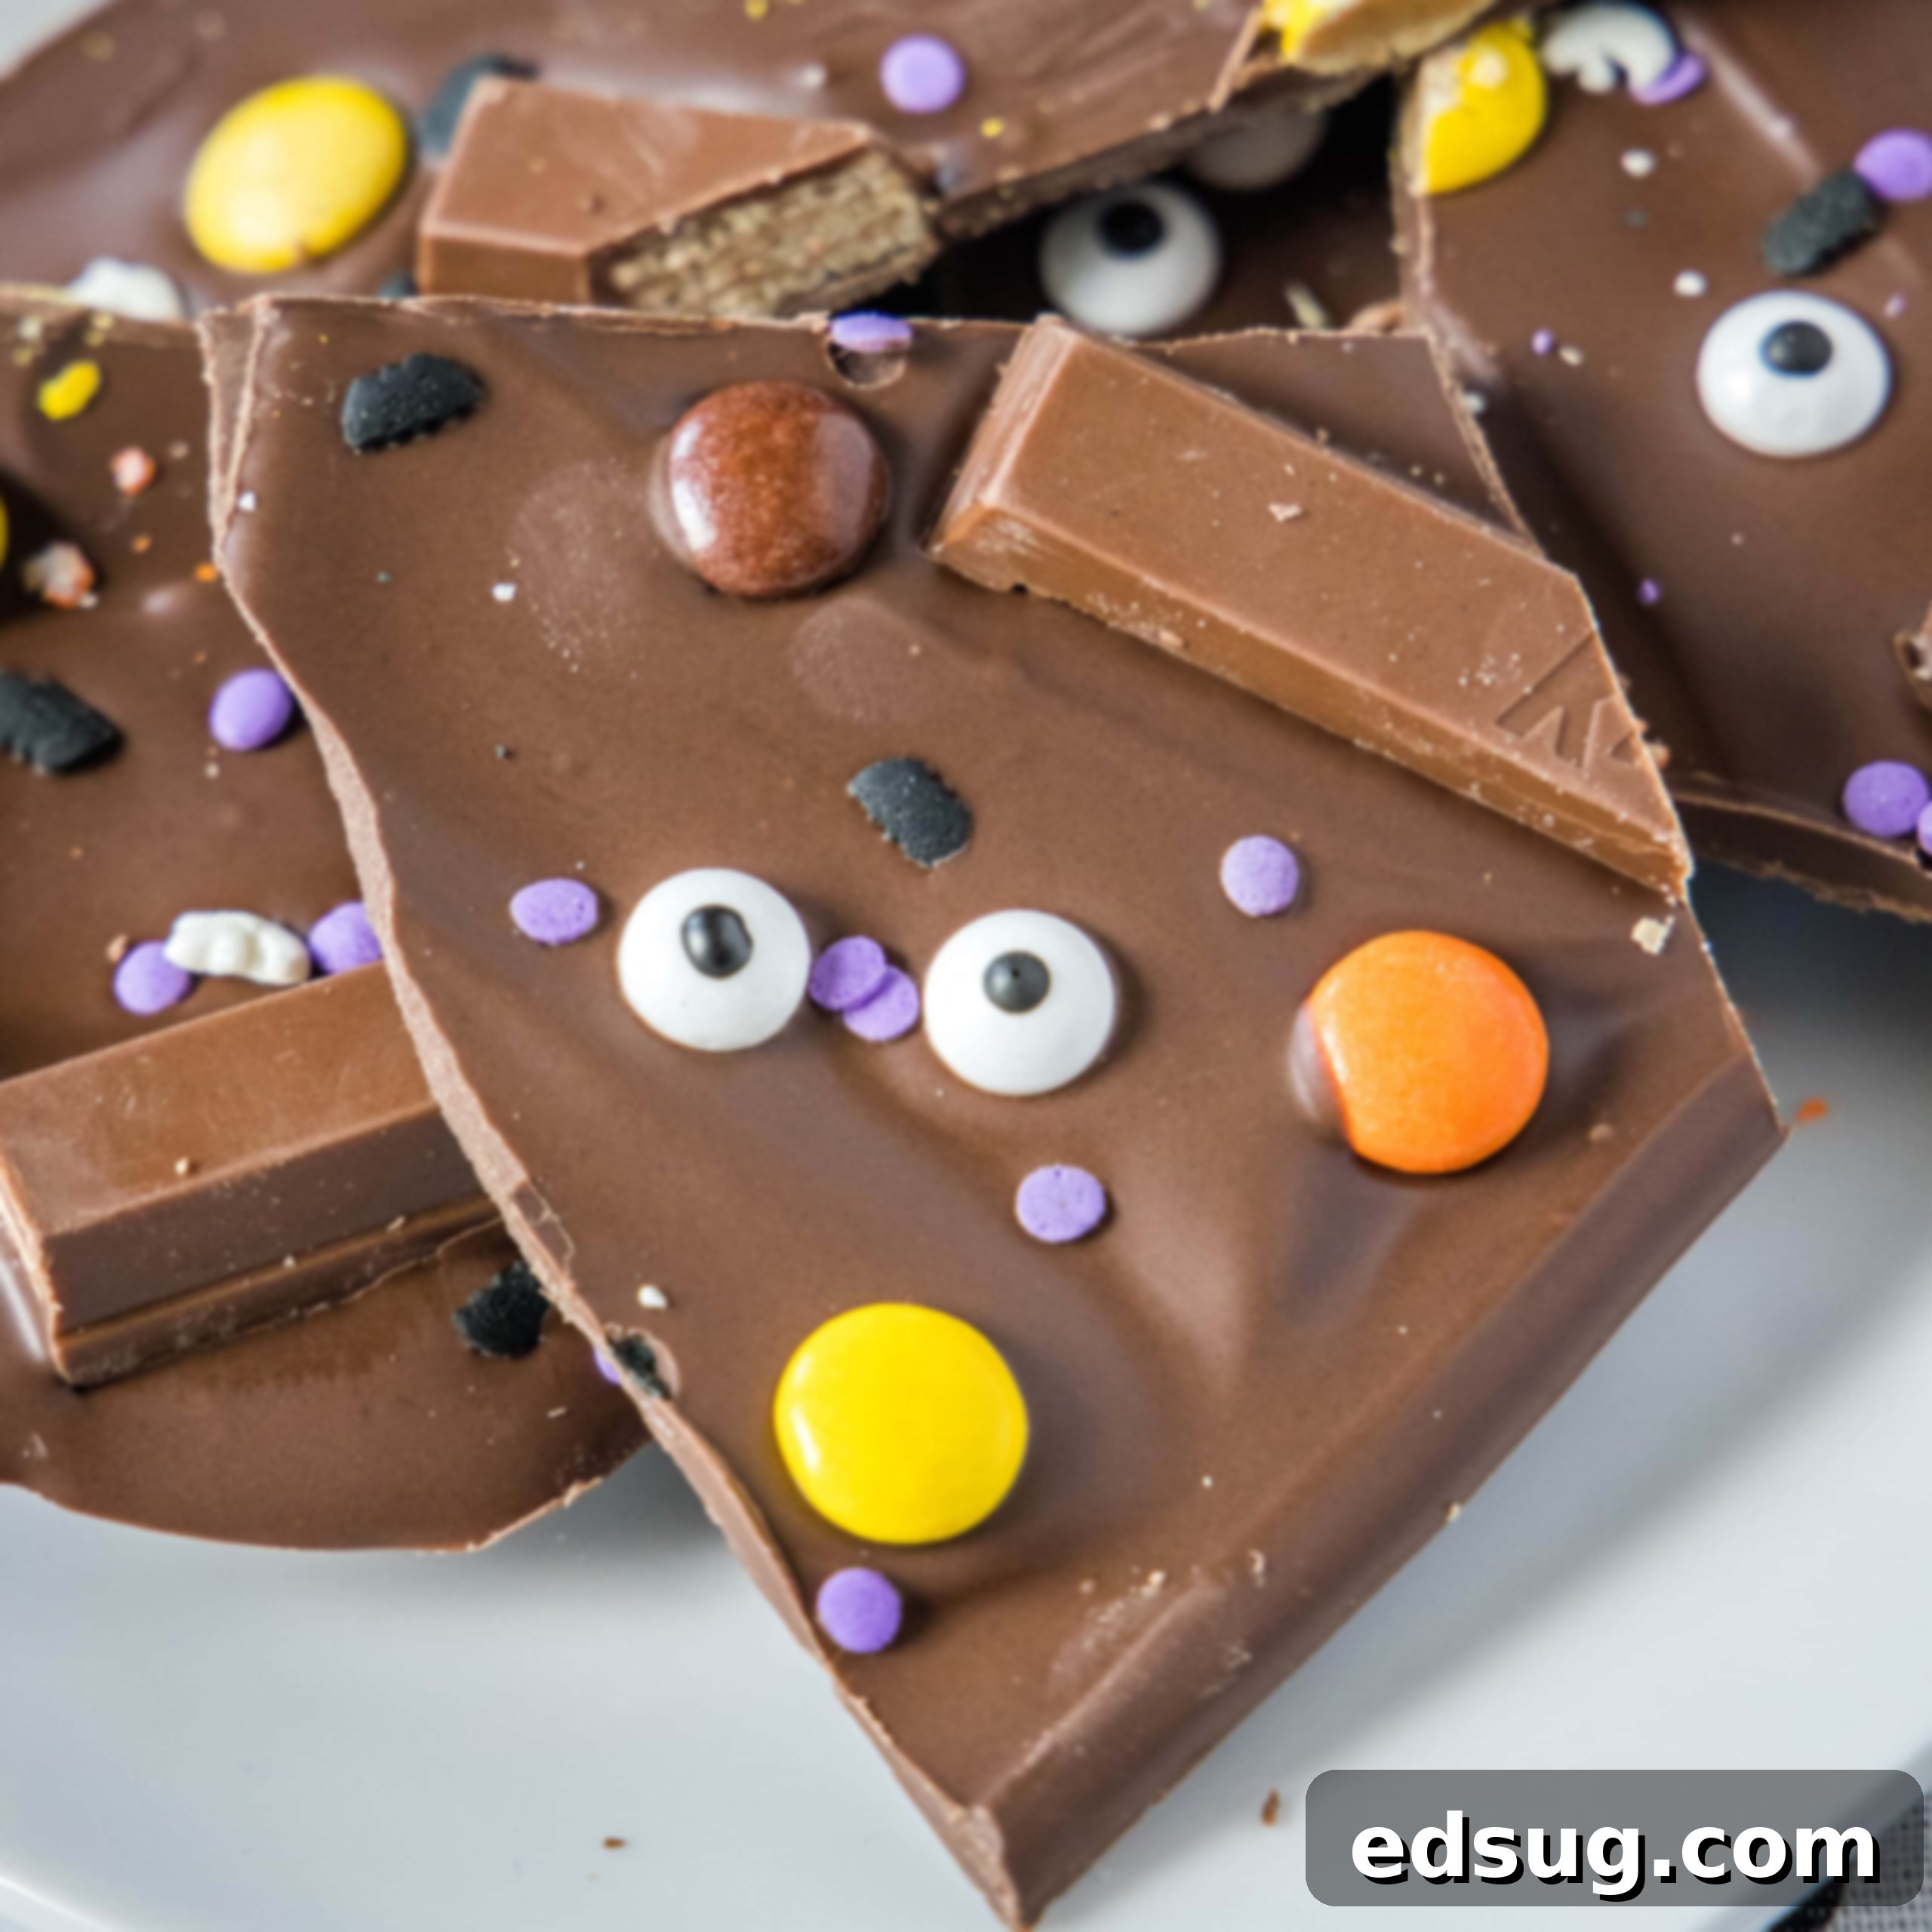
Spooky Sweet & Simple: The Ultimate Guide to Easy Halloween Candy Bark
Get ready to conjure up some magic in your kitchen with this incredibly fun and delightfully easy Halloween Candy Bark! This customizable treat is perfect for adding a festive touch to any Halloween celebration, whether you’re hosting a ghoulish gathering, preparing for trick-or-treaters, or simply enjoying a spooky movie night at home. In just minutes, you can create a vibrant, delicious dessert using your favorite chocolates, an assortment of candies, and imaginative decorations. It’s a no-bake wonder that promises maximum fun with minimal effort!
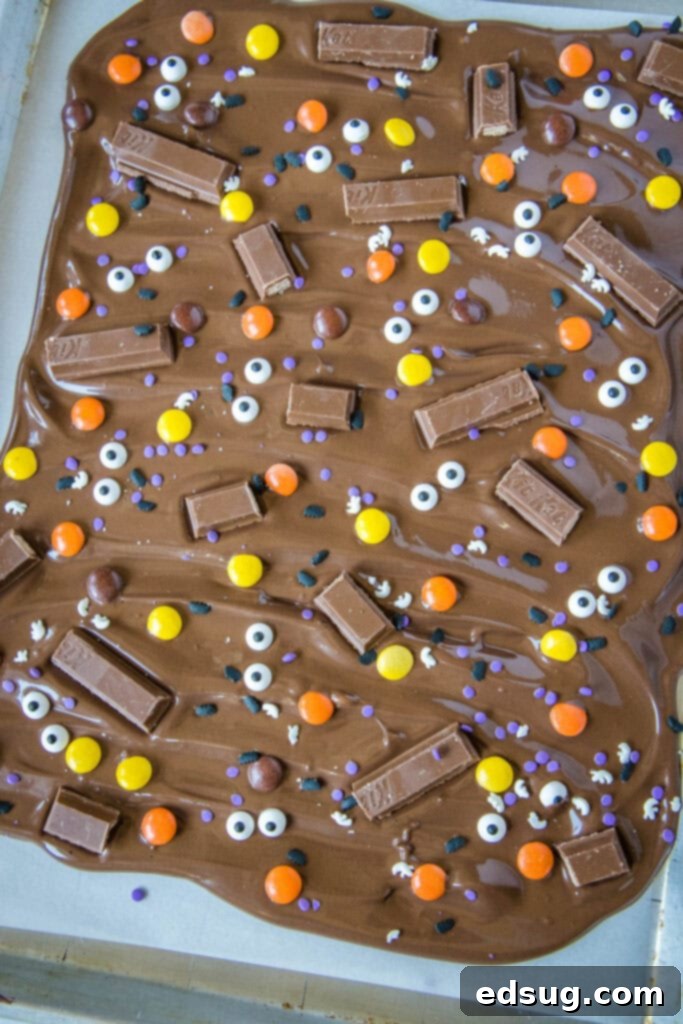
Halloween Bark isn’t just a treat; it’s an experience! Its remarkable versatility means it can be tailored to suit any preference or occasion. Planning a pumpkin carving session? You can design your bark to match a rustic autumn theme. Hosting a spooky monster mash? Pile on creepy crawly candies and vibrant colors! This recipe empowers you to unleash your creativity, making it a fantastic activity for kids and adults alike.
Why You’ll Adore This Halloween Candy Bark
- Effortlessly Simple – You only need a handful of ingredients, and the best part is, you get to choose exactly what those are! Melting chocolate is the most “complicated” step, making this an ideal recipe for beginner bakers or a fun, engaging project for children. No complex techniques or fancy equipment required – just pure, simple fun.
- Remarkably Fast – In the bustling lead-up to Halloween, time is often of the essence. This candy bark recipe is a lifesaver! The hands-on preparation takes mere minutes, typically around 5-10 minutes. The longest part is simply waiting for the chocolate to set, which happens relatively quickly, especially if you pop it in the fridge. Perfect for last-minute party contributions or an impromptu sweet craving.
- Incredibly Easy – Forget about heating up the oven or tending to a stovetop. All you need is a microwave-safe bowl for melting the chocolate and a baking sheet for spreading it out. This makes for super-speedy clean-up and a stress-free dessert-making process. It’s truly one of the easiest ways to create a visually stunning and delicious Halloween treat.
- Infinitely Customizable – This is where the Halloween magic truly happens! You’re the artist, and the bark is your canvas. Choose your favorite type of chocolate – rich dark, creamy milk, or sweet white. Add vibrant food coloring to your white chocolate for a dramatic effect. Then, go wild with toppings! From classic candy corn to mini chocolate bars, crunchy pretzels, or spooky candy eyes, the possibilities are endless. Mix and match to perfectly fit your party theme or personal taste.
Gather Your Ghoulish Goodies: Ingredients
For the detailed ingredient list and precise measurements, be sure to scroll to the bottom of the post for the FULL PRINTABLE recipe card.
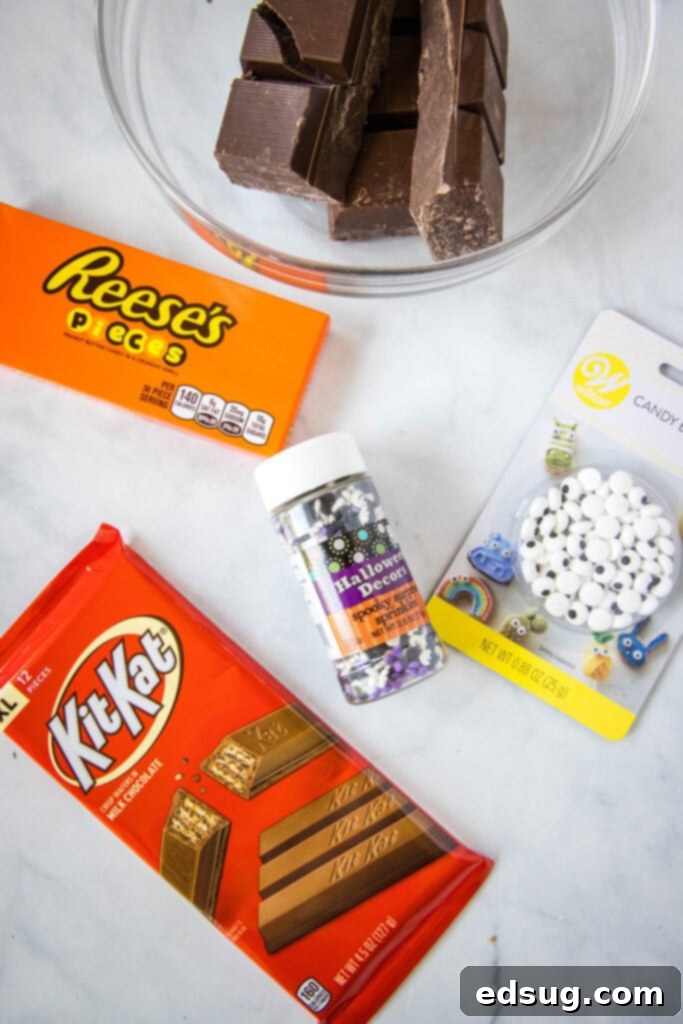
While the exact quantities are in the recipe card, here’s a general overview of the key components you’ll need to create your magnificent Halloween Candy Bark:
- Melting Chocolate: The foundation of your bark! Choose a high-quality melting chocolate for the best results. Options include chocolate chips, chocolate melting wafers (also known as candy melts), or almond bark. The type you pick will influence the flavor and how easily it melts and sets.
- Assorted Candy: This is where the fun begins! Think about your favorite Halloween candies. Mini chocolate bars, gummy worms, sour candies, M&M’s, Reese’s Pieces – anything goes! Consider a variety of textures and colors to make your bark visually appealing and exciting to eat.
- Candy Eyes: These small, edible decorations instantly add a playful, spooky, or cute character to your bark. They are a Halloween staple and really bring the treat to life!
You can often find candy eyes at most major grocery stores in the baking or seasonal aisle, as well as at craft stores like Michael’s or Hobby Lobby. For ultimate convenience, they are also readily available online through retailers like Amazon. Brands like Wilton produce them, but many store brands and other cake decorating companies offer similar options.
Crafting Your Spooky Slab: Step-by-Step Instructions
Making Halloween Candy Bark is a breeze! Follow these simple steps for a perfect batch every time:
- Step 1: Melt the Chocolate. Place your chosen melting chocolate into a microwave-safe bowl. Begin by heating it for 1 minute on high power. Remove the bowl, stir the chocolate thoroughly with a spatula or spoon, even if it doesn’t look fully melted. This helps to distribute the heat. Continue microwaving in short 20-second intervals, stirring vigorously after each interval, until the chocolate is completely smooth and melted with no lumps remaining. Be careful not to overheat, as this can cause the chocolate to seize or burn.
- Step 2: Prepare Your Base. Once the chocolate is perfectly melted, immediately pour it onto a baking sheet that has been lined with parchment paper or a silicone baking mat. Using an offset spatula or the back of a spoon, gently spread the chocolate into a thin, even layer. Aim for a thickness of about 1/4 to 1/2 inch. Don’t worry if it’s not perfectly rectangular; the rustic edges add to its charm!
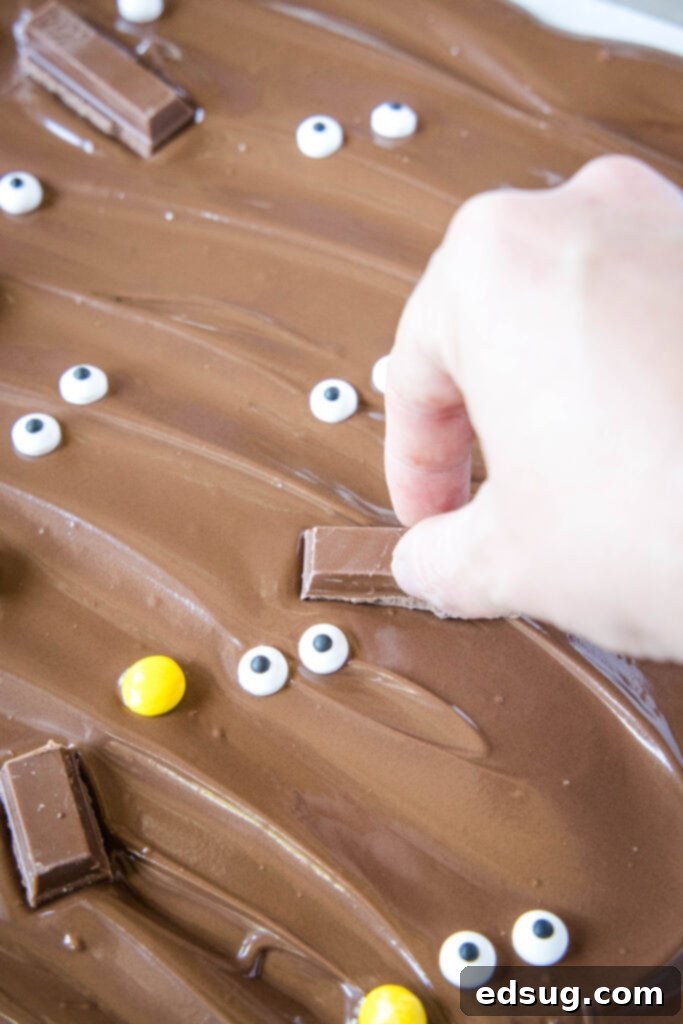
- Step 3: Decorate with Delight. This is your chance to get creative! While the chocolate is still wet and pliable, arrange your chosen candies, sprinkles, and candy eyes over the top as desired. Press them gently into the chocolate so they adhere firmly as it sets. Don’t wait too long, as the chocolate will begin to harden, making it difficult for the toppings to stick.
- Step 4: Let it Set. Once decorated, allow the bark to set completely. This typically takes about an hour at room temperature. To speed up the process, you can carefully transfer the baking sheet to the refrigerator for about 20-30 minutes. The bark is ready when it is firm to the touch and easily lifts off the parchment paper.
- Step 5: Break and Enjoy! Once fully set, carefully peel the bark from the parchment paper. You can either use a sharp knife to cut it into neat squares or rectangles, or for a more rustic look, simply break it into smaller, irregular pieces. Serve immediately or store for later!
Unleash Your Inner Mad Scientist: Topping Ideas Galore
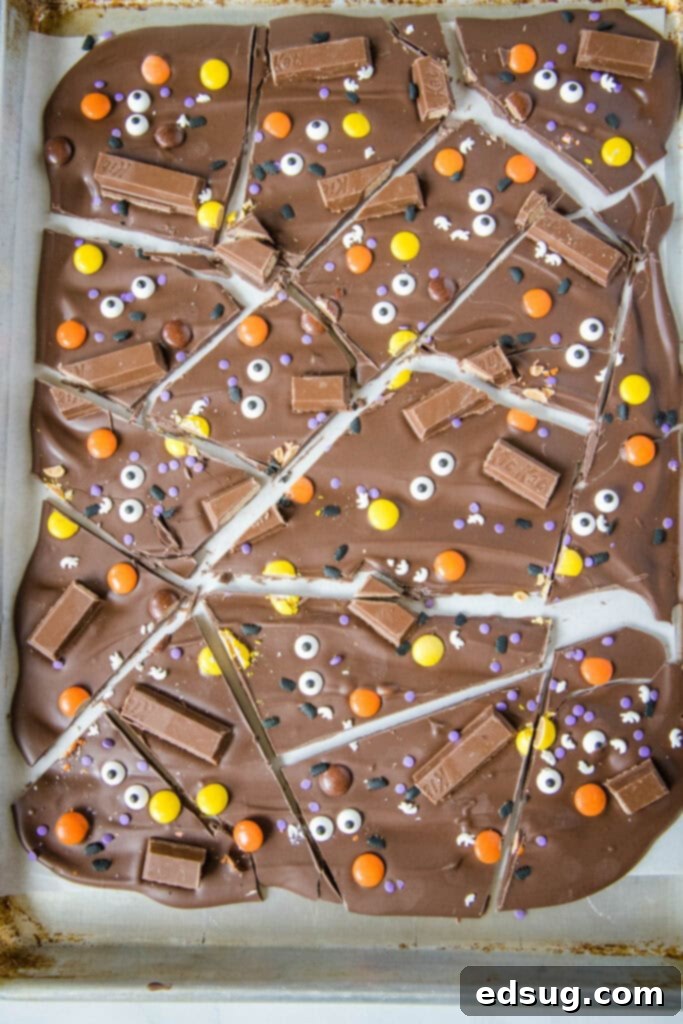
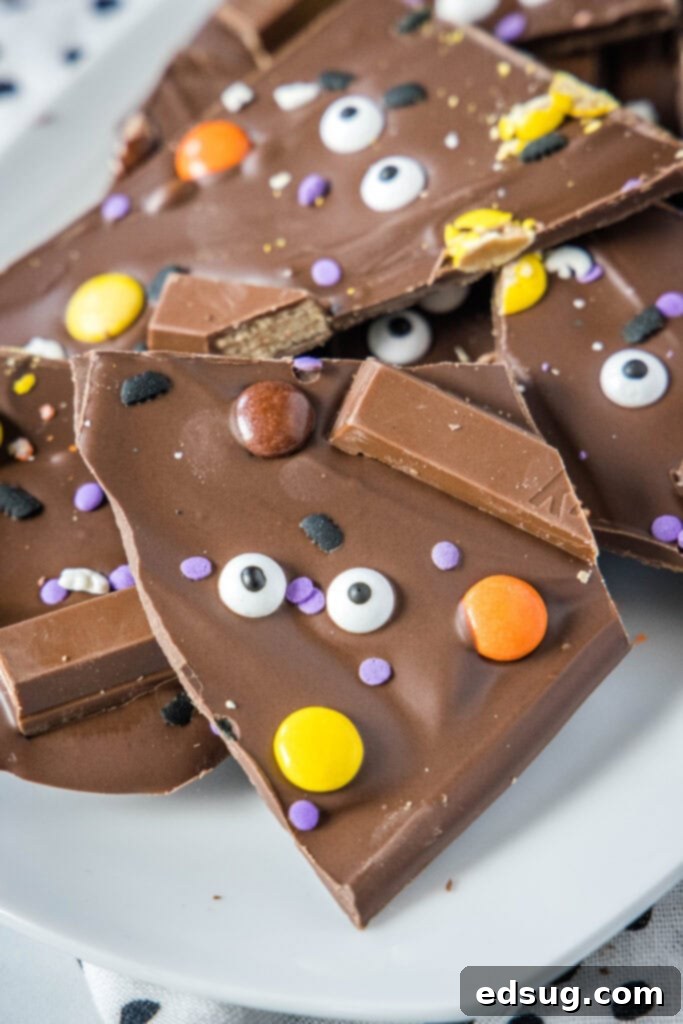
The beauty of Halloween Candy Bark lies in its adaptability. As you can see from the images, I’ve used a classic combination of themed sprinkles, chopped Kit Kat bars, colorful Reese’s Pieces, and expressive candy eyes. But please, don’t stop there! The options are truly endless, and you don’t have to stick to just candy. Think outside the candy wrapper!
Here are some monstrously good ideas to inspire your bark creations:
- Classic Candies:
- Candy Corn & Mellocreme Pumpkins: The quintessential Halloween candies, adding traditional fall colors and a unique texture.
- M&M’s (Halloween Colors): Orange, black, purple, and green M&M’s are perfect for a festive pop of color and classic chocolate taste.
- Mini Peanut Butter Cups: Chopped or whole, these add a delightful peanut butter and chocolate combo.
- Gummy Worms & Spiders: For a truly creepy-crawly effect that kids adore.
- Skittles or Starburst: Add a burst of fruity flavor and vibrant hues.
- Crunchy & Savory Additions:
- Pretzels (Crushed or Mini Twists): Offer a fantastic salty-sweet contrast and an irresistible crunch.
- Chopped Nuts: Almonds, peanuts, walnuts, or pecans provide a sophisticated crunch and nutty flavor.
- Crushed Oreo Cookies: These create a “dirt” or “graveyard” effect, especially when paired with gummy worms.
- Pop Rocks: For a surprising and fun popping sensation!
- Mini Marshmallows: Add a soft, chewy texture.
- Chocolate Bar Delights:
- Chopped Snickers, Twix, or Milky Way: Use up leftover trick-or-treat candy by chopping it into smaller pieces.
- White Chocolate Chips: If using dark or milk chocolate as a base, white chocolate chips add visual contrast and an extra layer of sweetness.
- Caramel Bits: For a chewy, gooey texture and rich caramel flavor.
- Spooky & Creative Touches:
- Halloween Sprinkles: Ghost, pumpkin, bat, or skull-shaped sprinkles instantly elevate the festive factor.
- Edible Glitter or Dust: A touch of orange or black edible glitter can make your bark shimmer.
- Black Licorice Strings: Cut into small pieces for a unique look and flavor.
Choosing Your Chocolate Canvas: Types of Chocolate
The type of chocolate you select for your bark will significantly impact its flavor profile and how easily it handles. You really can use whatever your favorite is! However, some options are better suited for melting and setting smoothly.
I personally prefer using chocolate almond bark. It’s fantastic because it melts incredibly fast, yields a super-smooth consistency, and sets up quickly and firmly, making it ideal for bark recipes. But truthfully, any chocolate you enjoy eating that melts well will work wonderfully for this recipe. Think about chocolate chips (milk, semi-sweet, dark), melting wafers, or even high-quality chocolate bars finely chopped.
For a vibrant and truly customizable look, consider using white chocolate as your base. You can then drizzle contrasting colors over the top using orange and green candy melts (or any Halloween colors like purple or black) for a fun, multi-colored swirl effect. Imagine a dark chocolate base with elegant white chocolate swirls, or white chocolate tinted green for a monstrous theme. You could even use plain white chocolate and strategically place candy eyes and ghost-shaped sprinkles to make it look like a field of friendly ghosts! Don’t be afraid to experiment with different flavor combinations and visual designs – your imagination is the only limit!
Keeping Your Spooky Sweets Fresh: Storing Halloween Candy Bark
Once your delectable Halloween Candy Bark has fully set and been broken or cut into pieces, proper storage is key to maintaining its freshness and delightful texture. Store the bark in an airtight container at room temperature. It should comfortably last for 1-2 weeks. To prevent the pieces from sticking together, you can place layers of parchment paper between them, especially if your bark contains sticky candies. While refrigeration can help it set faster, continuous storage in the fridge isn’t always necessary and can sometimes lead to condensation, which might affect the chocolate’s appearance (though not its taste). If you live in a very warm climate, refrigeration is advisable. Just bring it to room temperature for a few minutes before serving for the best flavor and texture.
Expert Tips for Bark Perfection
To ensure your Halloween Candy Bark is a screaming success every time, keep these simple tips in mind:
- Don’t Overheat Chocolate: Melt chocolate in short intervals, stirring frequently. Overheated chocolate can seize (become thick and crumbly) or burn, making it unusable. Low and slow is the way to go in the microwave.
- Pre-Chop Toppings: Have all your candies and toppings chopped and ready to go *before* you melt the chocolate. Once the chocolate is spread, you’ll need to work quickly before it starts to set.
- Thin and Even Layer: Spread your chocolate into a relatively thin and even layer (about 1/4 to 1/2 inch thick). This ensures a good candy-to-chocolate ratio and makes the bark easier to break.
- Press Toppings Gently: Lightly press your toppings into the melted chocolate. This helps them adhere and prevents them from falling off once the bark is set.
- Patience is Key for Setting: While it’s tempting to rush, allow the bark to set completely. If you try to break it too soon, it might smear or crumble unevenly.
- Warm Knife for Clean Cuts: If you prefer clean cuts over rustic breaks, warm a sharp knife under hot water, dry it completely, and then use it to slice the bark. Re-warm and dry the knife as needed.
Serving Suggestions and Gifting Ideas
Halloween Candy Bark is incredibly versatile, not just in its creation but also in how it can be enjoyed and shared. Serve it as a festive platter at your Halloween party, or package individual pieces in cellophane bags tied with spooky ribbons for delightful party favors or treats for teachers and friends. It also makes a wonderful homemade gift for neighbors or a special contribution to a school bake sale. This bark is a fantastic way to use up leftover Halloween candy, giving it a new and exciting presentation!
More Fun Halloween Recipes to Try
- Halloween Muddy Buddies
- Mummy Pretzel Rods
- Witches Brew
- Halloween Jello Shots
- Ghost Cupcakes
- Spooky Spider Brownies

Halloween Candy Bark
Erin Sellin
5
minutes
1
hour
1
hour
5
minutes
12
Rate Recipe
Print Recipe
Ingredients
-
1
pound
chocolate -
1/3
cup
Reese’s Pieces -
2
Kit Kat candy bars -
Candy Eyes -
Festive Sprinkles
Instructions
-
Add your chocolate to a microwave safe bowl and heat for 1 minute. Stir and continue microwaving in 20 second intervals until completely melted.
-
Pour chocolate onto a lined baking sheet. Spread into a thin even layer.
-
Arrange your candy over the top as desired. Let set up for about an hour until it is solid.
-
Cut or break into smaller pieces.
Notes
Nutrition
Serving:
1
g
|
Calories:
294
kcal
|
Carbohydrates:
33
g
|
Protein:
4
g
|
Fat:
16
g
|
Saturated Fat:
9
g
|
Polyunsaturated Fat:
5
g
|
Cholesterol:
10
mg
|
Sodium:
67
mg
|
Fiber:
2
g
|
Sugar:
28
g
Nutrition information is automatically calculated, so should only be used as an approximation.
Additional Info
Erin Sellin
5
minutes
1
hour
1
hour
5
minutes
Dessert Recipes
American
12
294
Like this recipe? Leave a comment below!
I created a fun group on Facebook, and I would love for you to join us! It’s a place where you can share YOUR favorite recipes, ask questions, and see what’s new at Dinners, Dishes and Desserts (so that you never miss a new recipe)!
Be sure to follow me on Instagram and tag #dinnersdishes so I can see all the wonderful DINNERS, DISHES, AND DESSERTS recipes YOU make!
Be sure to follow me on my social media, so you never miss a post!
Facebook |
Twitter |
Pinterest |
Instagram
