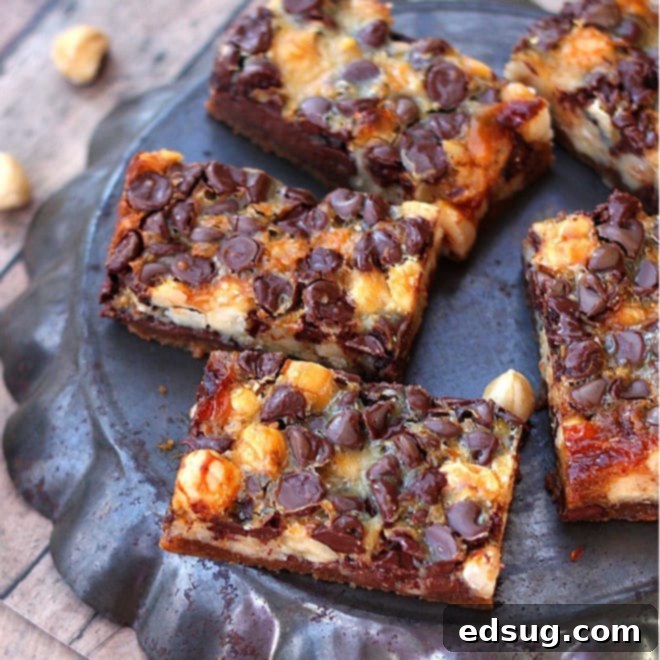
Ultimate Nutella Magic Bars: An Easy, Irresistible Chocolate Hazelnut Dessert
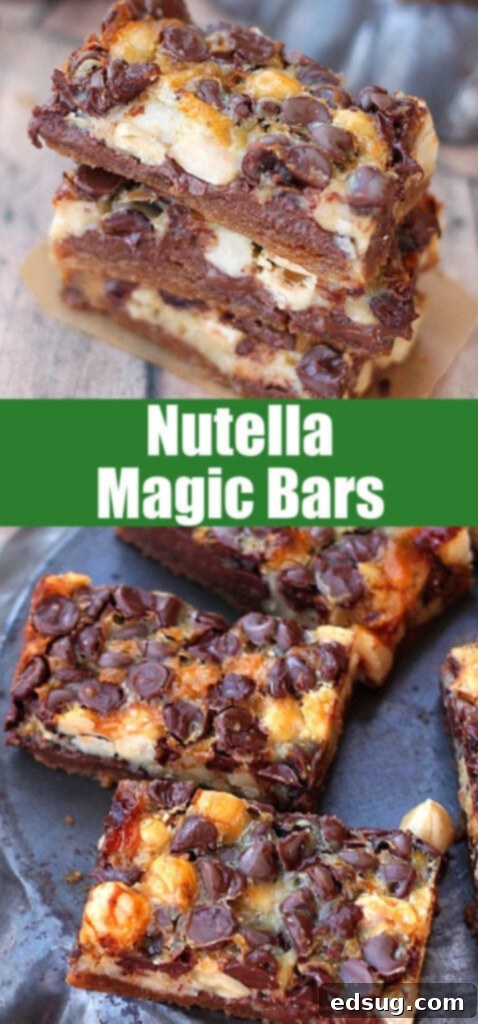
Discover the magic of these quick and easy Nutella Magic Bars, generously loaded with creamy Nutella, crunchy hazelnuts, and rich chocolate chips! These delightful bars are guaranteed to vanish in a flash, making them the perfect treat for any occasion.
There’s something truly nostalgic and comforting about classic Magic Bars. I fondly remember my grandma’s traditional version, a staple treat generously layered with sweet shredded coconut, rich chocolate chips, and gooey butterscotch. They are, without a doubt, a beloved classic and always a huge hit at family gatherings! Over the years, I’ve enjoyed putting my own spin on these timeless treats, like with these festive Christmas Magic Cookie Bars, which have also proven to be incredibly popular, bringing a touch of holiday cheer to the classic recipe.
But today, we’re diving headfirst into a world of pure indulgence with a celebration of the iconic flavor combination: Nutella and hazelnuts. If you, like countless others around the globe, are a devoted fan of that irresistible chocolate hazelnut spread, then these Nutella Magic Bars are an absolute must-try. They elevate the simple “magic bar” concept to a new level of decadent flavor, combining the familiar ease of preparation with an utterly irresistible taste profile that captures the essence of Nutella in every single bite. Prepare yourself for a truly magical dessert experience that’s shockingly simple to create.
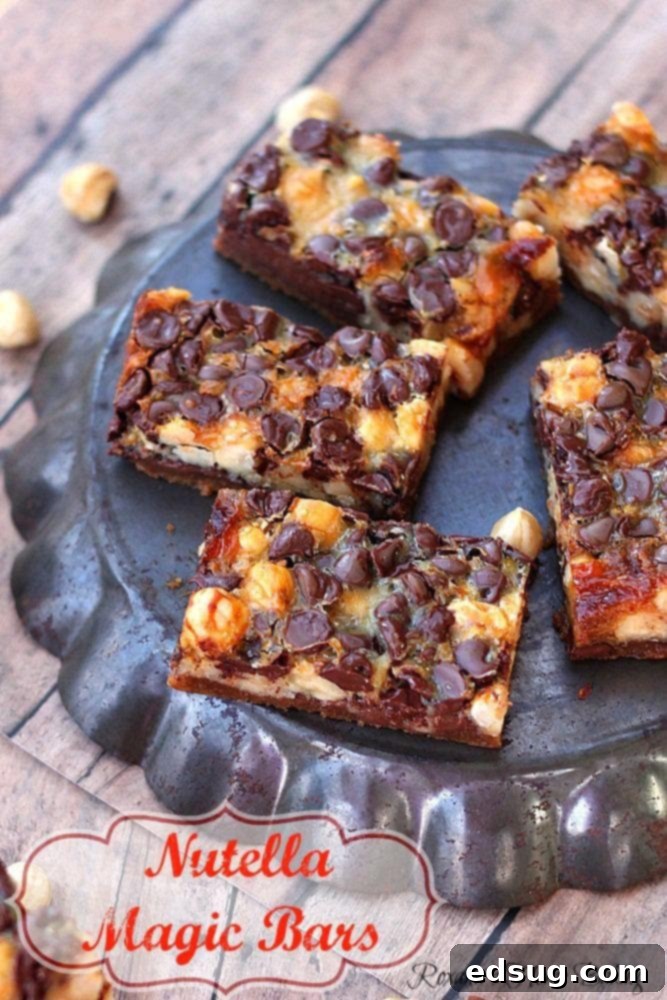
Why You’ll Fall in Love with These Nutella Magic Bars
These Nutella Magic Bars aren’t just another dessert recipe; they’re an experience waiting to happen. From their effortless preparation to their customizable nature and incredible flavor, there are so many reasons why these will quickly become a cherished favorite in your baking repertoire. Let’s explore what makes them truly special and why they deserve a spot on your must-bake list:
- Effortless Preparation for Any Baker: Just like their classic counterparts, these bars are incredibly simple to assemble, earning them the “magic” in their name. The beauty of Magic Bars lies in their straightforward layering process – you essentially just add ingredients directly to the baking pan, one delicious layer at a time, without the need for complex mixing or intricate techniques. This no-fuss method means minimal mixing bowls, fewer dirty dishes, and a stress-free baking experience, making them perfect for busy weeknights, last-minute cravings, or when you need a quick dessert fix for unexpected guests. It’s truly a “dump and bake” recipe that yields spectacular, consistently delightful results every single time. Even novice bakers can achieve perfection with these bars.
- The Option for Homemade Nutella: While store-bought Nutella is undeniably convenient and offers a beloved flavor profile, for those who prefer to control the ingredients, adjust the sweetness level, or simply enjoy the process of making things from scratch, crafting your own Homemade Nutella is a fantastic alternative. Preparing your own allows you to know exactly what goes into your treat, providing a potentially healthier option or simply a way to experiment with different flavor nuances. You can adjust the chocolate intensity, deepen the roasted hazelnut flavor, and fine-tune the sugar content to perfectly match your preferences, making these bars even more personal and uniquely delightful.
- Endless Customization Possibilities: This Nutella Magic Bar recipe serves as a wonderful canvas for culinary creativity. While hazelnuts are the natural and traditional choice to complement Nutella, you’re absolutely not limited to them. Feel free to mix up the nuts used – crunchy walnuts, buttery pecans, or even salty peanuts would be delicious and add a unique twist. Explore different varieties of chocolate chips, from rich dark chocolate to sweet milk chocolate, or even creamy white chocolate for a beautiful contrast. You could also introduce other delightful additions like shredded coconut (for a subtle nod to the classic Magic Bars!), mini marshmallows for extra chewiness, pretzel bits for an unexpected salty crunch, or even dried cranberries or cherries for a fruity note. The possibilities are truly endless, allowing you to tailor each batch to your specific cravings, dietary needs, or what you simply have on hand.
- Irresistible Flavor and Texture Harmony: These bars offer a harmonious and addictive blend of textures and tastes that will have everyone reaching for another piece. The buttery graham cracker crust provides a sturdy, slightly salty, and perfectly crumbly base, which perfectly balances the rich, creamy, and intensely chocolate-hazelnut Nutella layer. The generous addition of both chopped and whole hazelnuts delivers a delightful crunch and enhances the authentic, earthy hazelnut flavor, while the abundant scattering of chocolate chips adds pockets of gooey, melted chocolatey goodness throughout. Finally, the blanket of sweetened condensed milk caramelizes beautifully during baking, creating a luscious, chewy, and golden top layer that binds all these incredible flavors and textures together into one cohesive, utterly addictive bite.
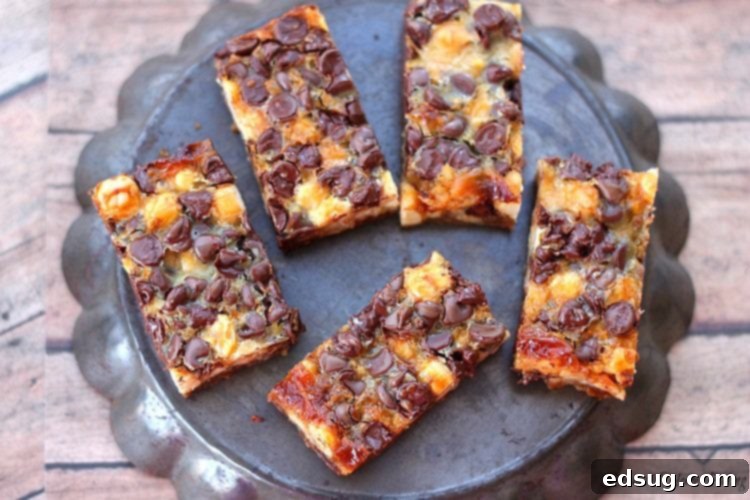
Essential Ingredients for Your Nutella Magic Bars
To embark on this delightful baking journey, you’ll need a handful of readily available, high-quality ingredients. Each component plays a vital role in creating the perfect balance of flavor and texture in your Nutella Magic Bars. Precision in measurement, though simple, will ensure the best results. Be sure to scroll to the bottom of the post for the FULL PRINTABLE recipe card with exact measurements and detailed instructions.
- Graham Crackers: These are the backbone of our bars, providing a subtly sweet, slightly spiced, and crunchy crust that holds all the delicious layers. You’ll need them crushed into fine crumbs. For convenience, you can buy pre-crushed graham cracker crumbs, or for a fresher taste, crush whole graham crackers yourself using a food processor for a fine texture or by placing them in a sturdy Ziploc bag and crushing with a rolling pin for a slightly coarser crumb.
- Butter: Melted butter is absolutely crucial for binding the graham cracker crumbs together, creating a firm, rich, and buttery base that won’t crumble once cut. We recommend using unsalted butter in baking as it allows you to control the overall salt content of your dessert. If using salted butter, you might want to slightly reduce any additional salt in the recipe, though none is explicitly added here.
- Nutella: The undeniable star of the show! This iconic creamy chocolate-hazelnut spread provides that signature, rich, and irresistible flavor we’re after. You can use your favorite store-bought brand – any brand of chocolate hazelnut spread will work – or, as mentioned, try your hand at homemade for a truly personalized and unique touch.
- Hazelnuts: These nuts are naturally paired with Nutella, given its hazelnut base, and provide a wonderful crunch and intensified hazelnut flavor. We’ll utilize both chopped hazelnuts for integration into the layers and whole hazelnuts for a bolder texture and visual appeal on top. To significantly enhance their nutty aroma and flavor, consider lightly toasting the hazelnuts in a dry pan or oven before chopping and adding them to the bars.
- Chocolate Chips: A generous amount of chocolate chips adds extra decadence and delightful pockets of melted chocolate throughout the bars. Semi-sweet chocolate chips are a classic and versatile choice that balances the sweetness, but feel free to experiment with milk chocolate chips for a sweeter bar, dark chocolate chips for a more intense chocolate flavor, or even white chocolate chips for a contrasting color and creamy taste.
- Sweetened Condensed Milk: This magical ingredient is the binder that holds all the delightful toppings together, creating a rich, chewy, and slightly caramelized layer as it bakes. It transforms from a thick liquid into a golden, sticky, and utterly delicious glue that envelops the nuts and chocolate. It is absolutely essential to ensure you’re using sweetened condensed milk, not evaporated milk, as they are very different products and substituting evaporated milk will not yield the same “magic” results.
Crafting Your Irresistible Nutella Magic Bars: A Detailed Step-by-Step Guide
Making these Nutella Magic Bars is an incredibly straightforward process that yields impressively delicious results. Follow these simple steps to create a dessert that will earn rave reviews from everyone who tries them. Remember, the key to “magic bars” is often in the simple yet effective layering!
- Prepare Your Baking Pan and Preheat Oven: First things first, preheat your oven to 350°F (175°C). Next, prepare your baking pan. We recommend using an 11×7 inch baking pan for optimal bar thickness, but an 8×8 or 9×13 can work with slight adjustments to baking time and bar thickness. Line the pan with parchment paper, ensuring you leave an overhang on all sides. This overhang will serve as convenient handles, making it incredibly easy to lift the entire batch of cooled bars out of the pan for clean and effortless slicing. For extra insurance against sticking, you can lightly grease the parchment paper with butter or cooking spray. Set your prepared pan aside.
- Form the Graham Cracker Crust Foundation: In a medium-sized mixing bowl, combine the melted butter and the finely crushed graham cracker crumbs. Stir them thoroughly with a spoon or spatula until all the crumbs are evenly moistened and coated with the butter. This ensures a cohesive and flavorful crust. Transfer this mixture into the bottom of your prepared baking pan. Press the mixture down firmly and evenly across the entire bottom. You can use the back of a spoon, a flat-bottomed glass, or even your clean hands to compact it well. A well-pressed crust is absolutely key to preventing crumbling once the bars are cut and served.
- Add the Decadent Nutella Layer: Now for the star! Using a teaspoon, carefully dollop small drops of Nutella all over the graham cracker crust. Try to distribute them as evenly as possible. While optional, for a more uniform layer of chocolate-hazelnut flavor in every bite, you can gently spread the Nutella across the entire crust using the back of the spoon or an offset spatula. Be careful not to disturb the pressed graham cracker crust too much in this process.
- Layer the Crunchy Hazelnuts and Rich Chocolate Chips: Once the Nutella layer is in place, it’s time to add texture and more flavor. Generously sprinkle both the chopped hazelnuts and the whole hazelnuts over the Nutella layer. The combination of different hazelnut sizes adds extra interest and crunch. Follow this with a lavish scattering of your chosen chocolate chips, ensuring they are distributed as evenly as possible over the nuts. This creates a visually appealing and incredibly delicious top layer that promises chocolatey goodness.
- Pour the Magical Sweetened Condensed Milk: This step is where the “magic” truly happens. Slowly and evenly pour the entire can of sweetened condensed milk over the chocolate chips and hazelnuts. The thick, sweet milk will seep down and around the toppings, acting as the ultimate magical binder that transforms everything into a rich, chewy, and gloriously gooey bar once baked. Try to achieve an even coating so all the delectable ingredients are enveloped and will bake together cohesively.
- Bake to Golden Perfection: Carefully place your baking pan into your preheated oven. Bake for approximately 35 minutes, or until the edges of the bars are beautifully golden brown and the center appears fully set and slightly bubbly. The sweetened condensed milk should be visibly caramelized and firm to the touch, not liquid or jiggly. Keep an eye on it to prevent over-browning.
- Cool Completely and Slice with Care: This is arguably the most crucial step for achieving neat, picture-perfect bars! Once baked, remove the pan from the oven and immediately place it on a wire rack to cool completely at room temperature. Patience is key here – attempting to slice warm or even slightly warm magic bars will inevitably result in a sticky, messy, crumbled disaster. Allow them to cool for several hours, or for the cleanest cuts, chill them in the refrigerator for at least an hour (or even overnight) before attempting to slice. Once thoroughly cooled and firm, use the parchment paper overhang to carefully lift the entire slab out of the pan, then transfer it to a cutting board. Use a sharp, non-serrated knife to cut into your desired bar sizes. Clean the knife between cuts for the neatest edges.
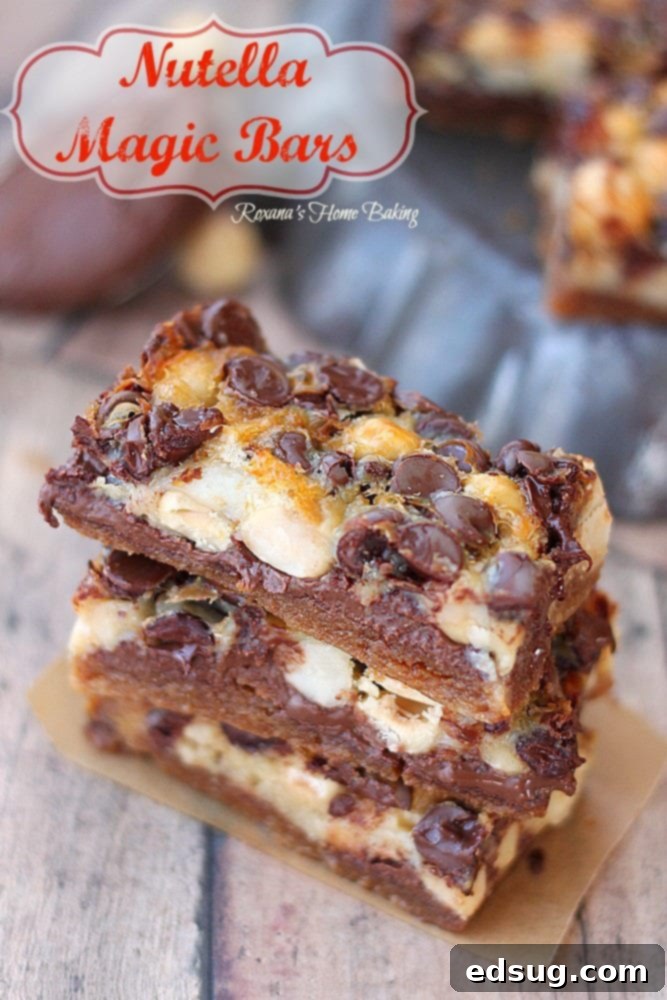
Customizing Your Bars: Can I Use Other Nuts?
Absolutely! While hazelnuts are the perfect and most natural complement to Nutella, given that it’s fundamentally a chocolate-hazelnut spread, we understand that fresh hazelnuts can sometimes be a bit harder to find or pricier than other commonly available nuts. The wonderful thing about Magic Bars, and dessert bars in general, is their incredible versatility, so you truly can use any nut you like to customize these delicious treats! Don’t let the hazelnut suggestion deter you from making these incredible bars if you have another type of nut on hand.
My top recommendations for delicious substitutions would be **walnuts or pecans**. Both of these nuts offer a rich, buttery flavor and a satisfying crunch that works beautifully with chocolate and the deep sweetness of the condensed milk layer. You can use them either finely chopped or in larger pieces (halves or quarters), depending on your preference for texture and visual appeal within the bars. Even **peanuts** would be a surprisingly delicious choice, bringing a delightful salty-sweet dynamic, especially if you’re a big fan of the classic peanut butter and chocolate combination. For an extra depth of flavor and to enhance the natural nuttiness, consider lightly toasting any nuts you plan to use in a dry pan or oven for a few minutes before adding them to the bars. This simple step can really bring out their natural oils and intensify their aroma and taste, taking your Nutella Magic Bars to an even higher level of deliciousness.
Storing Your Nutella Magic Bars for Lasting Freshness
Proper storage is key to ensuring your delicious Nutella Magic Bars remain fresh, moist, and enjoyable for as long as possible. Whether you plan to savor them over a few days or save some for a later treat, these guidelines will help you keep them at their absolute best, preserving their magical texture and flavor.
For immediate enjoyment, you’ll want to cover your Nutella Magic Bars tightly or store them in an airtight container at room temperature. Placed on the counter in a cool, dry spot, they will maintain their deliciousness and soft, chewy texture for approximately 4-5 days. If your kitchen tends to be on the warmer side, or if you simply prefer a slightly firmer bar, refrigeration can extend their freshness for up to a week. Just be sure they are exceedingly well-sealed to prevent them from drying out or absorbing any unwanted odors from the fridge. Always allow them to come closer to room temperature for the best texture when serving, or enjoy them chilled for a different experience.
These bars also freeze beautifully, making them an excellent candidate for advance meal prep, holiday baking, or simply for having a convenient sweet treat on hand whenever a craving strikes. To freeze, first ensure the bars are completely cooled and sliced into individual portions. Then, place them in a single layer on a baking sheet and flash freeze them for about 30 minutes to an hour until they are firm. This crucial step prevents them from sticking together. Once firm, transfer the bars to a freezer-safe airtight container or a heavy-duty freezer bag, separating layers with small squares of parchment paper to prevent sticking. They will last wonderfully in the freezer for a good 3-4 months without significant loss of quality. When you’re ready to enjoy, simply let them sit on the counter to thaw for an hour or two before serving. For an extra gooey and warm experience, you can also heat them slightly in the microwave for a few seconds.
Craving More Nutella? Explore These Delicious Recipes!
If you’ve fallen head over heels for the delightful, creamy, and irresistible flavor of Nutella in these Magic Bars, you’re absolutely in for a treat! Nutella is an incredibly versatile ingredient that can elevate a wide array of desserts, adding its signature creamy chocolate-hazelnut goodness to everything from simple cookies to elegant crepes and fudgy brownies. Its distinct flavor profile makes it a fantastic addition to almost any sweet creation. Here are some more irresistible Nutella dessert recipes from our collection that are sure to satisfy your sweet tooth and keep that Nutella jar in heavy rotation in your pantry:
- Nutella Stuffed Cookies: Imagine a classic, chewy chocolate chip cookie, but with a delightful and irresistible molten Nutella center that oozes with every bite. Pure bliss!
- Fudgy Nutella Brownies: These are not just any brownies; they are rich, incredibly dense, and deeply chocolatey, generously infused with the creamy hazelnut flavor of Nutella. A true chocolate lover’s dream.
- Nutella Swirled Blondies: Enjoy the best of both worlds with these chewy, buttery blondies beautifully swirled with ribbons of Nutella throughout, offering a stunning marble effect and an incredible depth of flavor.
- Nutella Cupcakes: Indulge in moist, tender cupcakes, perfectly baked and then crowned with a decadent, light, and airy Nutella-infused frosting. These are a perfect individual treat for parties or a personal indulgence.
- Nutella Crepes: Master the art of thin, delicate crepes, generously spread with a layer of warm Nutella. These are perfect for a luxurious breakfast, a special brunch, or an elegant dessert. Add some fresh berries or sliced bananas for an extra touch of freshness.
- Nutella Oreo Truffles: These are super easy, no-bake truffles made with crushed Oreo cookies, creamy cream cheese, and a generous dollop of Nutella, all rolled into balls and then coated in more chocolate or sprinkles. A guaranteed crowd-pleaser!
- Nutella Donuts: Experience the joy of fluffy, homemade donuts, filled to the brim with smooth and creamy Nutella. An indulgent treat for any time of day that will transport you straight to a European patisserie.
Nutella Magic Bars
Pin Recipe
Rate Recipe
Print Recipe
Ingredients
- 1 1/2 cup graham crackers crumbs, about 11 crackers
- 1/2 cup butter, melted
- 1/3 to 1/2 cup Nutella
- 1/2 cup chopped hazelnuts
- 1 cup whole hazelnuts
- 1 1/2 to 2 cups chocolate chips
- 14 oz sweetened condensed milk
Instructions
-
Heat the oven to 350º F. Line an 11X7 baking pan with parchment paper, allowing some overhang on the sides. Set aside.
-
In a mixing bowl, combine the melted butter and graham cracker crumbs. Stir until thoroughly combined and the crumbs are evenly moistened.
-
Press the butter-graham cracker mixture evenly and firmly into the bottom of the prepared pan to form your crust.
-
Using a teaspoon, place small drops of Nutella all over the graham cracker crust. For a more uniform layer, you can gently spread it across the entire crust.
-
Sprinkle the chopped hazelnuts, followed by the whole hazelnuts, evenly over the Nutella. Then, scatter the chocolate chips generously over the nuts.
-
Pour the sweetened condensed milk slowly and evenly over the chocolate chips and other toppings. Bake for approximately 35 minutes, or until the top is golden and bubbly and the center is set. Remove from the oven and let it cool completely on a wire rack before attempting to slice into bars. Chilling for at least an hour can aid in cleaner cuts.
Nutrition
Nutrition information is automatically calculated and should be considered an approximation. Always consult a certified nutritionist for precise dietary advice.
Additional Info
Like this recipe? Leave a comment below!
I’ve created a fun and engaging community group on Facebook, and I would absolutely love for you to join us! It’s a vibrant place where you can share YOUR favorite recipes, ask any cooking or baking questions you might have, and stay up-to-date on what’s new and exciting at Dinners, Dishes and Desserts (so that you never miss a new, delicious recipe)!
Be sure to follow me on Instagram and tag #dinnersdishes so I can see all the wonderful DINNERS, DISHES, AND DESSERTS recipes YOU make! I love seeing your culinary creations and connecting with fellow food enthusiasts.
Don’t miss out on any of our delicious updates! Be sure to follow me on my social media channels, so you never miss a post, new recipe, or fun cooking tip!
Facebook | Twitter | Pinterest | Instagram
