Make Adorable Love Bug Oreo Cookies: The Easiest No-Bake Valentine’s Day Treat
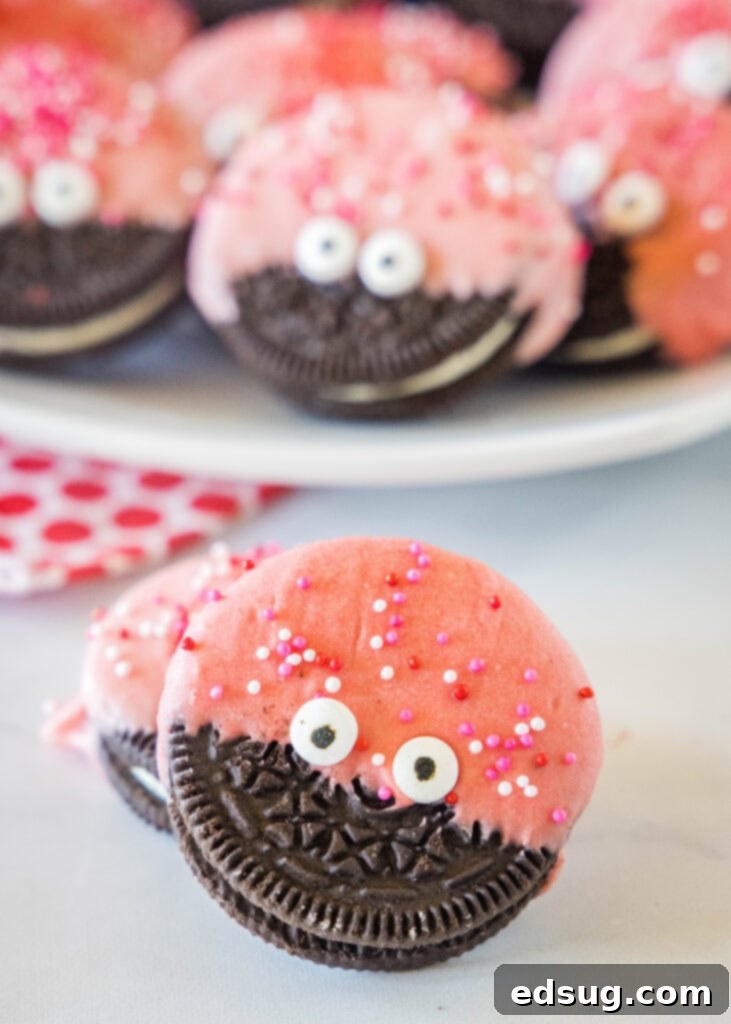
Get ready to spread some love this Valentine’s Day with these absolutely adorable and incredibly simple Love Bug Oreo Cookies! Forget the oven – these charming little treats are a no-bake wonder, making them perfect for busy parents, aspiring young bakers, or anyone looking for a fun and festive project. With just a few basic ingredients and a dash of creativity, you can transform ordinary Oreo cookies into sweet, heart-stealing love bugs that are guaranteed to bring smiles to your loved ones.
Valentine’s Day is all about celebrating connection and joy, and what better way to express affection than with a handmade treat? These Love Bug Cookies aren’t just cute; they’re a delicious and delightful way to show you care. Whether you’re planning a romantic evening, a lively classroom party, or simply craving a sweet snack, these charming cookies fit every occasion. Their versatility also means you can easily customize them to reflect your unique style, adding a personal touch to each adorable creation.
Why These Love Bug Oreo Cookies Are Your Valentine’s Day Must-Make
Considering adding these sweet little love bugs to your Valentine’s Day celebrations? Here are several compelling reasons why they’re not just a dessert, but a delightful experience you and everyone you share them with will absolutely adore:
-
Effortlessly Easy: The Ultimate No-Bake Delight
If the thought of preheating an oven or following complex baking instructions fills you with dread, then these Love Bug Oreo Cookies are your culinary savior! This recipe is proudly no-bake, which means you won’t need to turn on your oven at all. The most intricate step involves melting chocolate, a process so simple that even kitchen novices can achieve perfect results. There are no precise measurements for flour or sugar, no tricky leavening agents – just straightforward melting, dipping, and setting. It’s a truly stress-free way to create impressive holiday treats.
-
Perfectly Festive & Undeniably Adorable
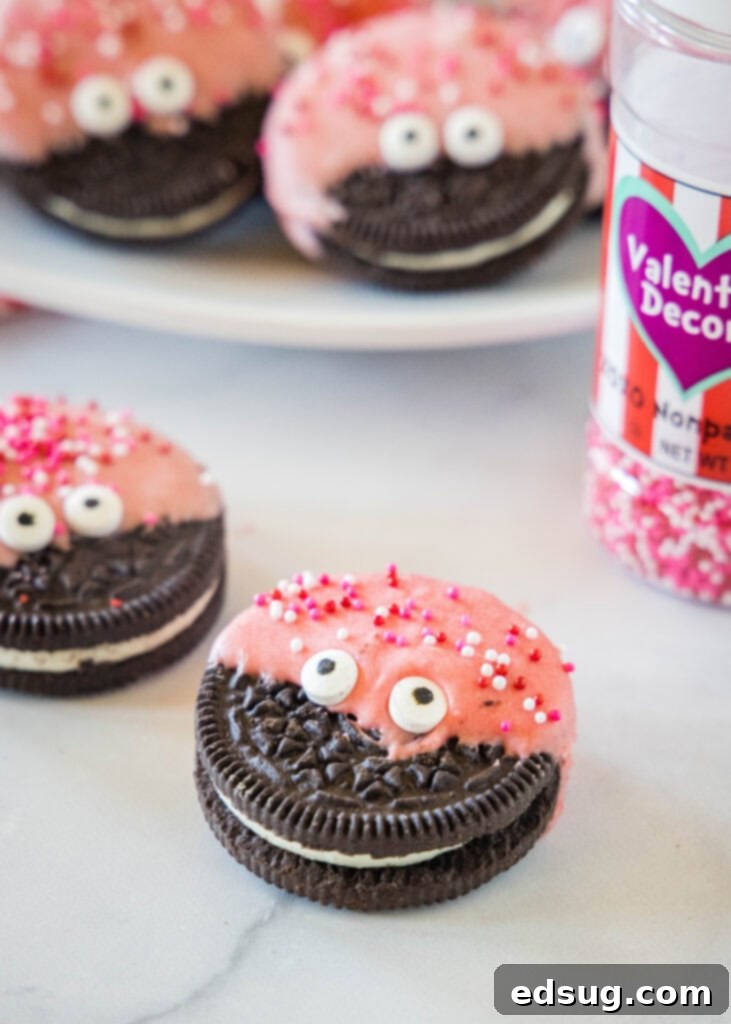
From their vibrant red or pink coating to their playful candy eyes and charming sprinkles, these cookies instantly capture the spirit of Valentine’s Day! Their “love bug” design is whimsically cute and makes them a fantastic, eye-catching addition to any dessert table, party spread, or gift basket. They are incredibly photogenic, ready to brighten up your social media feeds, and serve as a delightful conversation starter. Imagine the joy of gifting a small bag of these personalized treats to friends, teachers, or neighbors!
-
A Joyful Activity for All Ages
These Love Bug Oreo Cookies are more than just a recipe; they’re an invitation for family fun. Kids will absolutely delight in helping with the dipping process, carefully placing the candy eyes, and showering the cookies with colorful sprinkles. It’s a wonderful opportunity to engage younger members of the family in a creative, edible craft that fosters precious memories. Since there’s no hot oven involved, it’s a safer, more relaxed, and immensely enjoyable culinary adventure for little hands, allowing everyone to participate in the magic of creating something special for Valentine’s Day.
Gathering Your Sweet Supplies: What You’ll Need
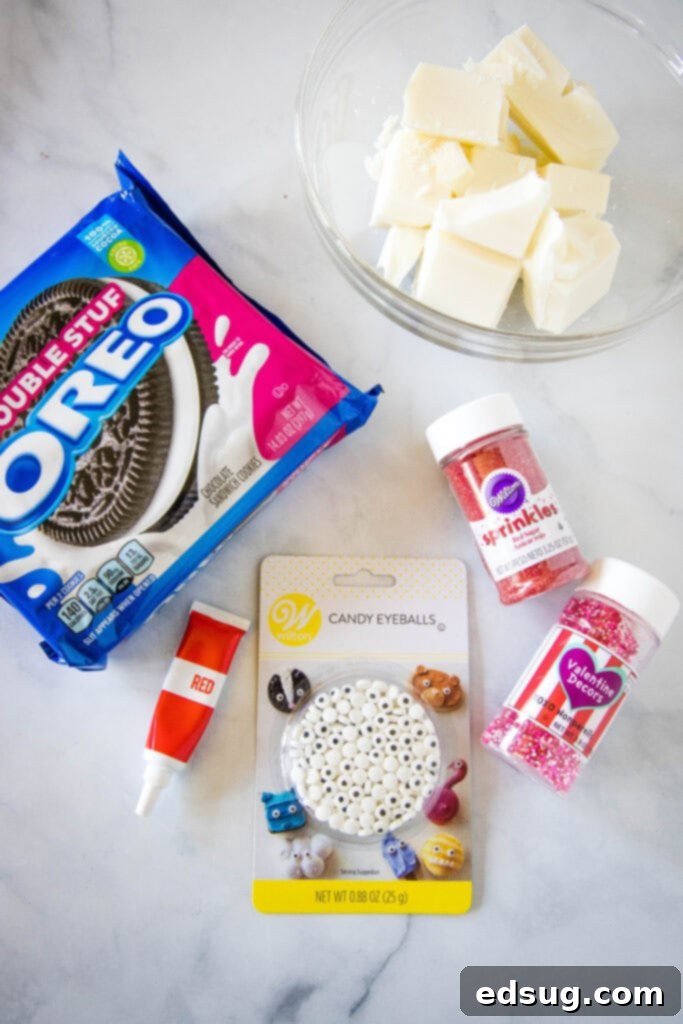
One of the many charms of this recipe is its straightforward ingredient list, relying on just a handful of easily accessible items and common kitchen tools. Here’s a detailed look at everything you’ll need to create your enchanting batch of Love Bug Oreo Cookies. (For precise quantities and measurements, please refer to the comprehensive printable recipe card located at the very end of this post!)
Core Ingredients
- Oreo Cookies: The iconic chocolate sandwich cookie serves as the perfect, sturdy foundation for our love bugs. Their perfectly round shape is ideal for uniform dipping, and the creamy vanilla filling adds an irresistible layer of flavor and texture that perfectly complements the chocolate coating. While classic Oreos are our go-to, feel absolutely free to experiment with different Oreo flavors or even other round cookies you adore, such as chocolate chip cookies, shortbread, or vanilla wafers, for a unique twist.
- White Chocolate: This forms the smooth, vibrant red or pink outer shell of your love bugs. You have a few excellent options here: white chocolate melting wafers, almond bark, or even high-quality white chocolate chips. Many bakers prefer almond bark or candy melts due to their superior melting consistency, which results in a wonderfully smooth finish, and their quick setting time, making the dipping process much more efficient and less messy.
- Oil-Based Food Coloring (Gel or Powder): This is a critical ingredient for success! To achieve that beautiful, rich red (or any other desired vibrant color) without compromising the chocolate’s texture, it is absolutely essential to use an oil-based gel or powder food coloring. Traditional liquid, water-based food colorings, often found in the regular baking aisle, will cause your melted chocolate to seize instantly, turning it into a lumpy, unworkable mess. Look for concentrated gel paste colors from brands like Wilton, Americolor, or Chefmaster, which are formulated to be chocolate-friendly.
- Candy Eyes: These delightful edible decorations are what truly bring your love bugs to life, giving them their undeniably cute and expressive personalities. You can typically find candy eyes with ease in the baking and cake decorating aisles of most major grocery stores (like Walmart or Target), craft supply stores (such as Michael’s or Hobby Lobby), or conveniently order them online from retailers like Amazon.
- Valentine’s Day Sprinkles: Add that extra festive flourish with an assortment of red, pink, and white sprinkles. You can choose classic jimmies, nonpareils, or even fun shapes like tiny hearts, pearls, or edible glitter. Sprinkles not only enhance the visual appeal but also contribute a pleasant, subtle crunch to each bite, making these love bug cookies even more delightful.
Essential Equipment You’ll Need
- Microwave-Safe Bowl: A sturdy bowl suitable for melting your white chocolate efficiently and safely in the microwave.
- Rubber Spatula or Heat-Resistant Spoon: Crucial for stirring the chocolate until it’s perfectly smooth and for assisting with the gentle dipping process.
- Parchment Paper or Wax Paper: An absolute must for lining your baking sheet. This prevents the freshly dipped and decorated cookies from sticking, ensuring easy removal and significantly simplifying cleanup.
- Baking Sheet(s): You’ll need one or more baking sheets to comfortably hold your dipped and decorated cookies as they cool and set.
Crafting Your Adorable Love Bug Oreo Cookies: Step-by-Step Guide
Creating these charming Love Bug Oreo Cookies is a delightful and surprisingly simple process that yields impressive results. Follow these clear, step-by-step instructions, and you’ll have a batch of festive, homemade treats ready to share in no time!
-
Step 1: Melt the Chocolate with Precision and Care
Place your chosen white chocolate (whether almond bark, candy melts, or wafers) into a large, microwave-safe bowl. Heat it in the microwave on high for an initial 1 minute. After this first minute, remove the bowl and stir the chocolate thoroughly with a rubber spatula or spoon. Even if the chocolate doesn’t appear fully melted, stirring is vital as it helps to distribute the latent heat and prevent scorching. Continue to heat the chocolate in short 20-second intervals, stirring vigorously after each, until it is completely smooth, fluid, and free of any lumps. Once you achieve this perfect consistency, carefully add your oil-based red food coloring. Begin with a small amount, stir it in completely, and then gradually add more until you reach your desired vibrant red or charming pink hue. Remember, a little gel coloring goes a long way!
-
Step 2: Master the Art of the Perfect Dip
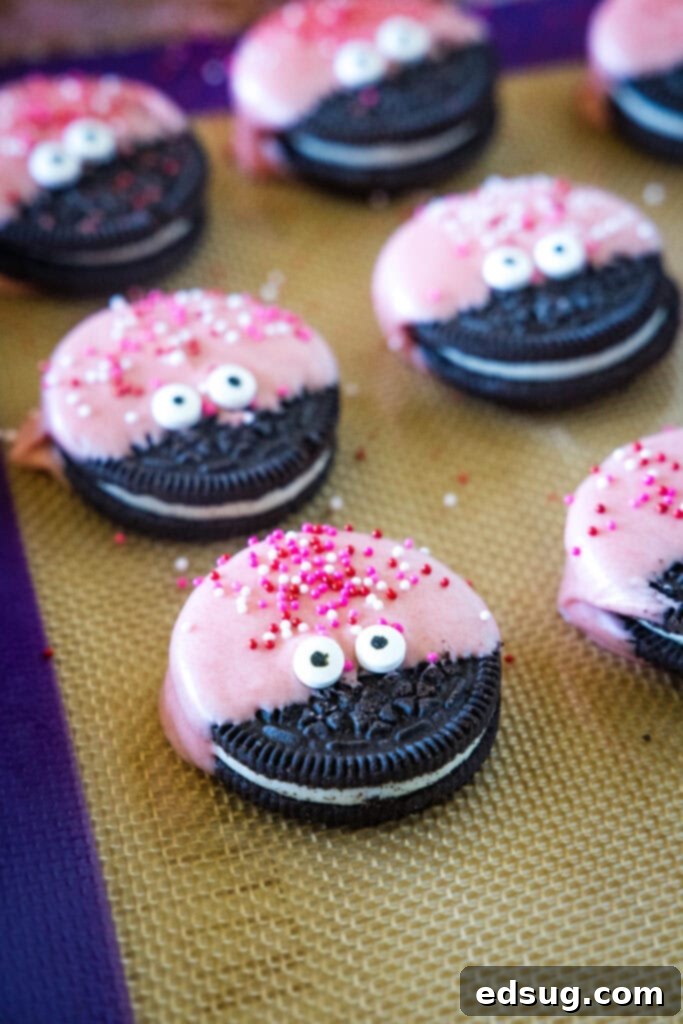
Prepare your workspace by lining a large baking sheet with parchment paper or wax paper. This crucial step prevents sticking and makes cleanup a breeze. Now, carefully hold an Oreo cookie firmly near its top edge (the portion that will remain undipped). Submerge approximately two-thirds of the cookie into the melted red chocolate. Gently lift the cookie out of the chocolate and lightly tap your hand or the side of the bowl to allow any excess chocolate to drip off. This technique helps to create a thin, even, and smooth coating on your cookies, preventing thick, pooling chocolate at the base. Once the excess is removed, carefully place the dipped cookie onto your prepared parchment-lined baking sheet.
-
Step 3: Bringing Your Love Bugs to Life with Decorations
This is where your love bugs truly begin to take shape! Immediately after dipping each cookie and placing it on the baking sheet, while the chocolate is still beautifully wet and tacky, quickly add two candy eyes to the upper edge of the chocolate-dipped portion. The wet chocolate will act as a natural adhesive, “gluing” the eyes securely into place. Following this, generously sprinkle your chosen Valentine’s Day sprinkles over the still-wet chocolate. Work efficiently during this step, as the chocolate, especially almond bark, will begin to set relatively quickly, and you want to ensure your decorations adhere properly before it hardens.
-
Step 4: Patience for Perfection – Allowing Your Cookies to Set
Once all your Love Bug Oreo Cookies are dipped and adorned with their adorable eyes and sprinkles, it’s time for them to set completely. Allow them to rest undisturbed at room temperature for approximately 1 to 2 hours. The exact time will depend on the ambient temperature and humidity in your kitchen. Alternatively, if you’re in a hurry, you can carefully transfer the baking sheet to the refrigerator for about 15-30 minutes to significantly speed up the setting process. It’s important to ensure the chocolate is fully solid and firm to the touch before handling, stacking, or storing your cookies, as this will prevent any smudges and ensure they maintain their perfect shape and festive appearance.

Expert Tips & Creative Suggestions for Perfect Love Bug Cookies
To ensure your Love Bug Oreo Cookies turn out flawlessly every time and to inspire some wonderful creative variations, here are some invaluable tips and thoughtful suggestions from seasoned bakers:
-
Choosing Your Chocolate Wisely for Best Results
While white chocolate or almond bark provides a fantastic base for coloring, don’t hesitate to opt for pre-colored red or pink candy melts if convenience is your priority. Brands like Wilton offer a vast spectrum of vibrant colors that are specifically formulated to melt smoothly and set quickly, ensuring a professional-looking finish. These are readily available at most craft stores, baking supply shops, or online. If you choose to color your own white chocolate, I strongly recommend using almond bark or high-quality white chocolate melting wafers over regular white chocolate chips. They have superior melting properties, are less prone to seizing, and set up much faster and harder, preventing stickiness.
-
The Absolute Necessity of Oil-Based Food Coloring
This crucial detail cannot be overstressed: you must **always use oil-based or gel food coloring** when you’re working with melted chocolate. Introducing any form of water, such as from standard liquid food colorings, will cause your beautiful, smooth melted chocolate to “seize.” This means it will instantly become thick, grainy, lumpy, and entirely unusable for dipping. Oil-based gel or powder food colorings are highly concentrated and won’t introduce moisture, allowing you to achieve rich, vibrant colors while maintaining the chocolate’s silky-smooth consistency. Investing in a good quality set of gel colors is a game-changer for chocolate work.
-
Cookie Alternatives & Flavor Adventures
While the classic Oreo cookie is undeniably perfect for these love bugs, don’t feel limited! Get creative and explore other round cookie options to change up the flavor and texture. Consider using vanilla wafers, shortbread cookies, or even your favorite homemade sugar cookies as the base. For an interesting flavor twist, imagine dipping mint-flavored Oreos in pink chocolate, or peanut butter sandwich cookies in white chocolate. The key is to select a sturdy, flat, and round cookie that can handle the dipping process without crumbling.
-
Sourcing Your Adorable Candy Eyes with Ease
Those cute candy eyes are surprisingly easy to find, especially as holidays like Valentine’s Day approach. You’ll typically find them in the baking and cake decorating aisles of larger supermarkets like Walmart or Kroger, specialty craft stores such as Michael’s or Hobby Lobby, and dedicated baking supply stores. For convenience, or if you plan on making multiple batches, online retailers like Amazon offer a wide selection and often larger quantities.
-
Decoration Ideas & Personal Touches
Beyond the classic sprinkles and candy eyes, let your imagination soar! For an extra dose of cuteness, use edible food markers to draw tiny eyelashes or eyebrows on the candy eyes. A delicate drizzle of contrasting white or dark chocolate over the set red coating can add an elegant touch. If you want to create a “ladybug” effect instead of a general love bug, use black icing gel or melted dark chocolate to pipe small dots onto the red coating. Tiny edible pearls, glitter dust, or even finely chopped nuts can also elevate the presentation and add textural interest. You can also try different colored chocolate for varied bug species!
-
Troubleshooting Common Issues for a Smooth Process
If your melted chocolate starts to thicken too much while you’re working, don’t panic! You can gently reheat it in the microwave for just 10-15 seconds and stir it vigorously to restore its fluidity. If it’s still too thick, you can add a tiny amount of shortening (like Crisco) or a specialized chocolate thinning agent (ensure it’s designed for chocolate, never water or milk!) to achieve a smoother consistency. If the cookies seem to be sticking to the parchment paper after setting, ensure they are absolutely fully hardened before attempting to move them. A quick chill in the refrigerator usually helps them release cleanly and easily.
Storing Your Sweet Creations
Ensuring your homemade Love Bug Oreo Cookies remain fresh, delicious, and visually appealing is easy with proper storage. Here’s how to best preserve your sweet treats:
-
Airtight Storage for Lasting Freshness
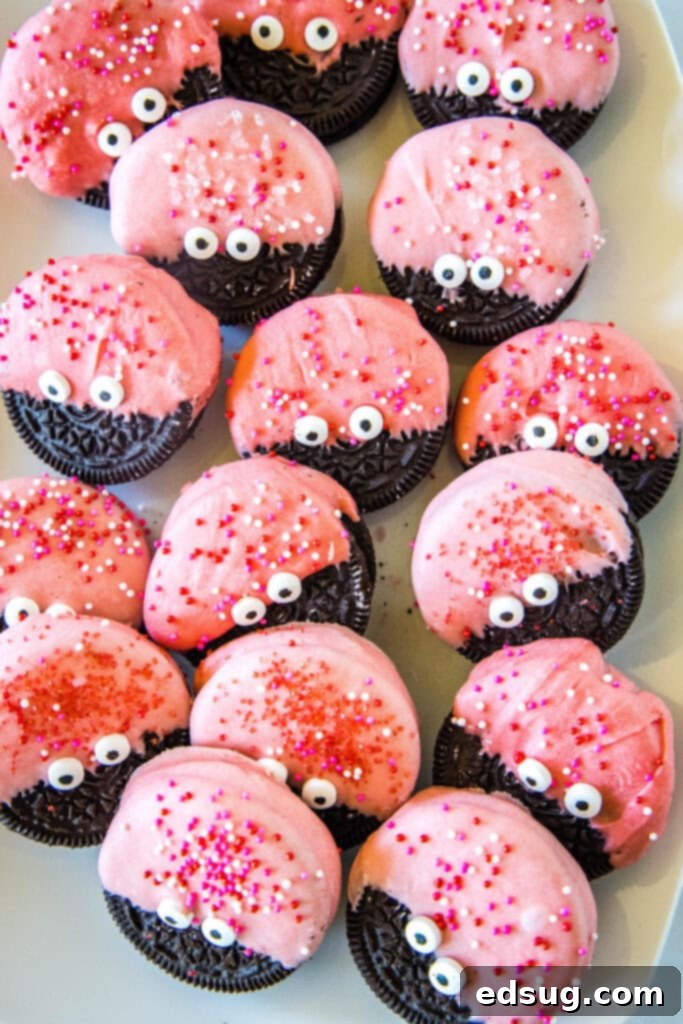
Once the chocolate coating on your Love Bug Cookies is completely and thoroughly set, carefully transfer them to an airtight container. Arrange them in a single layer if possible, or place sheets of parchment paper between layers to prevent them from sticking together. Store the container at cool room temperature, away from direct sunlight, heat sources, or high humidity, which can affect the chocolate. Stored correctly, these delightful cookies will maintain their freshness and delicious taste for up to two weeks, making them a superb make-ahead option for any Valentine’s Day festivity or simply to enjoy over time.
-
Freezing for Future Fun and Convenience
These decorated Oreo cookies are remarkably freezer-friendly, making them an excellent candidate for advance preparation! To freeze, arrange the fully set cookies in a single layer on a baking sheet and flash-freeze them for about 30 minutes until solid. Then, transfer them to an airtight, freezer-safe container. If you need to stack them, place parchment paper between each layer to prevent sticking. They can be safely stored in the freezer for up to three months without compromising flavor or texture. When you’re ready to enjoy them, simply remove them from the freezer and let them thaw gently at room temperature for an hour or two before serving. This convenient option makes holiday prep incredibly easy and ensures you always have a sweet treat on hand!
Explore More Valentine’s Day Delights
If these Love Bug Oreo Cookies have sparked your passion for Valentine’s Day baking (or no-baking!), you’re in luck! Discover more delightful and festive recipes from our collection that are absolutely perfect for sharing the love with family and friends:
- Valentine’s Day Chocolate Bark
- Red Velvet Muffins
- Valentine’s Day Cupid Mix
- Deep Dish Cookies For Two
- Red Velvet Brownies
- Maraschino Cherry Chip Cookies

Love Bug Oreo Cookies
Erin Sellin
15 minutes
2 hours
2 hours 15 minutes
24
Pin Recipe
Rate Recipe
Print Recipe
Ingredients
- 24 Oreo cookies
- 8 oz white chocolate, almond bark or melting wafers for best results
- Red Food Coloring, essential to use oil-based gel or powder color
- 48 candy eyes
- Valentine’s Day Sprinkles
Instructions
-
In a large microwave-safe bowl, heat your almond bark or white chocolate for 1 minute. Stir well, then continue heating in 20-second intervals, stirring thoroughly after each, until the chocolate is completely melted and smooth. Incorporate your oil-based red food coloring, stirring until you achieve a vibrant, uniform color.
-
Holding an Oreo cookie by its undipped portion, submerge approximately two-thirds of the cookie into the melted chocolate. Gently shake off any excess chocolate by lightly tapping the cookie, then carefully place it onto a baking sheet lined with parchment paper.
-
While the chocolate is still wet, attach two candy eyes near the top edge of the dipped chocolate to “glue” them in place. Immediately follow by adding your chosen Valentine’s Day sprinkles over the wet chocolate.
-
Allow the decorated cookies to set at room temperature for 1-2 hours, or until the chocolate is completely firm. You can also place the baking sheet in the refrigerator for about 15-30 minutes to speed up the setting process.
Notes
Nutrition
Nutrition information is automatically calculated and should be used as an approximation.
Additional Info
Erin Sellin
15 minutes
2 hours
2 hours 15 minutes
Dessert Recipes
American
24
107
Love this fun recipe? We’d be thrilled if you left a comment and rated it below!
Join our fun and friendly community on Facebook! It’s a fantastic place where you can
share your favorite recipes, get answers to your cooking questions, and stay updated on all the new and exciting recipes from Dinners, Dishes and Desserts. Don’t miss out – we’d love for you to join us!
Be sure to follow us on Instagram and
tag #dinnersdishes so we can see all the wonderful DINNERS, DISHES, AND DESSERTS
recipes YOU create! Your culinary masterpieces inspire us, and we love seeing your unique spins on our recipes.
Stay connected with us across all our social media channels, so you
never miss an update, a delicious new recipe, or our latest kitchen tips and tricks!
Facebook |
Twitter |
Pinterest |
Instagram
