Easy Peppermint Chocolate Covered Oreos: The Perfect No-Bake Holiday Treat
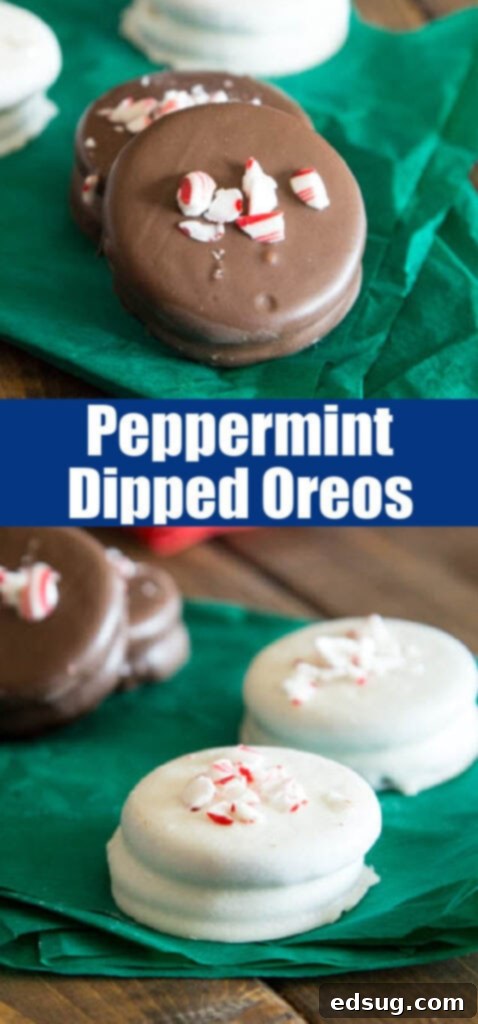
These delightful Chocolate Covered Oreos, infused with a refreshing hint of peppermint, are the ultimate easy, no-bake holiday treat. Ready in just 5 minutes of active prep time, they’re perfect for festive gatherings, thoughtful gifts, or simply a quick indulgence.
As the holiday season approaches, grocery store shelves become adorned with all sorts of festive treats, including commercially made chocolate-covered Oreos. While those are certainly an option, nothing quite compares to the homemade version. When you make these Peppermint Chocolate Covered Oreos yourself, you get to choose a much higher quality chocolate, ensuring a richer, more luxurious coating. Plus, adding a touch of pure peppermint extract elevates the flavor to a whole new level, creating a truly irresistible experience that store-bought versions simply can’t match.
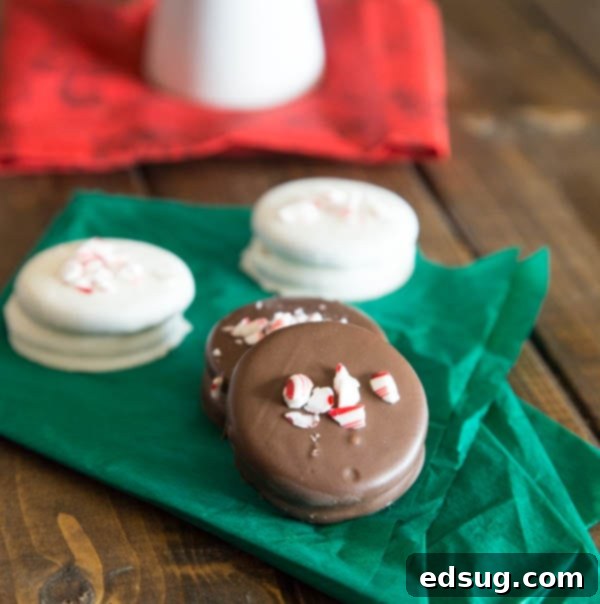
Beyond their superior taste, crafting these delicious cookies at home offers the wonderful opportunity to personalize their appearance. You can decorate them with vibrant sprinkles, crushed candy canes, or a contrasting chocolate drizzle, transforming them into extra festive and incredibly pretty additions to your holiday cookie tray. They are not just a dessert; they are a statement of homemade warmth and holiday cheer.
Why You’ll Love These Peppermint Chocolate Covered Oreos
These aren’t just any holiday cookies; they are a delightful blend of simplicity, flavor, and festive charm. Here’s why these Peppermint Chocolate Covered Oreos will quickly become a cherished part of your holiday tradition:
- **Effortlessly Easy & Quick:** Melting chocolate is genuinely the most challenging step, and even that is incredibly straightforward. With absolutely no baking involved, you can have a batch of these exquisite treats ready in approximately 10-15 minutes of hands-on time. This makes them perfect for last-minute holiday dessert needs or when you want to satisfy a sweet craving without a lengthy process.
- **Endlessly Customizable:** The beauty of this recipe lies in its flexibility. Do you prefer the intensity of dark chocolate, the classic appeal of milk chocolate, or the creamy sweetness of white chocolate? Perhaps you’d like to skip the peppermint or swap it for a different extract like almond or orange? You have complete freedom to use whatever chocolate, flavorings, and toppings you desire, making each batch uniquely yours. This adaptability ensures they cater to every taste preference.
- **The Perfect Edible Gift:** Beyond being a delicious snack, these decorated chocolate-dipped Oreos make for fantastic homemade gifts. Once dipped and adorned with festive peppermint candies or colorful sprinkles, simply place them in cellophane bags tied with a ribbon. They’re a wonderful, thoughtful gesture for friends, neighbors, teachers, co-workers, or anyone deserving of a sweet, handcrafted treat during the holidays.
What You’ll Need for Peppermint Dipped Oreos
Gathering your ingredients for these Chocolate Covered Oreos is simple, requiring just a few key items:
- **Oreo Cookies:** Any variety will work, but the classic chocolate Oreos provide a wonderful contrast to the peppermint chocolate coating. Consider seasonal flavors for an extra twist!
- **Melting Chocolate:** This is crucial for a smooth, glossy finish. High-quality melting wafers, baking chocolate bars, or candy melts are ideal. You can choose milk, dark, or white chocolate based on your preference.
- **Peppermint Extract:** A small amount goes a long way to infuse that signature festive mint flavor. Be sure to use a good quality extract for the best taste.
- **Candy/Sprinkles for Decorating:** Crushed candy canes are perfect for a classic holiday look, but festive sprinkles, a drizzle of contrasting chocolate, or even finely chopped nuts can add visual appeal and texture.
Essential Equipment for Dipping Oreos
While the ingredients are few, having the right tools can make the process even smoother:
- **Microwave-Safe Bowl or Double Boiler:** For melting your chocolate perfectly.
- **Spatula or Spoon:** For stirring the chocolate until smooth.
- **Two Forks or Dipping Tools:** Forks are excellent for submerging and retrieving Oreos, allowing excess chocolate to drip off. Specialized dipping tools can also make the job easier.
- **Parchment Paper or Silicone Mat:** Essential for lining your baking sheets, preventing the chocolate from sticking as it sets.
- **Baking Sheet:** To hold your dipped Oreos while they set.
- **Small Ziploc Bag (Optional):** For drizzling contrasting chocolate.
How To Make Perfect Chocolate Dipped Oreos
Creating these delightful Peppermint Chocolate Covered Oreos is incredibly simple. Follow these steps for a perfect batch every time:
- **Melt the Chocolate to Perfection:** Begin by gently melting your chosen chocolate. For best results, I highly recommend using high-quality melting disks or a baking bar, like Ghirardelli, which melt beautifully and provide a smooth, consistent coating. Place your chocolate in a microwave-safe bowl and heat in 30-second intervals, stirring thoroughly after each interval, until it’s completely smooth and free of lumps. Alternatively, you can use a double boiler for a more controlled melting process, ensuring the chocolate doesn’t scorch.
- **Infuse with Peppermint:** Once your chocolate is perfectly melted and smooth, stir in the peppermint extract. Mix it well until the extract is fully incorporated and the chocolate has that wonderful, inviting peppermint aroma. Taste a tiny bit to ensure the flavor is to your liking, adding a tiny bit more extract if you desire a stronger mint presence.
- **Dip and Coat Each Oreo:** Carefully add an Oreo cookie into the melted chocolate. Using two forks (or a specialized dipping tool), gently turn the cookie to ensure it’s completely coated in chocolate. Lift the cookie out, allowing any excess chocolate to drip back into the bowl. A gentle tap against the side of the bowl can help remove extra drips, ensuring a clean finish.
- **Decorate Immediately:** Transfer the chocolate-covered Oreo to a baking sheet lined with parchment paper or a silicone mat. This step is crucial: immediately top the cookie with crushed peppermint candy, festive sprinkles, or any other desired decorations while the chocolate is still “wet” and tacky. This ensures the toppings adhere perfectly before the chocolate begins to set.
- **Allow to Harden Completely:** Once all your Oreos are dipped and decorated, let the chocolate harden completely. You can leave them at room temperature, which usually takes about 30-60 minutes, or place the baking sheet in the refrigerator for 10-15 minutes to speed up the setting process. Once firm, they are ready to serve and enjoy!
Variations and Customization Ideas
These Peppermint Chocolate Covered Oreos are fantastic as is, but don’t be afraid to experiment and make them truly your own:
- **Chocolate Choices:** Experiment with different types of chocolate. Use dark chocolate for a richer, more intense flavor that pairs wonderfully with peppermint. White chocolate offers a sweet, creamy alternative, which can also be easily tinted with food coloring for themed events. Milk chocolate is a classic, universally loved option.
- **Flavor Extracts:** While peppermint is perfect for the holidays, you can swap it out for other extracts. Try almond extract for a nutty twist, orange extract for a chocolate orange fusion, or even a touch of rum extract for an adult-friendly treat.
- **Creative Toppings:** Beyond crushed candy canes and sprinkles, consider other fun toppings. Chopped toasted nuts (like pecans or almonds) add a great crunch. Shredded coconut creates a tropical vibe. A contrasting chocolate drizzle (e.g., white chocolate drizzle on dark chocolate Oreos) adds an elegant touch. Even a sprinkle of sea salt can balance the sweetness beautifully.
- **Seasonal Themes:** Adjust your sprinkles and colors to suit any occasion. Red, white, and blue for patriotic holidays; pastel colors for Easter; or autumn-themed sprinkles for Thanksgiving.
Gifting and Storage Tips for Dipped Oreos
Absolutely! These Peppermint Chocolate Covered Oreos are an excellent make-ahead treat, which is perfect for busy holiday schedules. Once fully hardened, store them in an airtight container at room temperature. They will remain fresh and delicious for 2-3 weeks, meaning you can get a head start on your holiday baking and have them ready well in advance of any celebrations or gifting occasions.
Technically, yes, you can freeze chocolate-covered Oreos. However, if you plan to serve them to guests or if their appearance is a key concern (for instance, if they are part of a gift platter), I generally don’t advise it. When thawed, the chocolate tends to develop a dull, pale, or “bloomed” appearance, which diminishes their visual appeal. While they will still be perfectly safe and tasty, they won’t look as pristine as freshly made or refrigerated ones.
For the best results when coating anything in chocolate, I highly recommend using high-quality melting disks (like Ghirardelli or Guittard) or baking chocolate bars. These types of chocolates are formulated to melt smoothly and maintain a glossy finish, making them incredibly easy to work with. While regular chocolate chips can work in a pinch, they often contain stabilizers that can make them a little harder to melt to a perfectly smooth consistency, sometimes resulting in a slightly thicker or less shiny coating. For a truly professional-looking and delicious result, invest in good melting chocolate.
To prevent chocolate from seizing (becoming thick and grainy), ensure no water comes into contact with the chocolate while melting, especially when using a double boiler. If microwaving, stir frequently and avoid overheating. If it does seize, sometimes adding a teaspoon of vegetable oil or melted coconut oil and stirring vigorously can help rescue it, but it might alter the final texture slightly.
Absolutely! While classic Oreos are fantastic, feel free to experiment with different Oreo flavors. Golden Oreos would be lovely with white chocolate and peppermint, or try peanut butter Oreos for a chocolate-peanut butter-peppermint twist. The possibilities are endless!

More Easy Christmas Cookie Recipes
- Reese’s Fudge
- Cornflake Cookies
- Grinch Sugar Cookie Bites
- Peanut Butter Cup Fudge
- Homemade Caramels
- Caramel Cashew Clusters
- Melted Snowman Bark
- Avalanche Cookies

Chocolate Covered Oreos
Erin Sellin
15
minutes
15
minutes
24
Pin Recipe
Rate Recipe
Print Recipe
Ingredients
-
1
package Oreo Cookies -
1
pound
melting chocolate,
chocolate or white -
1
teaspoon
peppermint extract -
Crushed Candy Canes,
optional
Instructions
-
Melt chocolate until smooth. Stir in peppermint extract.
-
Using a fork, dip cookies into the chocolate to coat completely.
-
Lay on a sheet of parchment paper or a baking sheet to set up. Sprinkle immediately with crushed candy canes before they harden.
Nutrition
Serving:
1
g
|
Calories:
118
kcal
|
Carbohydrates:
5
g
|
Protein:
4
g
|
Fat:
10
g
|
Saturated Fat:
1
g
|
Polyunsaturated Fat:
9
g
|
Sodium:
96
mg
|
Fiber:
2
g
|
Sugar:
2
g
Nutrition information is automatically calculated, so should only be used as an approximation.
Additional Info
Erin Sellin
15
minutes
15
minutes
Dessert Recipes
American
24
118
Like this recipe? Leave a comment below!
In conclusion, these homemade Peppermint Chocolate Covered Oreos are more than just a simple sweet treat. They are a celebration of ease, customization, and festive joy, making them an indispensable part of your holiday repertoire. Whether you’re whipping up a quick batch for family, preparing thoughtful edible gifts for loved ones, or simply indulging in a moment of minty-chocolate bliss, this recipe promises delicious results with minimal effort. So go ahead, gather your ingredients, and create some sweet holiday magic!
I’ve created a fun group on Facebook, and I would love for you to join us! It’s a place where you can
share YOUR favorite recipes, ask questions, and see what’s new at Dinners, Dishes and Desserts (so that you never miss a new recipe)!
Be sure to follow me on Instagram and
tag #dinnersdishes so I can see all the wonderful DINNERS, DISHES, AND DESSERTS
recipes YOU make!
Be sure to follow me on my social media, so you
never miss a post!
Facebook |
Twitter |
Pinterest |
Instagram
