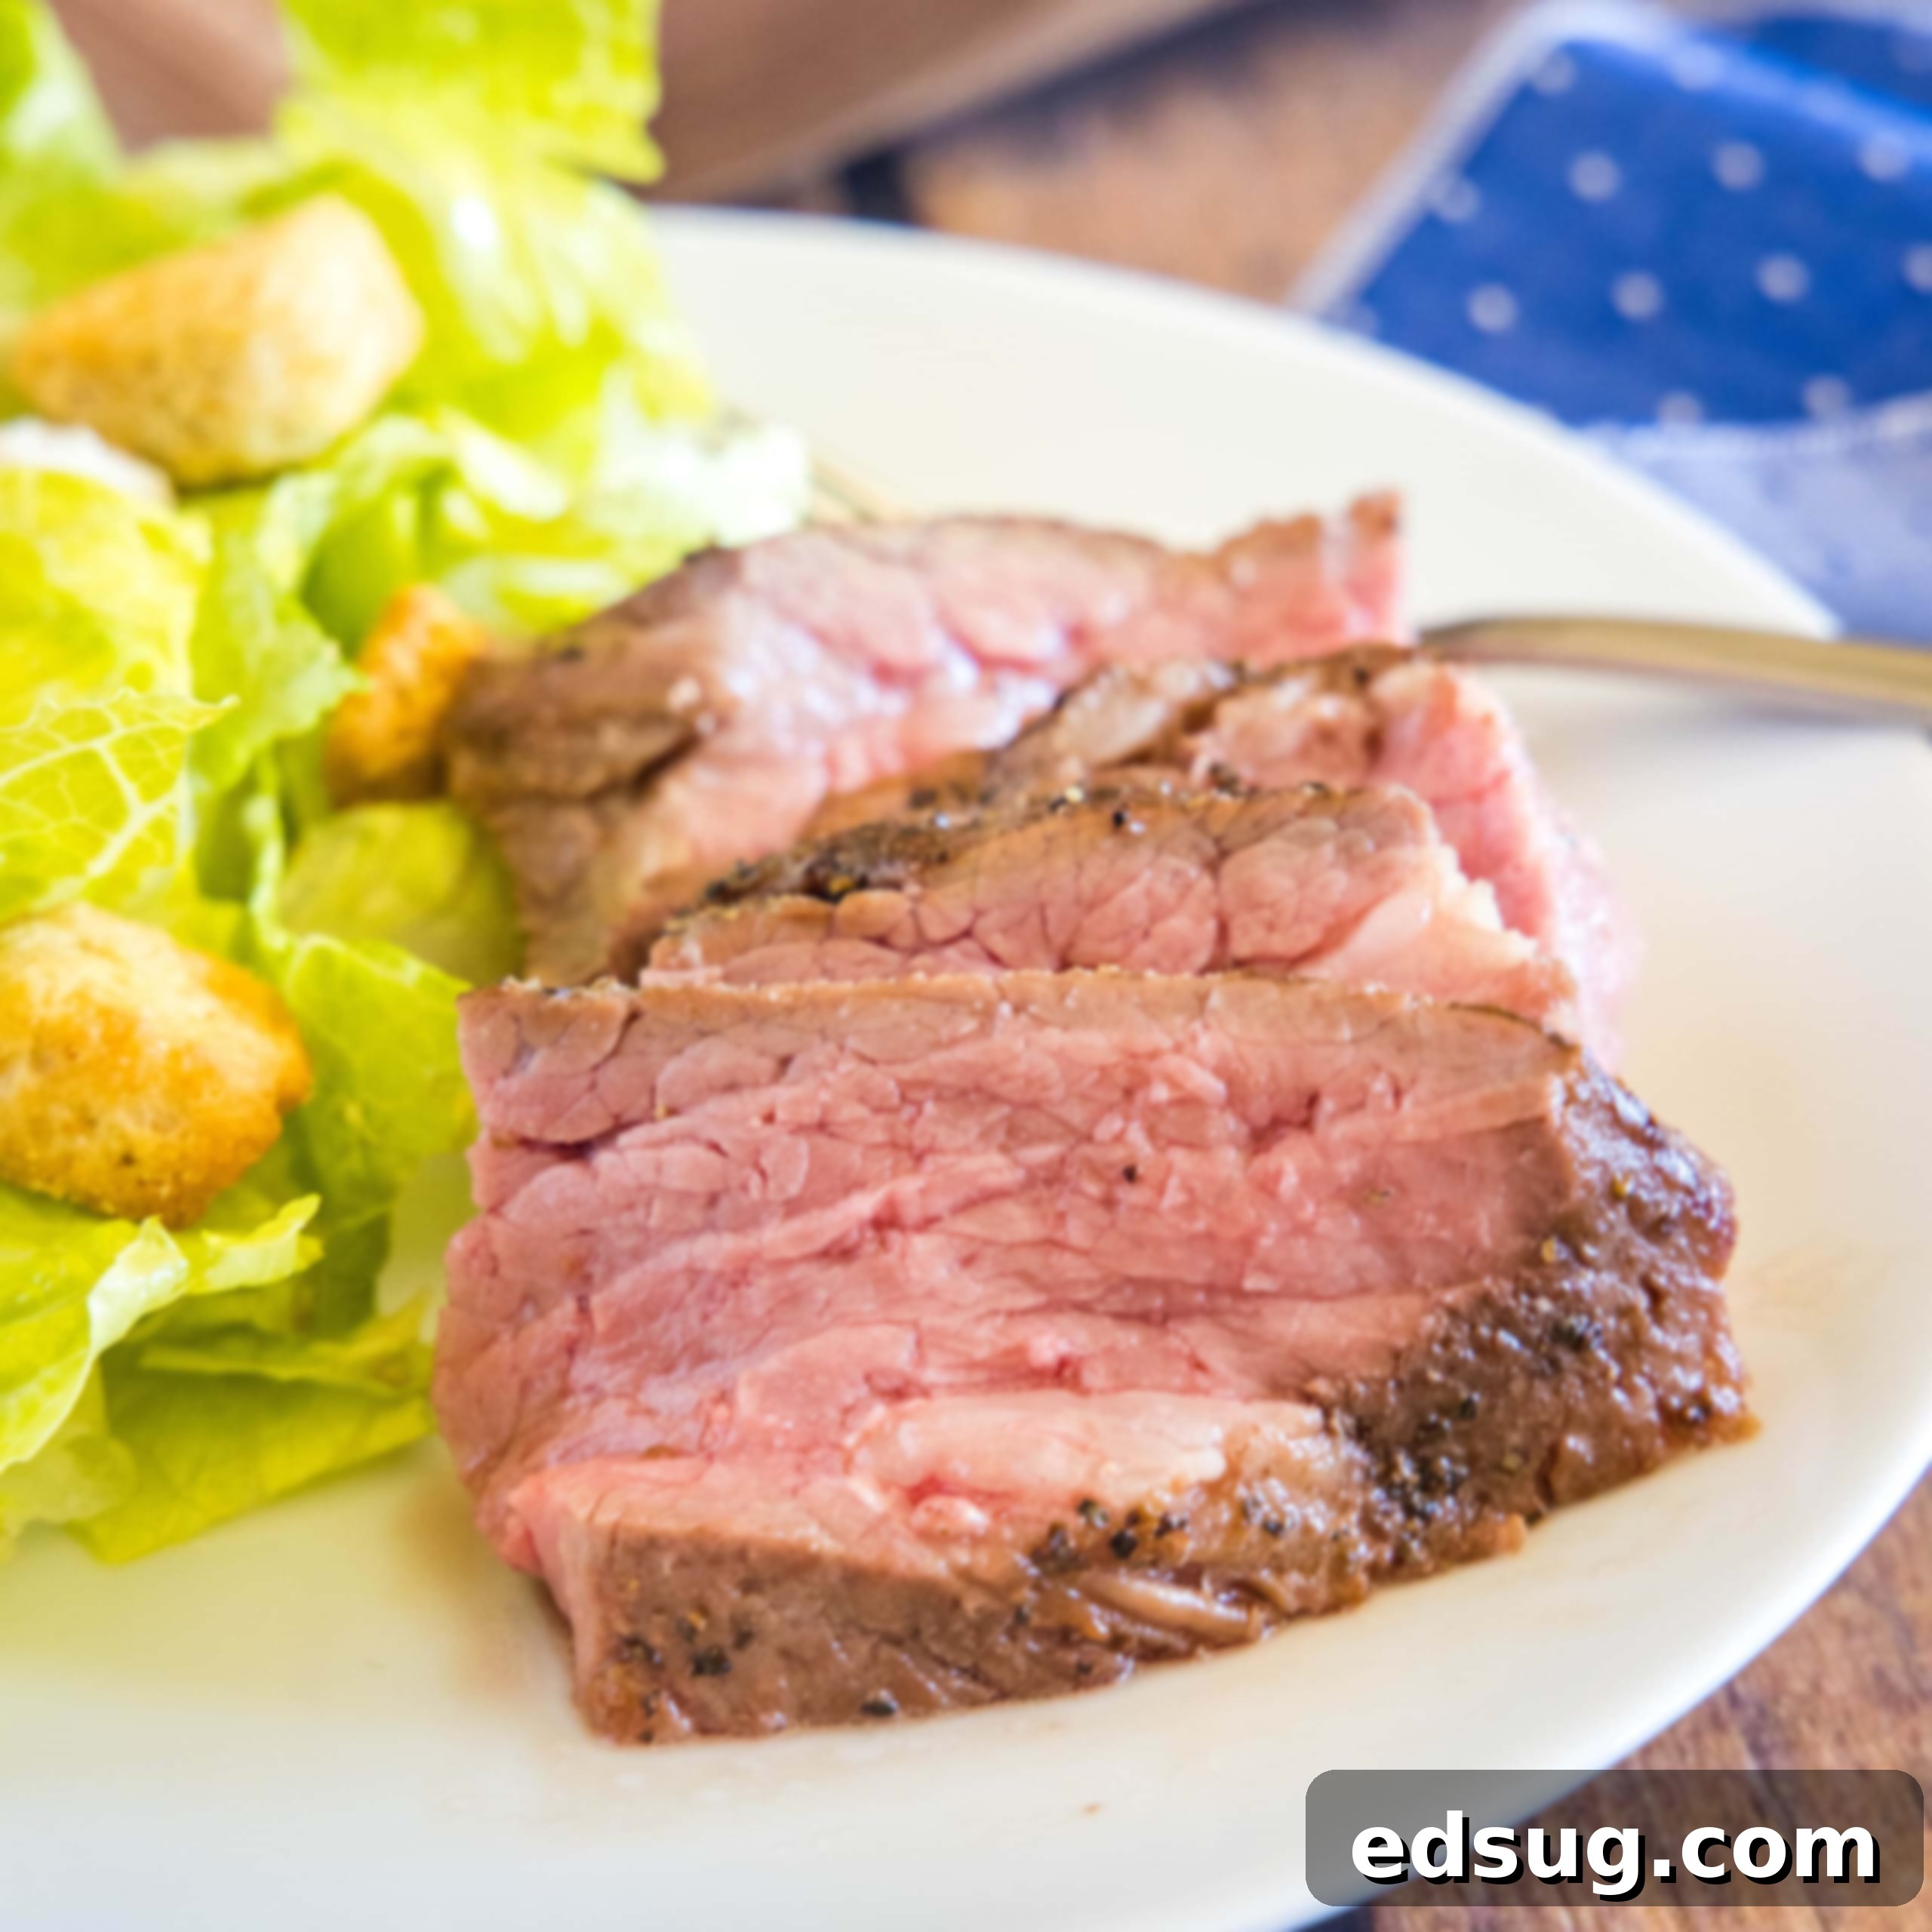
Sous Vide Tri-Tip: Transform an Affordable Cut into a Culinary Masterpiece
Sous Vide Tri-Tip: The ultimate guide to preparing a remarkably tender, juicy, and flavorful tri-tip roast. Elevate this budget-friendly cut of beef into an extraordinary dining experience!
Tri-tip, often overlooked and sometimes hard to find depending on your region, is a true gem of a beef cut. While it might not grace every grocery store aisle nationwide, many major retailers, like Costco, consistently offer it. You can often find it in two forms: pre-seasoned and vacuum-sealed, or unseasoned in convenient packs of two. The best part? Tri-tip is consistently budget-friendly, typically ranging from $5-6 per pound, which is an excellent value for beef these days.
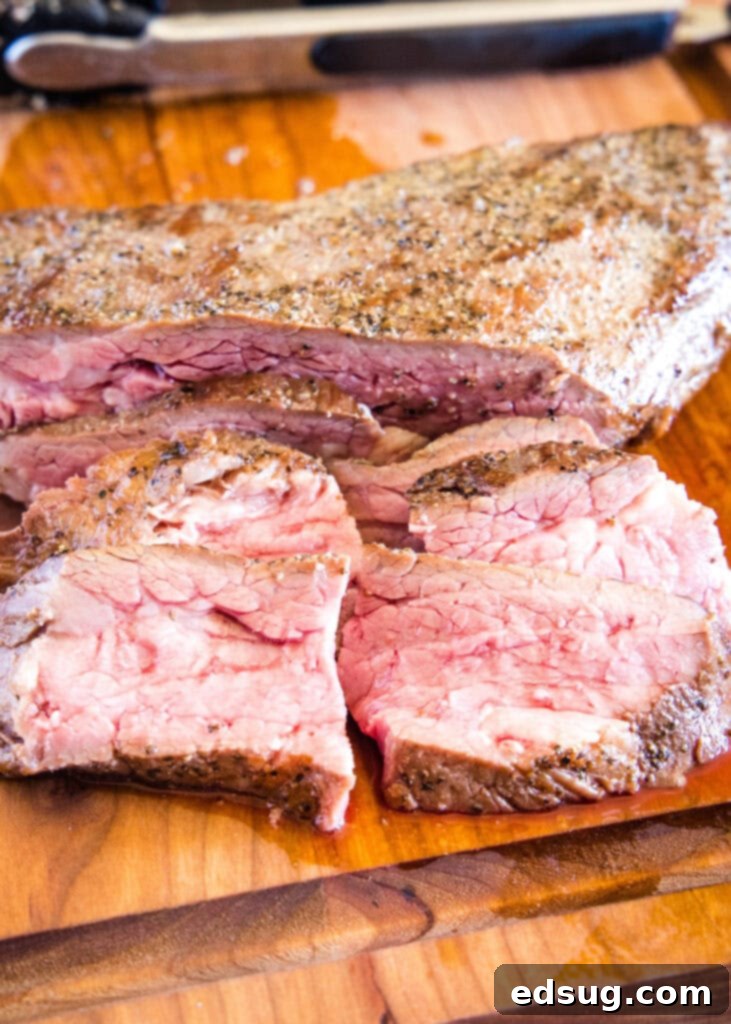
My first introduction to tri-tip was during a culinary trip with Certified Angus Beef, where I learned to make the most delicious Smoked Tri Tip. For years, this was our go-to method at home, delivering fantastic results. However, everything changed the moment I discovered the magic of sous vide cooking for this particular cut. Sous vide isn’t just a cooking method; it’s a culinary transformation, turning an economical cut of beef into a surprisingly tender, incredibly juicy, and truly luxurious steak that tastes far more expensive than it is. The best part? It requires minimal effort on your part.
Sous Vide Steak has always been a favorite in our kitchen, but this tri-tip stands out. Its exceptional quality, combined with its ability to generously feed a crowd, makes it an ideal choice for entertaining or family dinners. You’ll be amazed at how effortlessly you can achieve restaurant-quality results in your own home.
What is Tri-Tip? A Hidden Gem of the Beef World
Before diving into the cooking process, let’s appreciate the tri-tip cut itself. Originating from the bottom sirloin, the tri-tip is a triangular-shaped cut of beef, hence its name. It’s also known as a “Santa Maria steak” due to its popularity in Santa Maria, California, where it’s a staple for barbecuing. This cut boasts excellent marbling, which contributes to its rich flavor, but it also contains connective tissues that can make it a bit tough if not cooked properly. This is precisely where the sous vide method shines.
Its unique shape and grain direction are important considerations, especially when slicing. While other cuts might have a consistent grain, the tri-tip’s grain changes directions roughly halfway through the roast. Understanding this characteristic is key to achieving maximum tenderness in every bite.
Why Sous Vide for Tri-Tip? The Secret to Unmatched Tenderness
The sous vide method involves cooking food in a precisely temperature-controlled water bath. For a cut like tri-tip, this precision is invaluable. Here’s why sous vide is the superior choice for tri-tip:
- Unparalleled Tenderness: The long, gentle cooking process at a consistent temperature slowly breaks down the tough collagen and connective tissues in the tri-tip, resulting in incredibly tender meat without overcooking the exterior.
- Perfect Doneness, Edge-to-Edge: With sous vide, you achieve an exact level of doneness (e.g., medium-rare) from one edge of the roast to the other. There are no gray bands or dry spots, just perfectly cooked meat throughout.
- Enhanced Flavor and Juiciness: Cooking in a sealed bag locks in all the natural juices and flavors, allowing the meat to absorb its seasonings deeply. The result is a more succulent and flavorful roast.
- Foolproof Cooking: Since the water bath temperature never exceeds your target internal temperature, it’s virtually impossible to overcook the meat. This means less stress and more consistent results, even for novice cooks.
- Flexibility: Once cooked sous vide, the tri-tip can hold in the water bath for an extended period without degrading, giving you flexibility with your meal timing.
How To Cook Sous Vide Tri-Tip: A Step-by-Step Guide
- Prepare the Water Bath: Begin by filling a large pot or a dedicated sous vide container with water. Place your immersion circulator into the water and set it to your desired temperature. For a perfect medium-rare, aim for 130ºF (54.4ºC). If you prefer a slightly more done steak, 135ºF (57.2ºC) is a good option for medium.
- Season the Tri-Tip Generously: Pat your tri-tip roast dry with paper towels. Then, season both sides of the meat thoroughly with a generous amount of salt, black pepper, and garlic powder. While you can certainly experiment with other spices or rubs, keeping it simple allows the natural, rich flavor of the beef to truly shine.
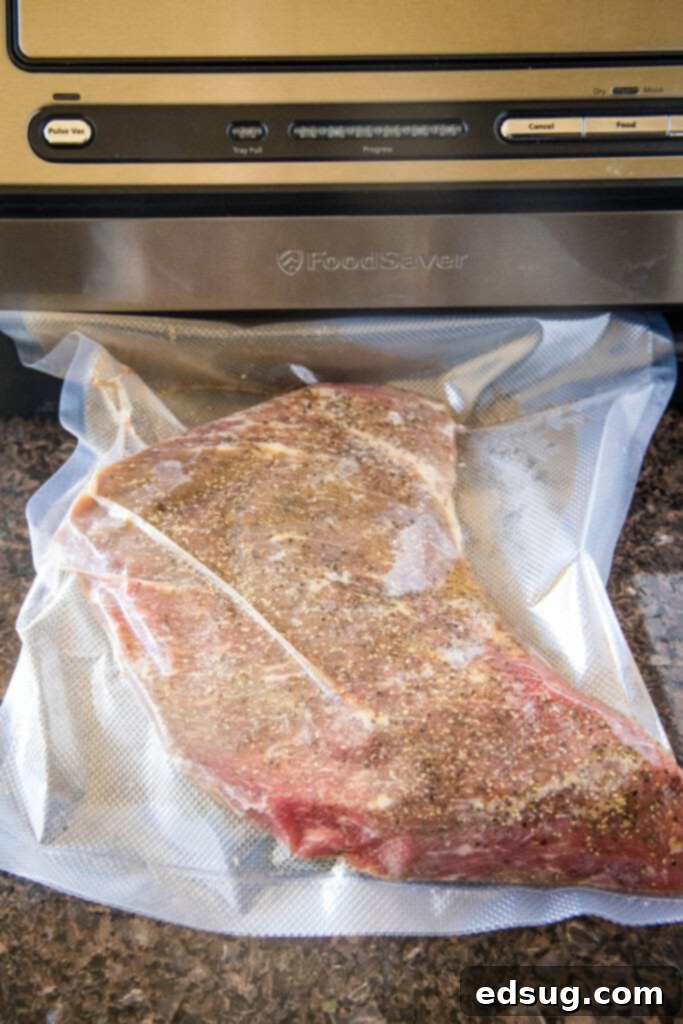
- Seal the Meat: Carefully place the seasoned tri-tip into a heavy-duty, food-grade plastic bag. If you are using a vacuum sealer, remove as much air as possible and seal the bag completely. If you don’t have a vacuum sealer, a high-quality zip-top bag works just as well. Seal the zip-top bag almost all the way, leaving about an inch open. Slowly lower the bag into the preheated water bath, allowing the water pressure to force the air out around the meat. Just before the opening submerges, seal the remaining portion of the bag. This is known as the water displacement method and ensures most of the air is removed.
- Cook in the Water Bath: Submerge the sealed bag containing the tri-tip into the preheated water bath. Ensure the meat is fully immersed. To prevent excessive water evaporation over the long cooking time, cover your water bath with a lid, aluminum foil, a pot lid, or even a layer of ping pong balls. Cook at your chosen temperature (130ºF for medium-rare) for 5 hours.
- Remove and Dry: After 5 hours, carefully remove the tri-tip from the water bath and take it out of the bag. Place the cooked meat on a tray lined with several layers of paper towels. It is crucial to pat the tri-tip extremely dry on all sides. Any moisture on the surface will hinder the searing process and prevent you from achieving a beautiful, crispy crust.
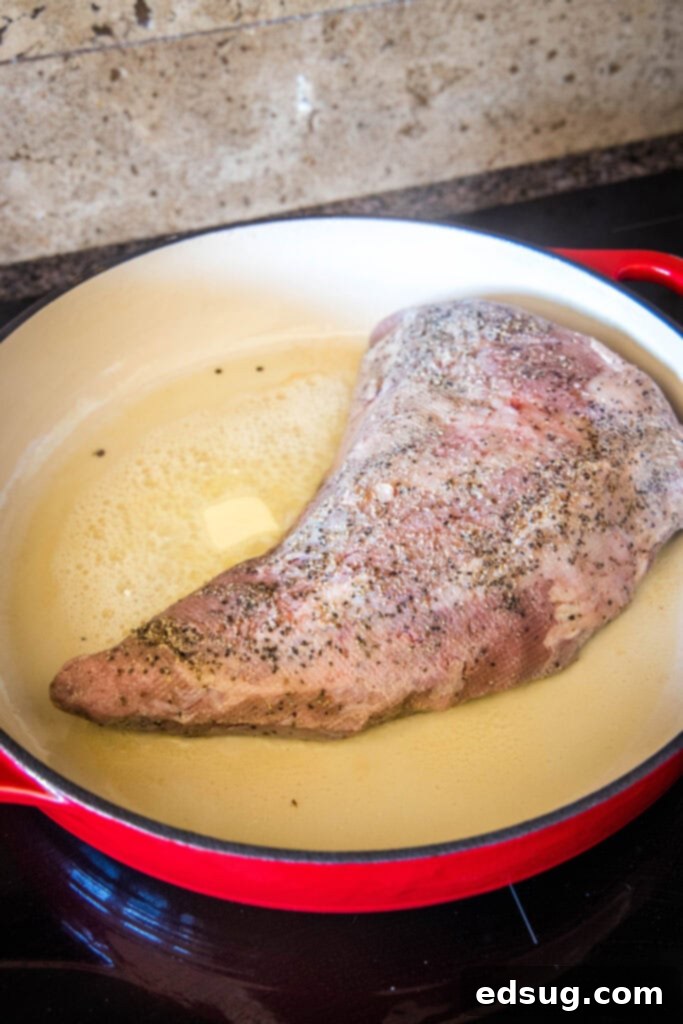
- Preheat Skillet for Searing: Heat a large cast-iron skillet or heavy-bottomed pan over high heat. Add the avocado oil (or other high smoke point oil like grapeseed oil) to the pan. You know the oil is hot enough when it starts to shimmer and just barely smoke.
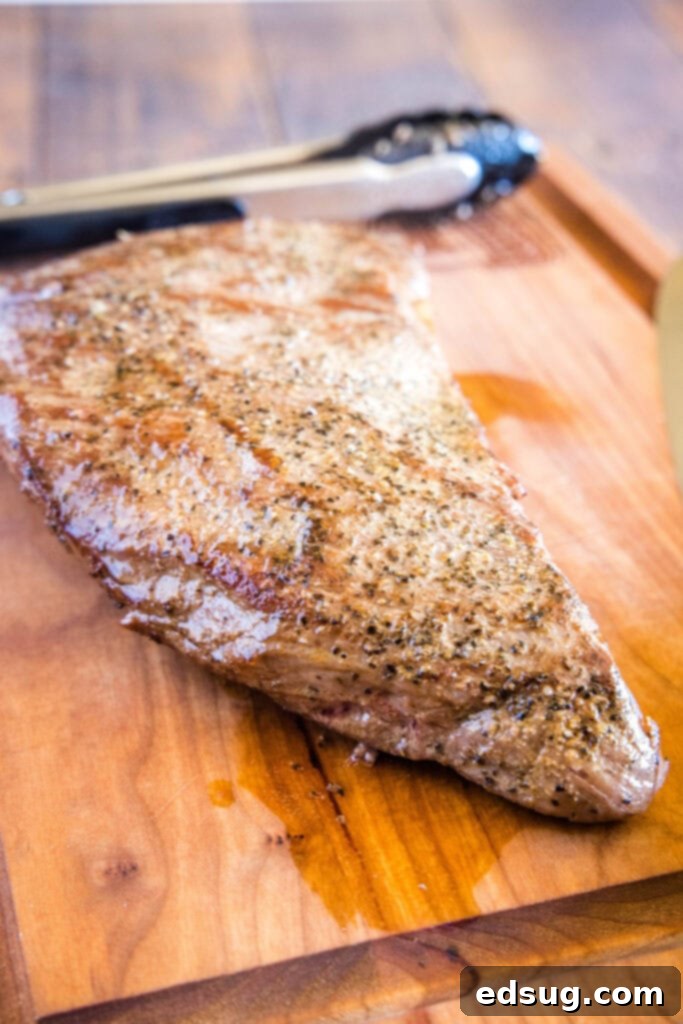
- Sear for a Perfect Crust: Carefully place the dry tri-tip into the scorching hot pan. Add a tablespoon of butter alongside the tri-tip for an extra layer of rich flavor and a beautiful golden-brown finish. Sear each side for approximately 30-45 seconds, until a deep, appetizing brown crust forms. Do not overcrowd the pan, and work quickly to avoid overcooking the interior of the meat, which is already at your desired doneness.
- Serve Immediately: Remove the seared tri-tip from the pan. Unlike conventionally cooked steaks, meat cooked sous vide does not need to rest because the juices are already evenly distributed throughout the meat due to the gentle cooking process. Slice against the grain and serve right away!
How Long Does It Take To Sous Vide Tri-Tip?
When cooking tri-tip sous vide, the duration significantly impacts its tenderness. While minimum cooking times exist, allowing for longer periods truly allows the magic of sous vide to unfold. I’ve found that 5 hours is the sweet spot – the “magic time” – to adequately break down the collagen and connective tissues. This results in an incredibly tender and juicy cut of meat, far surpassing what traditional methods can achieve for this particular roast. You can even extend the cooking time up to 8 hours without compromising the texture or doneness, offering excellent flexibility.
What Temperature To Sous Vide Tri-Tip?
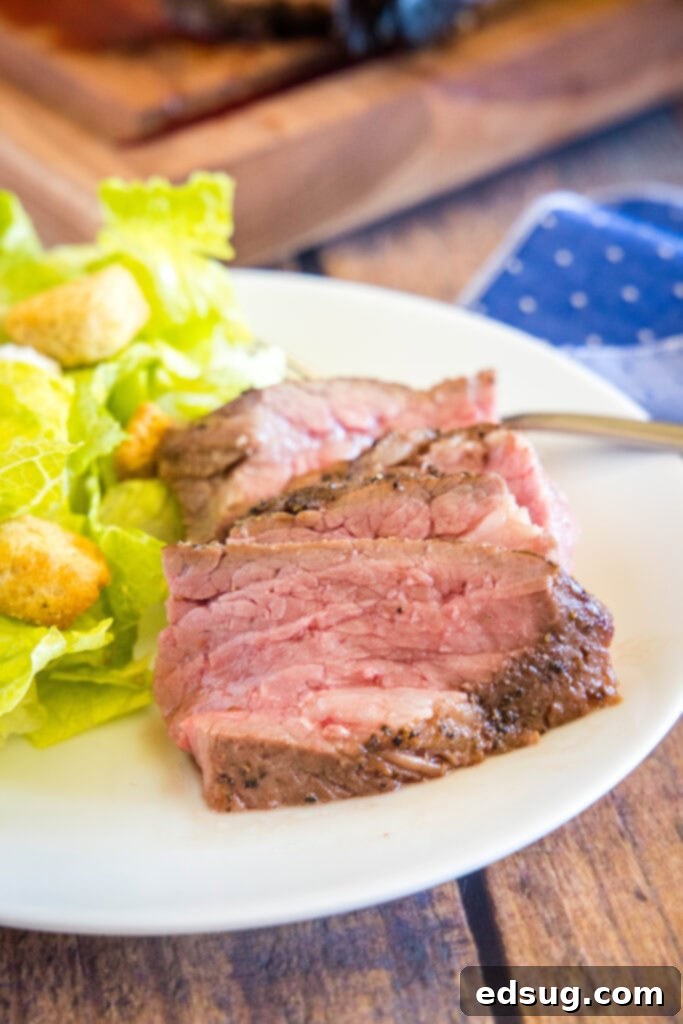
The ideal temperature for sous vide tri-tip primarily depends on your preferred level of doneness. Tri-tip is generally at its best when cooked to a medium-rare, showcasing its rich flavor and tender texture. For this reason, I consistently recommend cooking it at 130ºF (54.4ºC). This temperature yields a vibrant pink center that is both succulent and incredibly tender.
If you prefer your beef a little more done, you can increase the temperature slightly to 135ºF (57.2ºC) for a perfect medium. However, I strongly advise against going much higher than this. Cooking tri-tip to medium-well or well-done will unfortunately cause it to lose much of its inherent tenderness and flavor, diminishing the unique qualities that make this cut so enjoyable.
How To Slice Tri-Tip for Maximum Tenderness
Slicing any cut of meat correctly is crucial for tenderness, but it’s especially important for tri-tip due to its unique grain structure. To ensure the most tender bite, you must always slice against the grain. Here’s how to do it effectively:
Place the cooked and seared tri-tip on a cutting board in front of you. Take a moment to observe the direction of the muscle fibers, or “grains,” of the meat. You’ll notice that the tri-tip has two distinct grain patterns that run in different directions. To slice, orient your knife so that it cuts perpendicular to these lines. This shortens the muscle fibers, making the meat much easier and more pleasant to chew.
Tri-tip is a bit tricky because the grain changes directions approximately halfway through the roast. Therefore, you’ll need to pay close attention. Start slicing one section against its grain. Once you reach the point where the grain shifts, rotate the meat 90 degrees and continue slicing against the new grain direction. A sharp knife is your best friend here, ensuring clean, even slices.
Essential Sous Vide Cooking Tips for Success
- Always Sear the Meat: After its gentle bath in the sous vide, the meat will appear uniformly brown and perhaps not very appetizing. Searing is a non-negotiable step to develop that irresistible golden-brown crust and complex flavor through the Maillard reaction. This quick, high-heat step adds texture and depth that completes the cooking process.
- Pat the Meat Dry Thoroughly: This tip goes hand-in-hand with searing. Moisture on the surface of the meat will steam instead of sear, preventing the formation of a crisp crust. Use plenty of paper towels to ensure the tri-tip is as dry as possible before it hits the hot pan.
- Ensure the Oil is Extremely Hot for Searing: Since the meat is already perfectly cooked to your desired internal temperature, the goal of searing is to create a crust as quickly as possible without raising the internal temperature too much. A screaming hot pan with shimmering oil ensures a rapid sear, minimizing the time the meat spends in the pan.
- Incorporate a Touch of Butter: When searing beef, while you need a high-smoke-point oil like avocado or vegetable oil for the initial heat, adding a pat of butter (about 1 tablespoon) to the pan during the searing process imparts a rich, nutty flavor that beautifully complements the beef. Baste the meat with the melted butter for even more flavor.
- No Need to Rest Sous Vide Meat: One of the many advantages of sous vide cooking is that the gentle, even temperature distribution means the meat’s juices are already perfectly dispersed throughout the muscle fibers. Unlike traditional high-heat cooking methods, there’s no need for a resting period after searing. You can slice and serve immediately!
- Cover Your Water Bath: Over the course of a 5-hour cook time, a significant amount of water can evaporate from an uncovered sous vide bath. To maintain a consistent water level and temperature, cover your container. A dedicated sous vide lid, aluminum foil, a cookie sheet, or even a pot lid works wonderfully. Some people even use specialized floating balls to minimize evaporation.
- Consider Your Equipment: While any reliable immersion circulator will work, I personally use and highly recommend the Joule by Breville Sous Vide. Its consistent temperature accuracy and robust performance have made it a staple in my kitchen, outlasting other models I’ve tried.
What Side Dishes To Serve With Tri-Tip
A perfectly cooked sous vide tri-tip deserves equally delicious accompaniments. Here are some fantastic side dish ideas that will complement its rich flavor:
- Air Fryer Asparagus: Quick, crisp, and vibrantly green, offering a light contrast to the rich beef.
- Broccoli Rice Casserole: A comforting and hearty option that balances the meal.
- Texas Roadhouse Rolls: Soft, warm rolls are perfect for soaking up any delicious meat juices.
- Scalloped Potatoes: Creamy, cheesy, and utterly decadent – a classic pairing with beef.
More Delicious Sous Vide Recipes to Try
If you’ve fallen in love with the precision and ease of sous vide cooking, explore these other fantastic recipes that leverage the technique:
- Sous Vide Pork Chops: Juicier and more tender than any pan-fried chop.
- Sous Vide Mashed Potatoes: Achieve incredibly creamy, flavorful mashed potatoes.
- Sous Vide Pork Loin: Perfectly cooked pork loin every time, no dry meat!
- Sous Vide Lamb Chops: Tender, delicate lamb chops cooked to perfection.
- Sous Vide Pork Tenderloin: A lean cut made incredibly succulent with this method.

Average rating: 5 from 1 vote
Sous Vide Tri Tip Recipe
By Erin Sellin
Sous Vide Tri Tip – the most delicious and tender way to cook tri-tip. Completely transform this cheaper cut of meat into something magical!
Prep Time: 5 minutes
Cook Time: 5 minutes (for searing)
Additional Time: 5 hours (sous vide bath)
Total Time: 5 hours 10 minutes
Servings: 8
Rate Recipe
Print Recipe
Ingredients
- 2 pound tri-tip roast
- 1 1/2 teaspoons garlic powder
- 2 teaspoons salt
- 1 teaspoon black pepper
- 2 Tablespoons avocado oil, or other high heat oil
- 1 Tablespoon butter
Instructions
- Preheat water bath using your sous vide to your desired temperature. Medium rare 130º F or Medium 135º F.
- Season tri-tip well on both sides with salt, pepper, and garlic powder.
- Place the meat inside your plastic bag and if using a vacuum sealer, seal the bag. If you do not have a vacuum sealer, you can use a zip-top bag that you seal almost all the way. Slowly add the bag to the water bath until just below the top is submerged. Then seal the rest of the bag to ensure most of the air is out.
- Cover water bath with a lid (foil, pot lid, cookie sheet, table tennis balls) to help not lose too much water when cooking.
- After 5 hours remove from the water and place the meat on a paper towel lined tray. Pat dry.
- Heat oil in a large skillet over high heat. Once the oil is shimmering you know it is hot enough.
- Carefully place the tri-tip in the pan with a little bit of butter and cook for about 30-45 seconds a side, until it is nicely browned.
- Remove from the pan and slice against the grain to serve.
Nutrition
Serving: 1g | Calories: 286kcal | Carbohydrates: 1g | Protein: 30g | Fat: 18g | Saturated Fat: 1g | Polyunsaturated Fat: 3g | Cholesterol: 98mg | Sodium: 653mg
Nutrition information is automatically calculated, so should only be used as an approximation.
Additional Info
Author: Erin Sellin
Prep Time: 5 minutes
Cook Time: 5 minutes
Additional Time: 5 hours
Total Time: 5 hours 10 minutes
Course: Dinner Recipes
Cuisine: American
Servings: 8
Calories: 286
Like this recipe? Leave a comment below!
Your feedback helps other home cooks discover amazing recipes like this.
I created a fun group on Facebook, and I would love for you to join us! It’s a place where you can share YOUR favorite recipes, ask questions, and see what’s new at Dinners, Dishes and Desserts (so that you never miss a new recipe)!
Be sure to follow me on Instagram and tag #dinnersdishes so I can see all the wonderful DINNERS, DISHES, AND DESSERTS recipes YOU make!
Be sure to follow me on my social media, so you never miss a post!
Facebook | Twitter | Pinterest | Instagram
