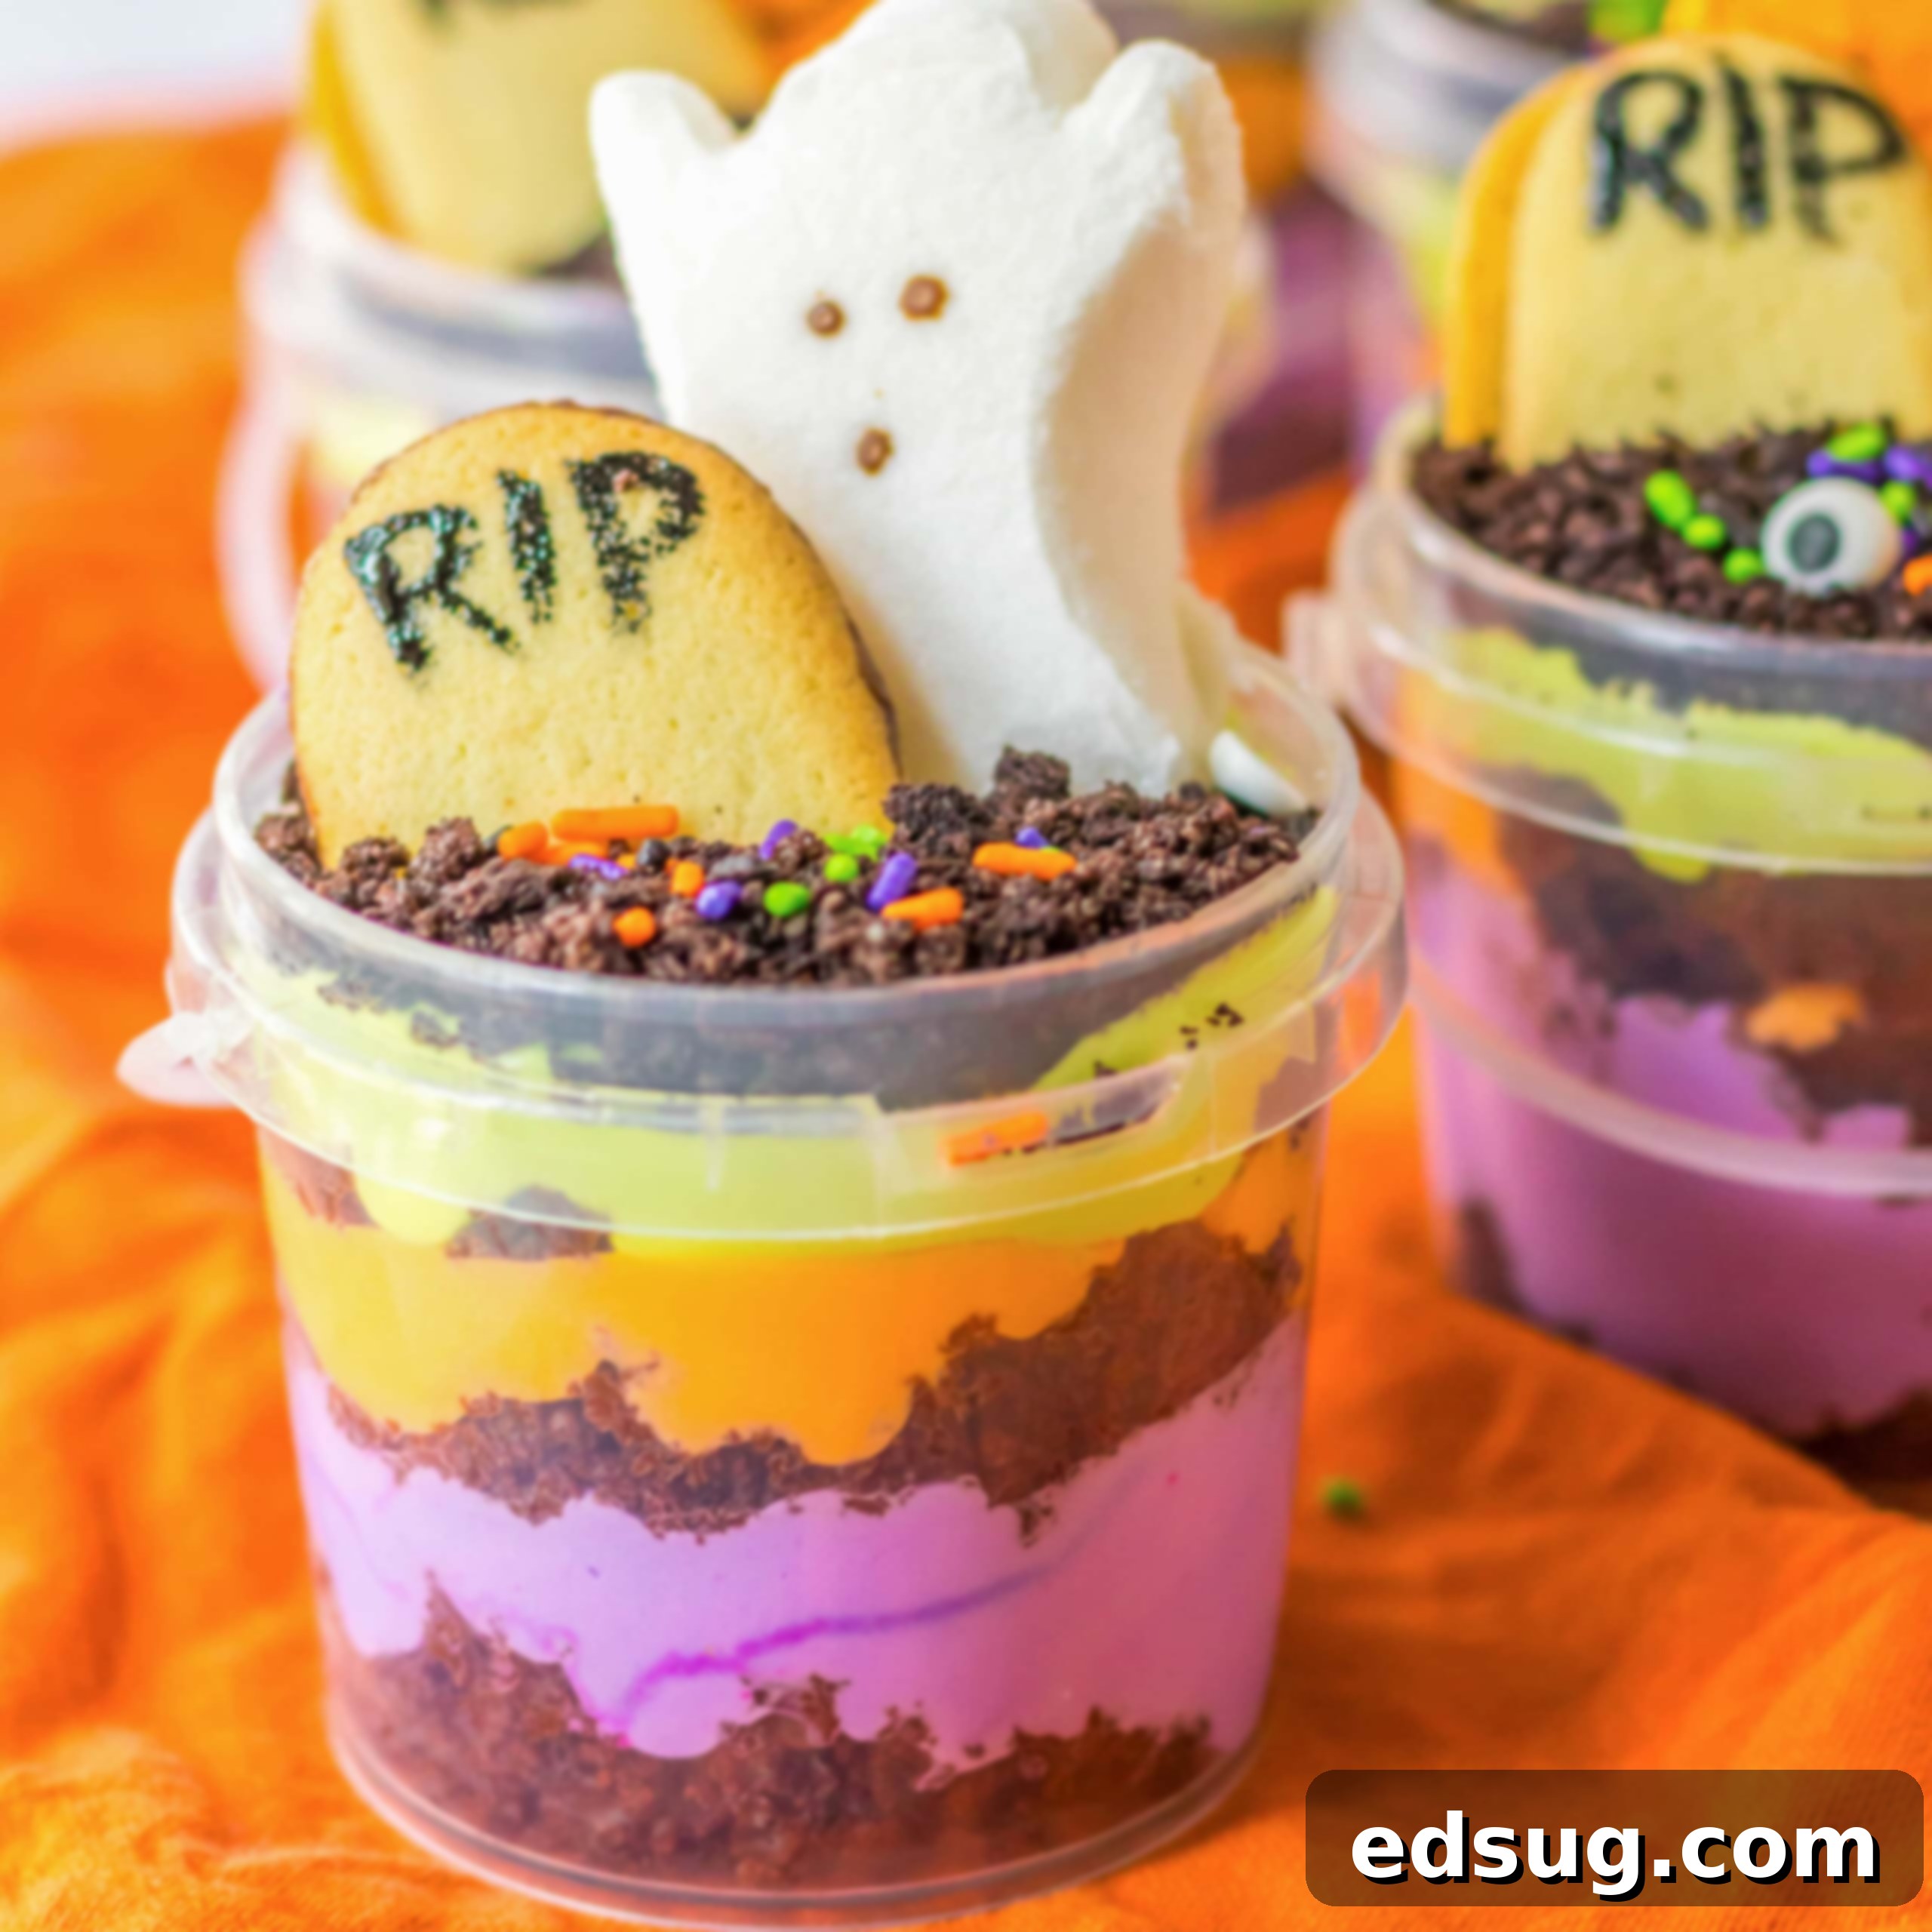
Spooktacular Graveyard Halloween Pudding Cups: An Easy & Fun Treat for All Ages
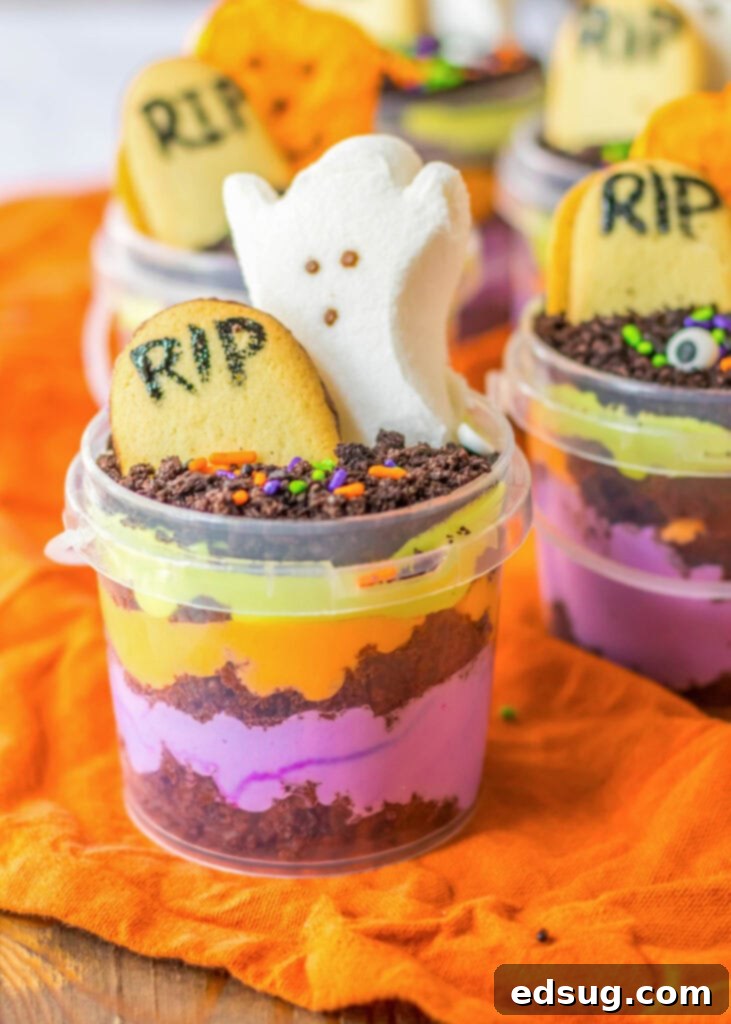
Get ready to dig into some ghostly good fun with these incredible Graveyard Halloween Pudding Cups! This delightful dessert is a must-make for any Halloween celebration, offering a perfect blend of eerie aesthetics and delicious flavors. Whether you’re serving them in charming little dirt-pail-style buckets or elegant clear plastic cups, these individual treats are guaranteed to be a hit with both kids and adults alike. They offer a creative and interactive way to enjoy the spooky season, making them ideal for parties, school events, or just a fun family activity.
Halloween is undoubtedly one of the most exciting holidays for creative culinary endeavors. The vibrant palette of green, yellow, purple, and orange naturally lends itself to festive food creations, and with the simple addition of candy eyes, any treat can instantly transform into something wonderfully whimsical or delightfully spooky. From quick and easy Mummy Pretzel Rods that require minimal effort but deliver maximum impact, to savory delights like these charming Witch Hat Breadsticks, there’s no shortage of ways to infuse your holiday menu with frightful fun. Our focus here is always on recipes that are not only simple to prepare but also incredibly enjoyable to make and, of course, to eat!
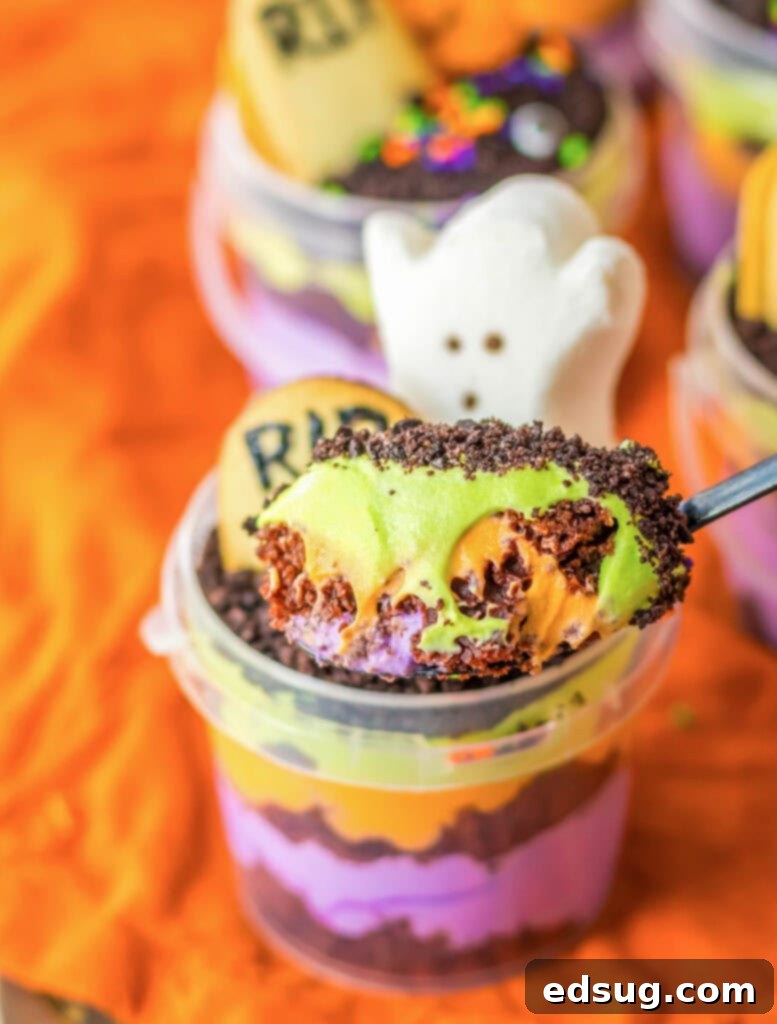
These Graveyard Pudding Cups perfectly embody that spirit. They combine convenience with creativity, allowing you to assemble a visually striking dessert without spending hours in the kitchen. The layering of moist cake, colorful pudding, and crushed cookies topped with playful decorations creates a mini edible graveyard scene that is as captivating to look at as it is satisfying to devour. It’s an imaginative dessert that taps into the playful spookiness of Halloween, making it an unforgettable addition to your festive spread.
Why You’ll Adore These Easy Halloween Pudding Cups
These Graveyard Halloween Pudding Cups aren’t just another dessert; they’re an experience! Here’s why they’ll quickly become a cherished part of your Halloween tradition:
- Effortlessly Easy – We believe Halloween treats should be fun, not stressful. This recipe leverages convenient store-bought ingredients like a box cake mix, instant pudding, and whipped cream, drastically cutting down on prep time. The magic happens in the assembly: simply spooning layers into cups to create a stunning, festive dessert that looks complex but is surprisingly simple to execute. Perfect for busy parents or those new to baking!
- Endlessly Fun – Halloween is all about imagination, and these pudding cups are your canvas! While we’ve styled them as a spooky graveyard, feel free to unleash your inner artist. Mix up the colors, add different candies, or invent entirely new themes. Whether you want them cute and friendly or genuinely ghoulish, the decorating possibilities are limitless, making this a fantastic activity for kids to participate in.
- Perfectly Scary (and Cute!) – What’s Halloween without a touch of fright? These graveyard-themed cups, complete with “RIP” tombstones and friendly ghost toppers, perfectly balance scary with adorable. They’re spooky enough to capture the Halloween spirit but sweet enough to not scare off the littlest ghouls. It’s the ideal treat to match the playful terror of your Halloween party.
- Absolutely Delicious – Beyond the captivating appearance, these pudding cups are genuinely tasty! The combination of tender cake, creamy pudding, and crunchy cookie “dirt” creates a delightful texture and flavor profile that will satisfy any sweet tooth. Plus, you get to choose your favorite cake and pudding flavors, ensuring a personalized taste experience that everyone will love.
Gather Your Ghoulish Ingredients
For the detailed ingredient list with exact measurements, please scroll to the bottom of the post for the FULL PRINTABLE recipe card.
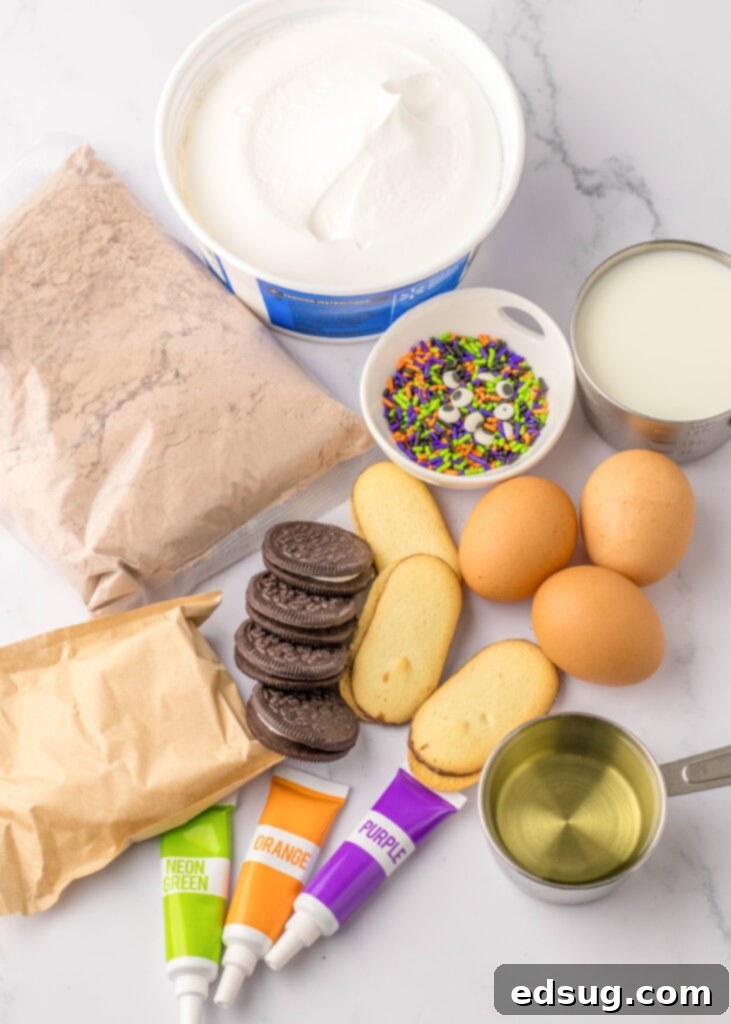
To create these enchanting Graveyard Halloween Pudding Cups, you’ll need a selection of simple, readily available ingredients:
- Chocolate Cake Mix: A standard 15.25-ounce box of your favorite chocolate cake mix provides the perfect base for our “earthy” graveyard. Its rich flavor pairs wonderfully with the pudding layers.
- Water, Oil, and Eggs: As directed on your specific cake mix box. These ingredients are essential for preparing a moist and fluffy cake.
- Vanilla Pudding: You’ll need two 3.4 oz boxes of instant vanilla pudding. While vanilla is preferred for its neutral white color (making it easy to tint), any white or light-colored instant pudding flavor you enjoy will work beautifully. French Vanilla or Cheesecake pudding are also excellent choices for a slight flavor variation.
- Milk: Cold milk is crucial for whisking with the instant pudding to achieve that perfectly thick and creamy consistency.
- Cool Whip: An 8-ounce container of thawed whipped topping provides a light, airy texture when folded into the pudding. For a homemade touch, consider using our recipe for Stabilized Whipped Cream, which holds its shape exceptionally well.
- Green, Orange, and Purple Food Coloring: These vibrant colors are key to creating the distinct, festive layers within your pudding cups. Gel food colorings tend to produce more intense hues.
- Crushed Oreo Cookies: Approximately 1 ½ cups of crushed Oreo cookie crumbs will serve as the realistic “dirt” topping for your graveyard. Be sure to crush them finely for the best effect – a food processor works wonders here!
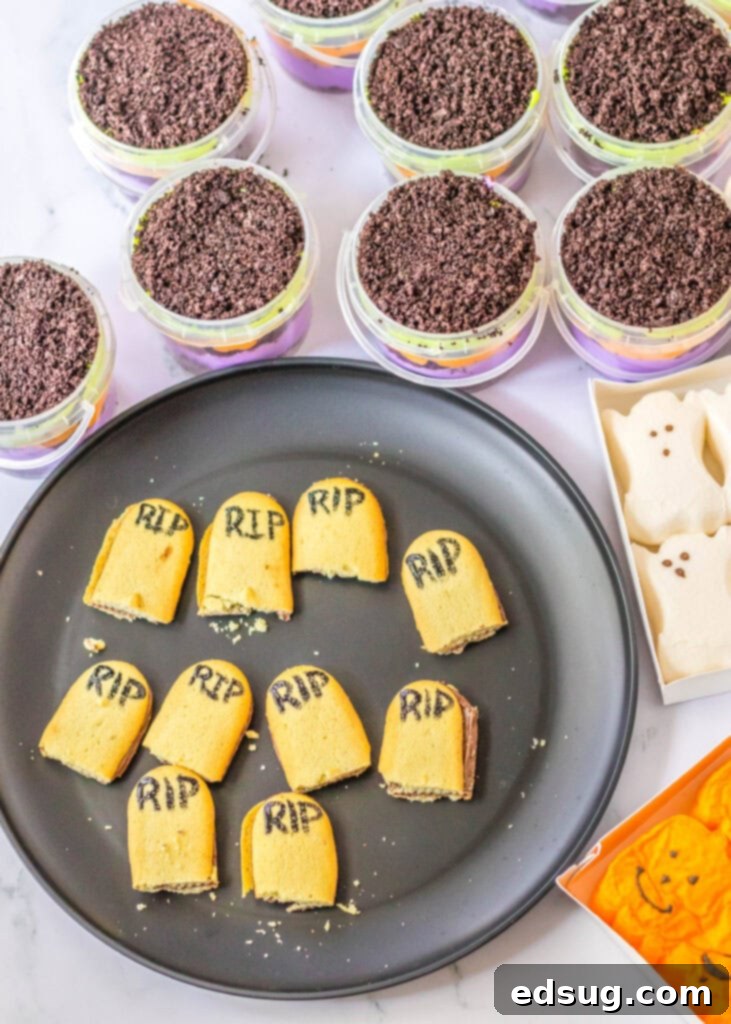
- Milano Cookies: About 10 Milano cookies are perfect for crafting individual “tombstones.” Their elegant shape and sturdy texture make them ideal for this purpose.
- Candy Eyes: These adorable and slightly eerie edible eyes are a Halloween staple! You can easily find them in the baking aisle at most major grocery stores, Walmart, Hobby Lobby, or craft stores like Michael’s. They add so much personality to your spooky creations.
- Festive Sprinkles: A mix of Halloween-themed sprinkles (ghosts, bats, pumpkins, or classic orange and black) will add extra sparkle and fun to your graveyard scene.
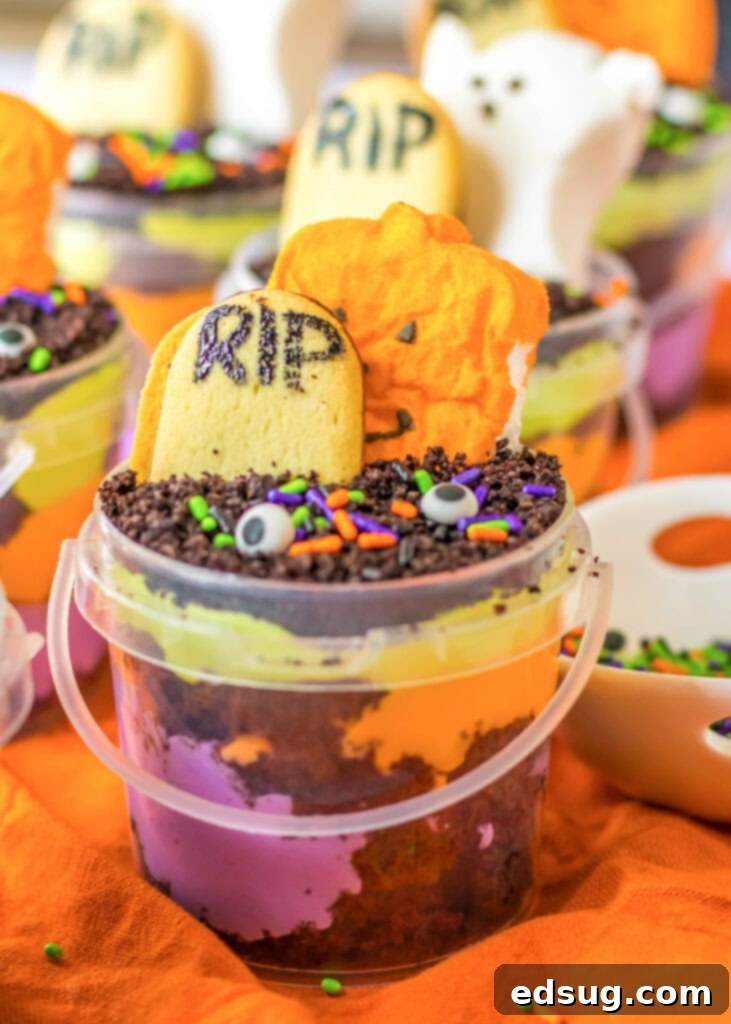
- Clear Buckets or Cups: To showcase the beautiful layers, we recommend using 10 eight-ounce clear plastic buckets (like these available onAmazon) or simple clear plastic cups. The transparency allows everyone to admire the colorful, layered effect.
How To Assemble Your Spooky Graveyard Pudding Cups
Creating these fun Halloween treats is a straightforward and enjoyable process. Follow these steps for perfect results:
- Bake the Cake. Begin by preparing your chocolate cake. Preheat your oven to 350º F. Follow the instructions on your cake mix box to bake the cake in a 13×9 inch pan. If you prefer, you can use your favorite homemade chocolate cake recipe or even a store-bought pre-made cake for ultimate convenience. The key is to ensure the cake cools completely after baking. Once cool, cut the cake into small, approximately 1-inch squares. These will form the foundation of your pudding cups.
- Prepare the Pudding. In a large mixing bowl, whisk together the two boxes of instant white pudding with 4 cups of cold milk. Whisk vigorously for about 2 minutes until the mixture begins to thicken. Gently fold in the thawed whipped topping until well combined and smooth. Transfer the pudding mixture to the refrigerator for at least an hour to allow it to set up and become thick and creamy, which is essential for layering.
- Color the Pudding. Once your pudding has set, divide it evenly into three separate bowls. Using your green, orange, and purple food coloring, tint each bowl of pudding a different vibrant Halloween shade. Stir well until the color is consistent throughout. This step adds a fantastic visual appeal to your finished cups.
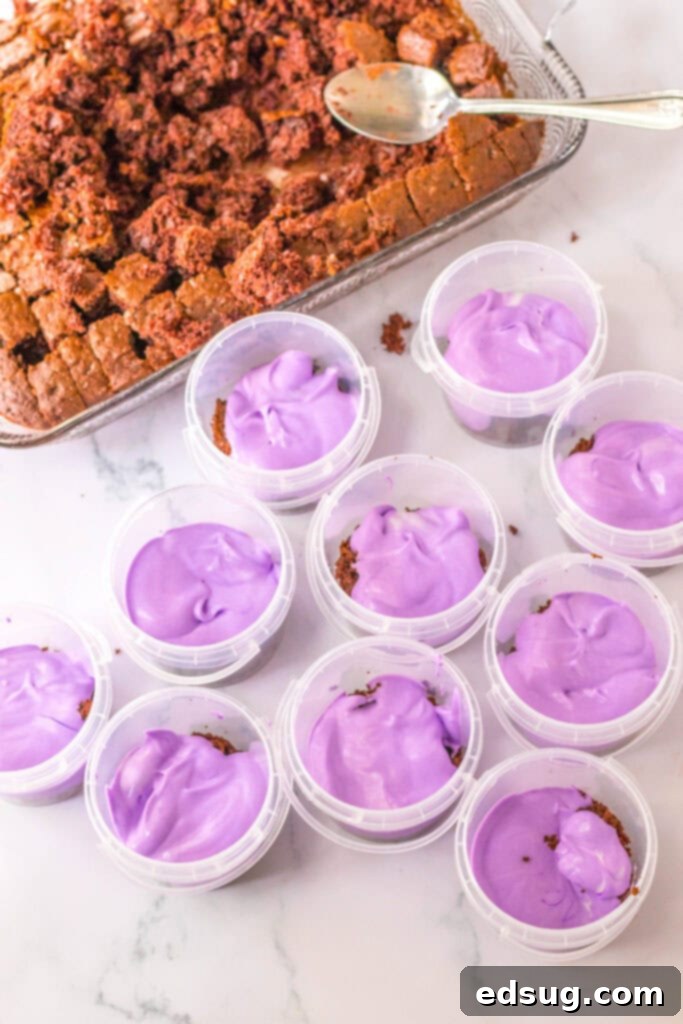
- Assemble the Layers. Now for the fun part: assembly! Place a generous layer of the cubed chocolate cake at the bottom of each clear cup or bucket. Then, top the cake layer with a dollop of one colored pudding. Repeat this process, adding another layer of cake, followed by a different colored pudding, and so on, until you have all three colors of pudding beautifully layered in each cup. You want to see distinct bands of color and cake.
- Decorate Your Graveyard. Once the layers are complete, it’s time to bring your graveyard to life! Top the final pudding layer generously with crushed Oreo cookie crumbs to create realistic “dirt.” This dark, crumbly texture is essential for the graveyard effect. Then, add your decorations. We suggest inserting “RIP” Milano cookies (instructions below), placing whimsical Halloween Peeps (pumpkins or ghosts), scattering candy eyes, and finishing with a sprinkle of festive Halloween sprinkles. Feel free to get creative with gummy worms, candy corn, or other spooky candies!
- Chill Before Serving. For the best texture and to ensure all the layers and decorations set properly, place your assembled pudding cups in the refrigerator for at least an hour before serving. This chilling time allows the flavors to meld and the pudding to firm up perfectly.
Crafting Your RIP Tombstone Cookies
The “RIP” tombstones are a classic and essential element for your graveyard pudding cups. They are surprisingly simple to make, and you have a couple of options for creating them:
- Shaping the Tombstones: To make each Milano cookie resemble a gravestone, you can either gently cut or break off approximately the bottom quarter to a third of each cookie. This creates a flatter base and a slightly more upright appearance. Alternatively, if you prefer to keep the cookies whole, simply insert them deeper into the pudding cups until they reach the desired height, making sure they are stable.
- Painting “RIP” with Food Coloring: For a rustic, hand-drawn look, squeeze a very small amount of your black (or dark brown) food coloring onto a small plate. Using a small, clean food-safe paintbrush (or a clean toothpick), carefully paint the letters “RIP” onto the surface of each cookie. Let the food coloring dry slightly before handling or inserting into the pudding. This method offers great control and a charming, homemade feel.
- Using Decorating Gel: If you’re looking for a cleaner, more professional finish, or if you prefer not to use a paintbrush, black decorating gel is an excellent alternative. Brands like Wilton offer decorating gels in convenient tubes that allow you to pipe the letters “RIP” directly onto your cookies. This method provides a smooth, raised letter effect. Be sure to give the decorating gel ample time to set and harden (usually 15-30 minutes, or as directed on the packaging) before placing the cookies into your pudding cups to prevent smudging.
Creative Tips & Spooky Variations
These Graveyard Halloween Pudding Cups are wonderfully adaptable. Here are some ideas to customize them to your taste and party theme:
- Container Choices: While our suggested “dirt buckets” add an authentic touch, don’t hesitate to use simple clear plastic cups. They work just as great for showcasing the colorful layers and are often more readily available and budget-friendly. You could even use small glass mason jars for a more sophisticated, reusable option.
- Cake Alternatives: If chocolate cake isn’t your preference, or you simply want to try something new, these pudding cups are fantastic with other bases. Consider using crumbled brownies for an even richer, fudgier texture, or even crushed chocolate cookies (like more Oreos!) mixed with a little melted butter for a no-bake option.
- Pudding Flavor Swaps: We love vanilla pudding for its versatility in coloring, but feel free to experiment with other “white” pudding flavors like French Vanilla or Cheesecake for a subtle twist. If you’re not planning to color your pudding, chocolate pudding can create a delicious, deep base layer that enhances the “dirt” theme.
- Unleash Your Inner Decorator: The decoration possibilities are truly endless! Instead of Peeps, try using classic candy corn pumpkins, gummy worms (half-buried in the “dirt” for a creepy-crawly effect), plastic spiders, small Halloween-themed chocolates, or even edible glitter for an extra magical touch. Get the kids involved in this step for maximum fun!
- Food Coloring Alternatives: If artificial food colorings are a concern, you have a few options. You can opt for a monochrome “dirt” theme by using only chocolate pudding in your layers, eliminating the need for coloring altogether. Alternatively, many stores now carry natural food colorings derived from fruits and vegetables, which can still provide beautiful hues.
- Add Different Textures: Introduce more textural contrast by layering in other crunchy or chewy elements. Think mini chocolate chips, chopped nuts (if no allergies), or even a layer of candy corn or gummy candies within the pudding.
- Adult-Friendly Versions: For an adult Halloween party, consider adding a splash of liqueur to the cake layer (once cooled) or the pudding for an unexpected boozy kick. Kahlua, Irish cream, or a chocolate liqueur would be excellent choices.
Frequently Asked Questions (FAQs)
Here are answers to some common questions about making these Halloween pudding cups:
- Can I make these pudding cups ahead of time? Absolutely! These cups are perfect for making in advance. You can assemble them up to 24 hours before your event. Just make sure to cover them tightly with plastic wrap and store them in the refrigerator. The cake will become even moister as it absorbs some of the pudding flavor. Add delicate decorations like Peeps or candy eyes just before serving to keep them fresh and vibrant.
- How long do these last in the refrigerator? When properly covered and refrigerated, these pudding cups will stay fresh for up to 2-3 days. Beyond that, the cake might become too soggy, and the decorations could start to degrade.
- What if I don’t have clear cups? No problem! While clear cups are great for showing off the layers, any individual serving container will work. Opaque cups, small bowls, or even mini flower pots (ensure they are new and food-safe, perhaps lined with plastic wrap) can be used. Just make sure they are roughly 8 ounces in capacity.
- Can I use homemade cake and pudding? Yes, definitely! If you have a favorite homemade chocolate cake recipe or a go-to creamy pudding recipe, feel free to use those. Just ensure the cake is fully cooled and cut into small pieces, and the pudding is thick and set before layering.
- What’s the best way to crush Oreos for the “dirt”? A food processor is the quickest and most efficient way to get fine, even crumbs. If you don’t have one, place the cookies in a Ziploc bag, seal it, and crush them with a rolling pin or the bottom of a heavy glass until fine.
Storage Tips for Freshness
To keep your Graveyard Halloween Pudding Cups at their best:
- Refrigeration is Key: Always store the assembled pudding cups in the refrigerator. The pudding and whipped topping require cold temperatures to maintain their texture and freshness.
- Cover Tightly: Use plastic wrap or airtight lids to cover each individual cup. This prevents the pudding from absorbing odors from the fridge and keeps the cake from drying out.
- Decorate Just Before Serving: While the main layers can be made ahead, it’s best to add any delicate toppers like Peeps, candy eyes, or elaborate cookie tombstones shortly before serving. This ensures they look their freshest and prevents them from getting soggy or dissolving.
More Fun Halloween Recipes to Explore
Looking for more spooktacular treats to complete your Halloween feast? Here are some other fantastic and easy recipes that will bring frightful delight to your table:
- Halloween Candy Bark: A colorful and crunchy treat made with melted chocolate and your favorite Halloween candies.
- Halloween Jello Shots: A playful and vibrant adult-only treat, perfect for adding a festive kick to your party.
- Witches Brew: A mysterious and delicious punch that’s visually stunning and magically refreshing.
- Spooky Spider Brownies: Fudgy brownies decorated to look like creepy-crawly spiders, ideal for chocolate lovers.
- Ghost Cupcakes: Adorable and easy-to-make cupcakes topped with whimsical ghost decorations.
- Mummy Granola Bars: A healthier, yet still fun and festive, snack option for Halloween.

Graveyard Halloween Pudding Cups
Pin Recipe
Rate Recipe
Print Recipe
Ingredients
- 1 15.25 ounce box chocolate cake mix
- Water, oil and eggs called for on the box
- 2 3.4 oz boxes instant vanilla pudding
- 4 cups cold milk
- 8 ounces whipped topping, thawed
- Green, Orange, Purple Food Coloring
- 1 1/2 cups crushed Oreo cookie crumbs
- 10 Milano cookies
- Candy Eyes
- Festive Sprinkles
- 10 8 oz clear plastic buckets or cups
Instructions
-
Preheat oven to 350º F.
-
Prepare cake according to the package instructions, baking in a 13×9 inch pan. Once baked, remove from the oven and cool completely. Cut into small 1 inch cubes.
-
Meanwhile, in a large bowl whisk together pudding and milk until it starts to thicken. Fold in whipped topping. Place in the fridge for about an hour for it to thicken.
-
Once the pudding is set, divide into 3 bowls and color each one (orange, purple and green).
-
In the bottom of your bucket or cup place a layer of cake, top with one color of pudding. Repeat until you have all 3 colors of pudding.
-
Top each bucket with crushed Oreos.
-
Cut or break off the bottom of each Milano cookie (or leave whole and insert further into the pudding so it is the right height). Put a tiny bit of food coloring onto a plate, and use a small paint brush to paint on the RIP. Or use Decorating Gel to write it on if you have it. Insert each cookie into the cup.
-
Decorate each cup by adding candy eyes, festive sprinkles, Peep ghosts or pumpkins, candy corn etc.
-
Place in the fridge for 1 hour to let them set up before serving.
Notes
Nutrition
Nutrition information is automatically calculated, so should only be used as an approximation.
Additional Info
Like this recipe? Leave a comment below!
We absolutely love seeing your creations! If you’re passionate about delicious food and sharing your culinary adventures, we invite you to join our fun and thriving group on Facebook! It’s a fantastic community where you can share YOUR favorite recipes, ask questions, and stay updated on all the exciting new recipes and content from Dinners, Dishes and Desserts. Never miss a delicious post again!
Don’t forget to follow us on Instagram and tag #dinnersdishes in your posts. We can’t wait to see all the wonderful DINNERS, DISHES, AND DESSERTS recipes YOU bring to life!
Be sure to follow us on our social media channels, so you never miss a post and stay connected with our growing community of food lovers!
Facebook | Twitter | Pinterest | Instagram
.
