Irresistibly Easy No-Bake Peanut Butter Cream Pie: The Ultimate Dessert
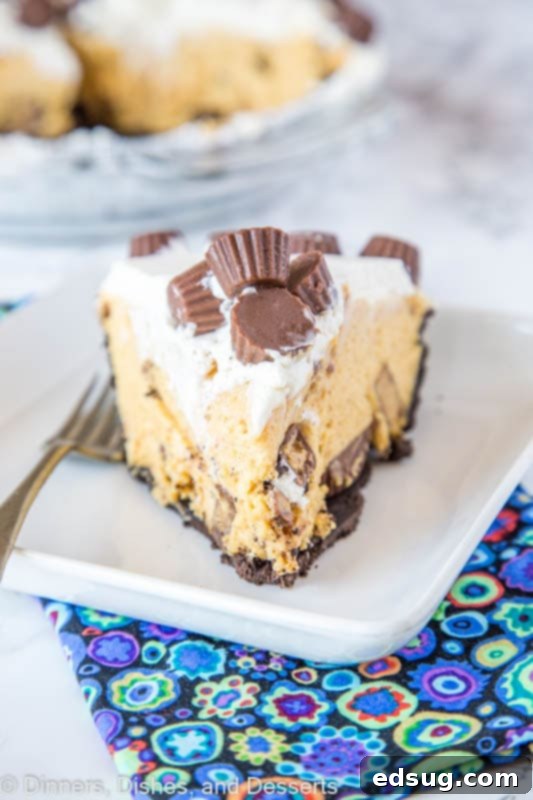
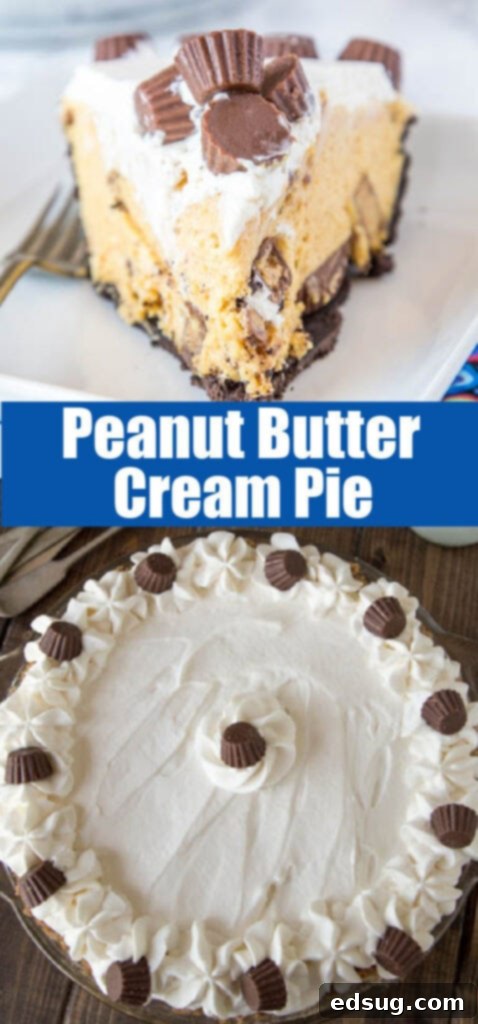
Indulge in the ultimate no-bake peanut butter pie! This creamy, dreamy dessert features a luscious peanut butter filling atop a rich chocolate layer and a perfect graham cracker crust, all crowned with homemade whipped cream and delightful peanut butter cups. It’s truly perfect for any occasion.
There are some desserts that just hit different, and for my husband, a good Peanut Butter Cream Pie is always at the top of that list. If it’s on a restaurant menu, it’s his go-to choice, often the only time he willingly embraces a dessert that features chocolate prominently! This particular recipe holds a special place in our hearts and our kitchen; it was one of the very first recipes I ever shared on my blog and has been a beloved staple in our home since we said “I do.” Much like our all-time favorite Pokey Sticks, this pie is one of those dishes that’s constantly requested and never fails to disappear. Its rich flavors and smooth texture make it an instant classic for family gatherings, potlucks, or simply a sweet treat any day of the week.
Why This No-Bake Peanut Butter Pie is a Must-Try
This isn’t just any peanut butter pie; it’s a no-bake wonder that simplifies dessert-making without compromising on flavor or decadence. Starting with a classic graham cracker crust, which I always prefer to make from scratch for that perfect crisp texture and buttery aroma, this pie builds layers of pure delight. While crushing graham crackers might seem like the “hardest” part, the reward of a homemade crust is truly worth it. However, if you’re aiming for absolute minimal effort, a store-bought crust works beautifully too. For those who adore chocolate as much as peanut butter, consider an Oreo crust – it takes this easy peanut butter pie to an even higher level of indulgence!
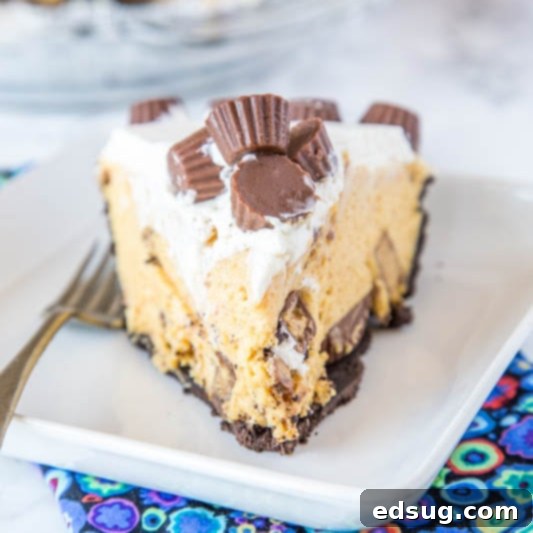
The beauty of this recipe lies in its simplicity and the incredible flavor combination it offers. The creamy peanut butter filling, a velvety smooth blend, is perfectly complemented by a luscious layer of hot fudge and the crisp, sweet crust. Topped with a cloud of fresh whipped cream and a generous sprinkle of mini peanut butter cups, it’s a dessert that not only tastes amazing but also looks impressive on any table. Its no-bake nature makes it ideal for warm weather or when oven space is limited during holidays, allowing you to whip up a show-stopping dessert with ease. This pie is a true testament to how simple ingredients can come together to create something truly extraordinary, making it a perennial favorite for peanut butter and chocolate lovers alike.
Gather Your Ingredients for This Dreamy Pie
Crafting this incredible peanut butter cream pie requires a few simple ingredients, most of which you likely already have in your pantry. Each component plays a vital role in creating the perfect balance of flavors and textures, ensuring every bite is a delightful experience.
- Graham Crackers: The foundation of our classic crust. Choose honey or cinnamon graham crackers for subtle flavor variations that complement the rich filling.
- Sugar: A touch of granulated sugar sweetens the crust, while powdered sugar is essential for the homemade whipped cream topping.
- Butter: Melted butter binds the graham cracker crumbs together, creating a sturdy and flavorful crust.
- Hot Fudge Sauce: This crucial chocolate layer adds depth, sweetness, and a delightful contrast to the peanut butter. Feel free to use your favorite store-bought brand or a decadent homemade version.
- Milk: Cold milk is the liquid base for our instant vanilla pudding, ensuring a smooth and quickly setting filling.
- Instant Vanilla Pudding Mix: The secret to a thick, creamy, and quick-setting filling. Vanilla provides a versatile and neutral base, allowing the vibrant peanut butter flavor to truly shine.
- Creamy Peanut Butter: The undisputed star of the show! Use a good quality, creamy peanut butter for the best, silkiest texture and most authentic flavor. Avoid natural peanut butter that separates, as it can affect the filling’s consistency.
- Cool Whip (or homemade whipped cream): This lightens the peanut butter filling, adding a wonderful airy texture. If opting for homemade, ensure it’s made thick enough to hold its structure.
- Mini Peanut Butter Cups: Chopped and folded into the filling, and used whole for decoration, these delightful candies are the ultimate indulgence, adding bursts of peanut butter and chocolate.
- Heavy Cream: Essential for making luscious, airy, and stable homemade whipped cream for the topping.
- Powdered Sugar: Sweetens and helps stabilize the homemade whipped cream, preventing it from weeping.
- Vanilla Extract: A splash of pure vanilla extract enhances the flavor profile of the whipped cream topping, adding a layer of aromatic richness.
If you have a cherished homemade Hot Fudge Sauce recipe, this is the perfect opportunity to showcase its deliciousness! While the recipe includes instructions for a homemade graham cracker crust, don’t hesitate to use a store-bought crust if you’re looking for an even quicker assembly, especially when time is of the essence. No matter your choice, the end result will be a phenomenal dessert!

Crafting Your Delicious No-Bake Peanut Butter Pie: Step-by-Step
Creating this show-stopping peanut butter pie is surprisingly straightforward, proving that you don’t need to be a pastry chef to make an unforgettable dessert. Follow these simple steps for a treat that tastes like it came from a gourmet bakery, but was made with love in your own kitchen.
- Prepare the Crust: While a store-bought crust is a convenient shortcut, making your own graham cracker crust is incredibly easy and yields superior flavor and texture. Simply combine 1 1/2 cups of crushed graham cracker crumbs with 1/4 cup of sugar and 1/3 cup of melted butter. Mix thoroughly until the crumbs are evenly moistened. Press this mixture firmly and evenly into your 9-inch pie plate, ensuring an even layer up the sides and across the bottom. For an extra crispy and sturdy crust that holds up exceptionally well to the creamy filling, I highly recommend baking it for a short period (about 8 minutes at 375°F). This step is optional for a truly “no-bake” approach, but it makes a noticeable difference in preventing sogginess. Allow the crust to cool completely before proceeding.
- Add the Chocolate Layer: Once your crust is prepared and fully cooled, generously spoon 1/2 cup of your favorite hot fudge or chocolate sauce over the bottom. Spread this layer evenly across the entire surface of the crust. This layer is non-negotiable for true peanut butter and chocolate enthusiasts, providing that essential contrasting sweetness and depth to the rich peanut butter filling. Pop the crust with its chocolate layer into the freezer for about 10 minutes to firm up slightly while you prepare the filling. This prevents the chocolate from bleeding into the peanut butter layer.
- Whip Up the Peanut Butter Filling: In a large mixing bowl, begin by combining 1/2 cup of creamy peanut butter and 1 1/4 cups of cold milk. Whisk these ingredients together until they are well blended. Don’t worry if it doesn’t become perfectly smooth immediately; just get it mostly combined.
- Thicken with Pudding Mix: To the peanut butter and milk mixture, add two 3.4 oz packages of instant vanilla pudding mix. Using an electric mixer, beat for approximately 2 minutes until the mixture thickens considerably and becomes very dense and creamy. The instant pudding acts as a stabilizer, giving the pie its signature firm yet smooth consistency.
- Fold in Whipped Topping and Peanut Butter Cups: Gently fold in half a tub of thawed Cool Whip (approximately 1 1/2 cups) and 1/2 cup of chopped mini peanut butter cups until just well incorporated. This step lightens the filling, adding a wonderful airy texture, and introduces delightful pockets of peanut butter cup goodness throughout the pie. Be careful not to overmix, which can deflate the whipped topping.
- Assemble and Chill: Carefully spoon the creamy peanut butter filling evenly over the frozen chocolate layer in your pie crust. Spread it smoothly to create a beautiful, even surface. Place the entire pie in the fridge to begin setting while you prepare the topping.
- Create the Perfect Whipped Cream Topping: In a separate, clean mixing bowl (preferably chilled, along with the whisk attachment), pour 1 cup of heavy cream. Using an electric stand mixer or a hand mixer fitted with the whisk attachment, beat the heavy cream on medium-high speed until soft peaks begin to form. Gradually add 3 tablespoons of powdered sugar and 1/2 teaspoon of vanilla extract. Continue whisking until stiff peaks are achieved. This homemade whipped cream is the perfect light and airy counterpoint to the rich filling, adding a fresh, luxurious finish.
- Top and Set: Gently spread the freshly made whipped cream over the peanut butter layer, creating a beautiful cloud-like topping. For an extra touch of elegance and flavor, I love to decorate the top generously with additional whole or chopped mini peanut butter cups. If you have extra whipped cream, you can use a piping bag to create decorative borders or swirls around the edges. Allow the pie to chill in the refrigerator for a minimum of 3-4 hours, or preferably overnight, until it is completely set. This is crucial for ensuring clean, firm slices and a truly satisfying texture.
This Reese’s peanut butter pie recipe is not only incredibly easy to make, but it’s also a guaranteed crowd-pleaser that consistently disappears whenever it’s served. It’s frequently requested for birthdays, holiday celebrations, parties, and even just as a spontaneous treat by almost everyone who tries it. One of its greatest advantages is its no-bake preparation, allowing you to make it entirely ahead of time, freeing you up to enjoy your event. You can even freeze this pie for an extra-thick, creamy, and refreshing dessert that’s perfect for warm days!
If your family and friends share an undeniable love for peanut butter, this pie will undoubtedly become their new favorite dessert! And don’t stop here; explore all the other incredible Reese’s Peanut Butter Cup Desserts you could whip up for a full chocolate and peanut butter celebration.
Cool Whip Alternatives: Homemade Whipped Cream
While I personally find Cool Whip to be an incredibly convenient and effective ingredient for the filling of this pie, offering a consistent texture and stability, I understand that not everyone is a fan or prefers to use homemade options. The good news is, you absolutely can use homemade whipped cream in place of Cool Whip for the filling!
For those who prefer a completely homemade touch, I already recommend using fresh whipped cream for the topping. To incorporate it into the filling as well, simply double the amount of homemade whipped cream you prepare. Use half for the pie’s filling and reserve the other half for the elegant topping. To make enough homemade whipped cream for both the filling and the topping, you will need a TOTAL of 2 cups of heavy cream, 1/3 cup of powdered sugar, and 1 teaspoon of vanilla extract. Just follow the instructions for making the topping, beating until stiff peaks form, then gently fold in 1 1/2 cups into the peanut butter mixture for the filling and use the remaining for the top. This ensures a consistent, delicious flavor throughout the entire pie.
Tips for a Flawless Peanut Butter Cream Pie
Achieving a perfect no-bake peanut butter cream pie is simple when you keep a few key tips in mind:
- Quality Peanut Butter: The type of peanut butter you use significantly impacts the filling. Opt for a good quality, creamy peanut butter. Natural peanut butter (the kind where oil separates) can sometimes alter the texture and prevent the filling from setting properly, so it’s best to stick to conventional creamy brands for the most reliable results.
- Cold Milk is Key: Ensure your milk is very cold when mixing with the instant pudding. Cold liquids help the pudding set quickly and achieve its intended thick, creamy consistency.
- Chill Your Bowl and Whisk for Whipped Cream: For the stiffest, most voluminous homemade whipped cream, place your mixing bowl and whisk attachment in the freezer for 10-15 minutes before whipping the heavy cream. This extra chill helps the cream incorporate air more effectively.
- Don’t Overmix the Pudding: Beat the pudding mixture just until it’s thick and smooth, about 2 minutes. Overmixing can sometimes make it too stiff, grainy, or cause it to seize.
- Patience with Chilling: The chilling time is absolutely crucial! Resist the urge to cut into the pie too early. A minimum of 3-4 hours (and preferably overnight) ensures the pie is fully set, making for clean, beautiful slices and a firm, satisfyingly creamy texture.
- Even Hot Fudge Layer: Make sure your hot fudge layer is spread evenly across the bottom of the crust to provide a consistent chocolate note in every bite. Freezing it briefly before adding the peanut butter filling is a smart trick to prevent the layers from mixing prematurely.
- Gentle Folding: When incorporating the Cool Whip or homemade whipped cream and chopped peanut butter cups into the filling, fold gently. This helps maintain the light, airy texture of the whipped topping and ensures the filling remains fluffy.
Delicious Variations to Try
This peanut butter cream pie is fantastic as is, but it’s also incredibly versatile, making it easy to customize to your personal preferences or seasonal themes. Here are a few exciting ideas to elevate or change up this classic dessert:
- Oreo Crust: As mentioned, for an intensely chocolatey base that pairs perfectly with peanut butter, substitute crushed Oreo cookies (including the creamy filling) mixed with melted butter for the graham cracker crust. This is a favorite among hardcore chocolate lovers.
- Extra Chocolate Chips: For an added textural element and an extra burst of chocolate flavor, fold in a handful of mini chocolate chips into the peanut butter filling along with the peanut butter cups.
- Caramel Drizzle: For a truly decadent twist, finish your pie with a generous drizzle of store-bought or homemade caramel sauce over the whipped cream topping just before serving. A sprinkle of sea salt can balance the sweetness beautifully.
- Peanut Butter Drizzle: For an ultimate peanut butter punch, gently warm a few tablespoons of creamy peanut butter until it’s pourable and drizzle it decoratively over the finished pie.
- Different Pudding Flavors: While vanilla is classic, don’t hesitate to experiment! You could try chocolate instant pudding for a deeper chocolate flavor, or even banana instant pudding for a unique and fruity twist.
- Nutty Crunch: To add another layer of texture, consider sprinkling a thin layer of finely chopped, roasted peanuts over the hot fudge layer before adding the peanut butter filling. This enhances the nutty flavor and provides a satisfying crunch.
- Seasonal Toppings: In the fall, a sprinkle of cinnamon or a drizzle of maple syrup could add a cozy touch. For holidays, consider adding festive sprinkles.
Storage and Make-Ahead Tips
One of the best features of this peanut butter cream pie is its suitability for making ahead, which is a lifesaver for entertaining or busy schedules. As noted, you need at least 4 hours for the pie to set up completely, otherwise, you’ll have a delightful, but messy, heap rather than clean, perfect slices. Making it the day before you plan to serve it is highly recommended; the flavors often deepen and meld even more beautifully overnight.
Refrigeration: Once served, any leftover slices of this delicious peanut butter cream pie should be covered tightly with plastic wrap or stored in an airtight container. This prevents the pie from absorbing refrigerator odors and keeps it fresh. Keep it in the fridge for up to 4 days. The texture remains wonderfully creamy, and the crust retains its integrity when properly stored.
Freezing: This pie freezes exceptionally well, making it perfect for long-term storage or for preparing way in advance! For longer storage, you can freeze the entire pie (without the final peanut butter cup garnish) or individual slices. To freeze the whole pie, first ensure it’s fully set in the refrigerator. Then, wrap it tightly in several layers of plastic wrap, followed by a layer of heavy-duty aluminum foil. This double wrapping protects against freezer burn. It can be stored in the freezer for up to 1-2 months. When ready to serve, thaw it in the refrigerator for several hours or overnight until it reaches a desirable creamy consistency. Add fresh whipped cream and the peanut butter cup garnish just before serving. Freezing gives it a delightful, almost ice cream-like texture, which is especially refreshing in warmer weather or as a unique twist on the classic pie.

Explore More No-Bake Dessert Delights
If you’re a fan of easy, delicious, no-bake treats, then you’re in for a truly delightful journey! This peanut butter cream pie is just the beginning of a world of desserts that require no oven time. Discover these other fantastic recipes that satisfy your sweet tooth with minimal effort and maximum flavor:
- No-Bake Oreo Cheesecake: A rich and creamy cheesecake bursting with crunchy chunks of Oreo cookies, all set on a chocolatey crust. It’s an Oreo lover’s dream!
- Strawberry Cheesecake Lasagna: Layers of sweet graham crackers, fluffy, tangy cheesecake filling, fresh, juicy strawberries, and a cloud of whipped cream create a refreshing and visually stunning dessert, perfect for summer.
- No-Bake Monster Cookie Bars: Chewy, sweet, and incredibly satisfying bars packed with wholesome oats, creamy peanut butter, melty chocolate chips, and colorful M&M’s – all without turning on the oven!
- No-Bake Peanut Butter Cheesecake: A lighter, tangier take on peanut butter goodness, combining the rich flavor of peanut butter with the classic creamy texture of cheesecake, all on an easy crust.
- No-Bake Jello Pie: A vibrant, fruity, and incredibly simple pie that’s light, airy, and perfect for warm weather gatherings. Choose your favorite Jello flavor for endless possibilities!
- Kool-Aid Pie: A fun, colorful, and tangy dessert that’s a hit with kids and adults alike. Its bright flavors and easy preparation make it a unique and refreshing treat.
- Oreo Cream Squares: Easy-to-make dessert squares featuring a rich, crumbly Oreo base and a luscious, creamy topping. These are perfect for parties or lunchboxes.
- No-Bake Mint Chocolate Chip Pie: A refreshing and cool pie with classic mint and chocolate flavors, this dessert is perfect for a palate cleanser or a holiday treat.
- Peanut Butter Krispie Treats: A delightful, chewy twist on the classic crispy rice treat, infused with irresistible peanut butter and often drizzled with chocolate for extra indulgence.

Peanut Butter Cream Pie
Equipment
- Pie Plate
- Electric Mixer (Stand or Handheld)
Ingredients
Filling
- 1/2 cup hot fudge sauce
- 1/2 cup creamy peanut butter
- 1 1/4 cup cold milk
- 2 3.4 oz packages vanilla flavor instant pudding
- 1/2 tub Cool Whip, thawed (about 1 1/2 cups)
- 1/2 cup mini Reese’s peanut butter cups, chopped
Topping
- 1 cup heavy cream
- 3 Tablespoons powdered sugar
- 1/2 tsp vanilla extract
- Mini Reese’s peanut butter cups for decoration
Graham Cracker Crust
- 1 1/2 cup crushed graham crackers
- 1/4 cup granulated sugar
- 1/3 cup butter, melted
Instructions
- Preheat oven to 375º F (190°C). This step is optional if you prefer a truly no-bake crust, but baking it for a short period adds crispness and helps it hold its shape better.
Prepare Pie Crust
- In a medium bowl, combine the crushed graham crackers with the granulated sugar. Pour in the melted butter and stir until the crumbs are thoroughly moistened and resemble wet sand. Pour this mixture into a 9-inch pie plate. Using the back of a spoon or your fingers, press the mixture firmly and evenly against the bottom and up the sides of the pie plate to form a compact crust.
- If baking, place the pie crust in the preheated oven and bake for 8 minutes. Once baked (or if using no-bake method), allow the crust to cool completely on a wire rack before proceeding with the filling. A cool crust is essential for preventing the layers from melting or mixing.
Make Pie Filling
- Spoon the hot fudge sauce into the bottom of the cooled pie crust, spreading it into an even layer. Ensure the chocolate covers the entire bottom surface of the crust. Place the crust with the chocolate layer in the freezer for 10 minutes to allow the fudge to firm up slightly. This creates a distinct layer and prevents it from mixing with the peanut butter filling.
- In a large mixing bowl, combine the creamy peanut butter and cold milk. Using a whisk or an electric mixer on low speed, beat these ingredients until they are well blended and mostly smooth. The mixture might still have a slightly textured appearance.
- Add both packages of instant vanilla pudding mix to the peanut butter and milk mixture. Increase the mixer speed to medium and beat for about 2 minutes. The mixture will quickly become very thick and creamy. Avoid overmixing once it has thickened sufficiently.
- Gently fold in the thawed Cool Whip (or homemade whipped cream) and the chopped mini peanut butter cups. Use a spatula to carefully fold until just combined, being careful not to overmix, which can deflate the air from the whipped topping.
- Spoon the creamy peanut butter filling evenly over the firm chocolate layer in the pie crust. Smooth the top with a spatula. Place the pie back in the fridge to continue setting while you prepare the final topping.
Make Topping
- Using an electric stand mixer fitted with the whisk attachment (or a hand mixer), beat the heavy cream on medium-high speed until soft peaks begin to form. Gradually add the powdered sugar and vanilla extract, continuing to whisk until stiff peaks are achieved. The whipped cream should hold its shape firmly.
- Gently spread the freshly made whipped cream over the peanut butter layer, creating a beautiful, fluffy cloud-like topping.
- Garnish generously with additional mini Reese’s peanut butter cups for a decorative and delicious finish. You can arrange them artfully or simply sprinkle them over the top.
- Allow the pie to set in the fridge for a minimum of 3-4 hours (preferably overnight) before slicing and serving. This extended chilling time is crucial for a perfectly firm, sliceable pie with beautifully defined layers.
Notes
Nutrition Information (Approximate)
Nutrition information is automatically calculated, so should only be used as an approximation.
Additional Info
Join Our Community! I’ve created a fantastic group on Facebook, and I’d absolutely love for you to become a part of it! It’s a vibrant space where you can share your favorite recipes, ask questions, connect with other food lovers, and stay updated on all the new and exciting dishes and desserts from our kitchen. Never miss a new recipe again!
Don’t forget to follow me on Instagram and tag #dinnersdishes so I can see all the wonderful DINNERS, DISHES, AND DESSERTS recipes YOU create at home!
Stay connected and never miss out on delicious recipes or kitchen tips. Be sure to follow me on my social media channels for daily inspiration:
Facebook | Twitter | Pinterest | Instagram
