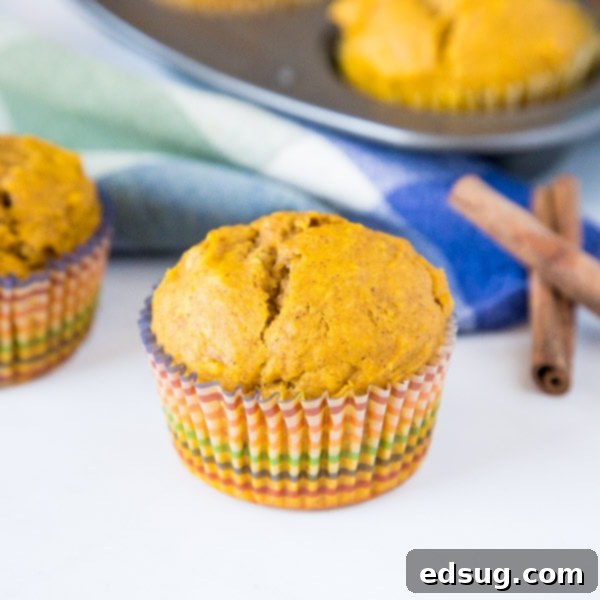
The Best Healthy Pumpkin Muffins: Easy, Delicious, and Perfectly Spiced for Fall
These Healthy Pumpkin Muffins are incredibly light and fluffy, bursting with the comforting flavors of warm fall spices. Best of all, they’re made with wholesome ingredients that make them a treat you can feel good about enjoying!
There’s something truly magical about baking with pumpkin. As autumn leaves begin to change and the air turns crisp, the aroma of pumpkin and cozy spices like cinnamon, nutmeg, and ginger fills the kitchen, instantly creating a warm and inviting atmosphere. Pumpkin isn’t just for pies; it’s a wonderfully versatile ingredient that adds incredible moisture and tenderness to baked goods. These healthy pumpkin muffins are a perfect example, delivering that rich, comforting flavor we crave without compromising on nutrition. They’re an ideal breakfast on a busy morning, a satisfying afternoon snack, or a delightful addition to any fall gathering.
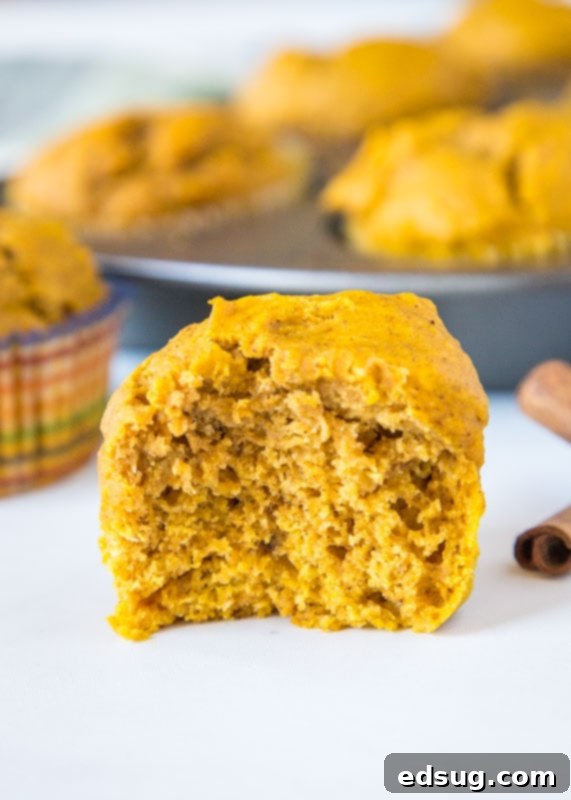
Why You’ll Love These Healthy Pumpkin Muffins
Beyond their delicious taste, these muffins offer several compelling reasons to become your new fall favorite:
- Wholesome Ingredients: Made with natural sweeteners and healthy fats, these muffins are a guilt-free indulgence, perfect for a balanced diet.
- Incredibly Moist & Fluffy: The generous amount of pumpkin puree ensures a consistently tender crumb, preventing dry muffins.
- Perfectly Spiced: A thoughtful blend of cinnamon and pumpkin pie spice brings all the classic, comforting fall flavors to life in every bite.
- Quick & Easy: With a straightforward preparation process and minimal baking time, you can have these delectable muffins ready in under 30 minutes, ideal for busy schedules.
- Freezer-Friendly: Their excellent freezing capability makes them perfect for batch baking and enjoying later, ensuring a quick and healthy option is always available.
- Customizable: These muffins serve as a fantastic base for various mix-ins, allowing you to easily add your favorite chocolate chips, nuts, or dried fruit to match your cravings.
Essential Healthy Pumpkin Muffin Ingredients
Creating these delightful muffins requires a careful selection of ingredients that balance incredible flavor with wholesome goodness. Here’s a closer look at what you’ll need and why each component is vital for the perfect outcome:
- Pumpkin Puree: This is the unequivocal star ingredient! It’s absolutely crucial to use 100% pure pumpkin puree, not pumpkin pie filling. Pie filling contains pre-added sugars and spices, which would significantly alter the carefully balanced flavor and sweetness of these muffins. Pumpkin puree not only imparts a rich, natural sweetness and a beautiful orange hue but also adds unparalleled moisture, making your muffins wonderfully tender. It’s also a fantastic source of vitamins and dietary fiber!
- Healthy Oils (Coconut or Avocado Oil): For a healthier touch, we lean on wholesome fats like coconut oil or avocado oil. Both are excellent choices for baking. Coconut oil provides a subtle, pleasant richness that complements the pumpkin, while avocado oil is virtually flavorless, allowing the pumpkin and spices to shine, while adding healthy monounsaturated fats. If using coconut oil, ensure it’s melted but not too hot when incorporated into the wet ingredients.
- Eggs: Eggs are foundational for structure and binding in baking. They play a critical role in helping the muffins rise, provide a desirable richness, and act as an emulsifier, holding all the diverse ingredients together to create that perfect, cohesive muffin texture. Using large eggs is the standard for most recipes unless specified otherwise.
- Natural Sweeteners (Honey or Maple Syrup): Moving away from refined sugars, these muffins are sweetened with honey or pure maple syrup. Both are natural alternatives that contribute a lovely depth of flavor. Maple syrup offers a distinct autumnal note that pairs wonderfully with pumpkin, while honey provides a classic, gentle sweetness. Opt for high-quality, pure versions of either for the best taste.
- Milk (Any Type): The beauty of this recipe is its flexibility with milk. Feel free to use whatever type of milk you typically have on hand – whether it’s dairy milk (whole, 2%, or skim) or a non-dairy alternative such as almond milk, oat milk, or soy milk. The milk adds essential moisture to the batter and helps achieve the ideal, pourable consistency.
- Vanilla Extract: A splash of good quality vanilla extract is indispensable. It doesn’t just add its own pleasant aroma; it acts as a flavor enhancer, deepening and rounding out all the other flavors, particularly the warm spices, and adding a layer of aromatic complexity to your finished muffins.
- Flour (All-Purpose, Whole Wheat, or Combination): You have wonderful flexibility here to tailor to your preference. All-purpose flour yields a classic, light, and tender muffin. For increased fiber and added nutritional benefits, whole wheat flour is a fantastic option, providing a slightly denser texture and a pleasant, nutty undertone. Many find that a combination of half all-purpose and half whole wheat flour strikes a perfect balance, offering the best of both worlds – tenderness with added nutrition.
- Baking Powder: This powerful leavening agent is absolutely essential for giving the muffins their characteristic lift and incredibly light, fluffy texture. It works by reacting with moisture and heat to produce carbon dioxide bubbles, which cause the batter to expand.
- Baking Soda: Another crucial leavening agent, baking soda functions in conjunction with acidic ingredients (like pumpkin puree itself, or any slight acidity from honey/maple syrup). This reaction helps the muffins rise and become airy, contributing to a delightful, soft interior.
- Salt: Often underestimated, a small pinch of salt is absolutely vital in baking. It performs several critical functions: it balances the sweetness of the sugars, intensifies and enhances the flavors of all the other ingredients, and ensures your muffins are never bland, bringing out their true potential.
- Warm Fall Spices (Cinnamon and Pumpkin Pie Spice): These are truly what define the autumnal essence of these muffins. Cinnamon is a fundamental must-have, providing a warm, inviting, and spicy base note. Pumpkin pie spice is a convenient and potent blend that typically includes cinnamon, nutmeg, ginger, and cloves, delivering that quintessential, complex autumnal flavor profile we all adore. Do not be shy with your spices; they are the key to a truly flavorful and aromatic muffin!
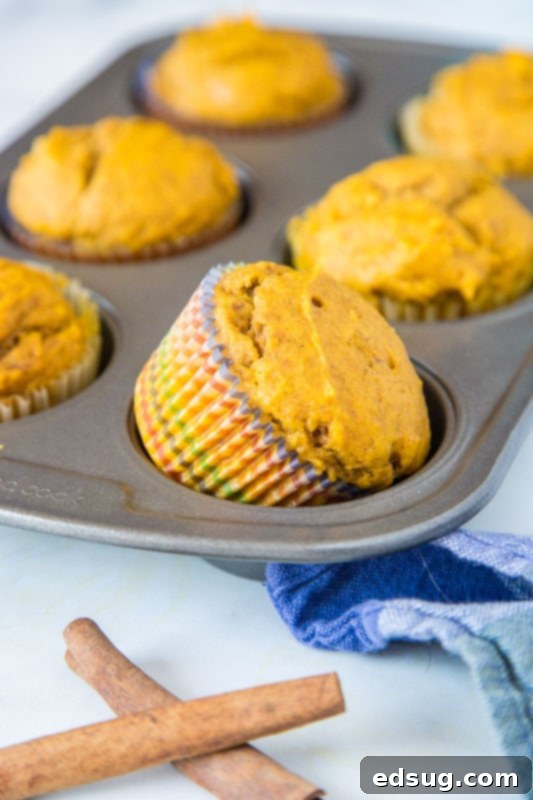
How To Bake the Perfect Healthy Pumpkin Muffins
Making these healthy pumpkin muffins is a surprisingly straightforward process, even if you’re a beginner baker. By following these clear steps, you’ll consistently achieve light, fluffy, and utterly delicious results every time:
- Prepare Your Muffin Tin and Preheat Oven: Begin by preheating your oven to the optimal baking temperature of 350°F (175°C). Next, prepare a standard 12-cup muffin tin. You have two excellent options: either line each cup with paper liners (cupcake liners work perfectly) or thoroughly grease each cup with baking spray, butter, or coconut oil. Proper preparation ensures your muffins won’t stick and makes for a much easier cleanup later.
- Combine the Wet Ingredients: In a large mixing bowl, the foundation of your muffin batter comes together. Whisk vigorously to combine all of your liquid and moist ingredients: the pumpkin puree, your chosen healthy oil (coconut or avocado), the eggs, honey or maple syrup, milk, and vanilla extract. Continue whisking until the mixture is completely smooth, well combined, and looks uniformly orange and creamy. This crucial step ensures an even distribution of flavor and moisture throughout every single muffin.
- Combine the Dry Ingredients: In a separate, medium-sized bowl, prepare the dry components. Whisk together the flour (whether it’s all-purpose, whole wheat, or a combination), cinnamon, pumpkin pie spice, baking powder, baking soda, and salt. Use your whisk to thoroughly combine them, paying attention to break up any potential lumps. This ensures that the leavening agents and spices are evenly dispersed, which is absolutely critical for consistent rising and flavor in every bite of your muffins.
- Gently Combine Wet and Dry Mixtures: Now for the pivotal step: carefully pour the whisked dry ingredient mixture into the bowl containing the wet ingredients. Mix them together using a spatula or spoon until they are *just combined*. This is where the golden rule of muffin making comes in: do not overmix the batter. Overmixing develops the gluten in the flour too much, which inevitably leads to tough, dense, and chewy muffins. As soon as you no longer see significant streaks of dry flour, stop mixing. A few small lumps in the batter are perfectly fine and often contribute to a more tender and appealing muffin texture.
- Fill Muffin Cups Evenly: Once your batter is ready, it’s time to fill the prepared muffin cups. For perfectly uniform muffin sizes and professional-looking, neatly filled cups, an ice cream scoop (or a large cookie scoop) is an invaluable tool. It ensures that each muffin cup receives approximately the same amount of batter, which promotes even baking across the entire batch and helps prevent any messy drips on your muffin tin, simplifying cleanup. Fill each cup about two-thirds full to allow for proper rising.
- Bake to Golden Perfection: Place your filled muffin tin into the preheated oven and bake for approximately 18-20 minutes. Keep in mind that baking times can vary slightly depending on the calibration of your specific oven, so it’s always wise to keep a close eye on them. You’ll know your muffins are perfectly done when the tops spring back lightly and gently when pressed with your finger. Alternatively, you can insert a toothpick into the center of one of the muffins; it should come out mostly clean. A few moist crumbs clinging to the toothpick are ideal, but if you see wet batter, they require a few more minutes of baking.
- Cool and Enjoy: Once baked, carefully remove the muffin tin from the oven. Allow the muffins to cool in the tin for a crucial 5-10 minutes. This setting time allows them to firm up slightly and prevents them from sticking to the pan when removed. After this initial cooling, transfer the muffins to a wire rack to cool completely. While they are undeniably delicious warm, allowing them to cool completely helps their flavors to fully develop and makes them much easier to handle, store, and enjoy later.
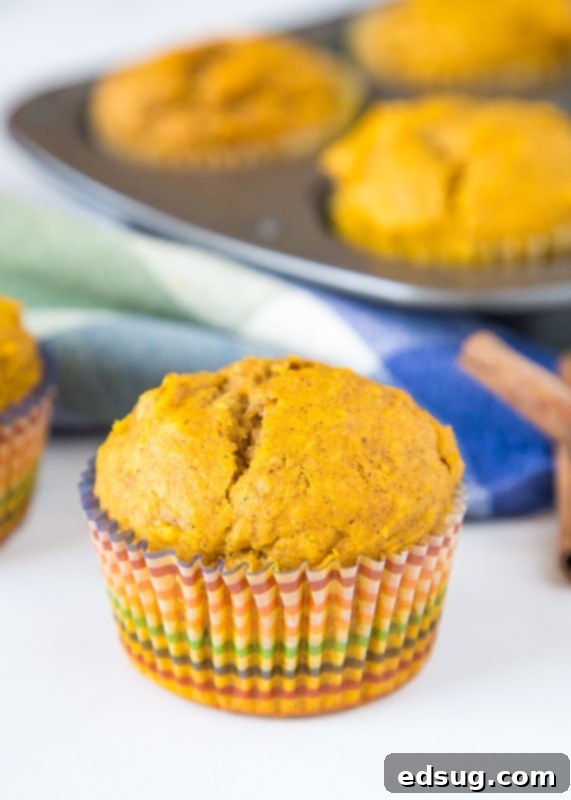
Delicious Mix-In Ideas for Your Pumpkin Muffins
While these healthy pumpkin muffins are absolutely delightful and satisfying on their own, their light and fluffy texture also makes them a fantastic canvas for various delicious and creative mix-ins. Don’t shy away from adding a little extra something to personalize them and make them even more special!
- Chocolate Chips: A truly classic and beloved pairing with pumpkin! Mini chocolate chips work particularly well here, as their smaller size ensures they distribute evenly throughout the batter, giving you a hint of chocolate in every bite. Dark chocolate chips add a sophisticated bitter note that contrasts beautifully with the sweet pumpkin and spices, while milk chocolate offers a sweeter, more indulgent touch.
- Nuts: Incorporating chopped walnuts or pecans into your muffin batter adds a wonderful crunch, a satisfying texture, and an earthy, nutty flavor that complements pumpkin perfectly. For an extra boost of flavor and aroma, consider lightly toasting the chopped nuts in a dry pan over medium heat for a few minutes before adding them to the batter.
- Dried Fruit: Dried cranberries or raisins are excellent choices, offering delightful chewy pockets of tartness or sweetness that burst with flavor. You could also experiment with other dried fruits like finely chopped dried apricots for a tangy twist, or even a small amount of finely diced candied ginger for a warm, spicy kick.
- Streusel Topping: For an extra layer of irresistible texture and a hint of buttery sweetness, consider sprinkling a simple streusel topping over the muffins just before they go into the oven. A quick streusel can be made by combining a tablespoon of flour, a tablespoon of brown sugar, and a half tablespoon of cold, diced butter, then crumbling it over the batter.
- Cream Cheese Swirl: For a slightly more decadent and creamy touch, prepare a simple cream cheese mixture (softened cream cheese, a touch of powdered sugar, and a hint of vanilla extract) and dollop a spoonful onto the top of each muffin cup, gently swirling it into the pumpkin batter with a toothpick before baking.
- Seeds for Extra Nutrition: If you’re looking to boost the nutritional profile and add a slight textural contrast, consider adding chia seeds, ground flax seeds, or pumpkin seeds (also known as pepitas). Pepitas, in particular, would enhance the pumpkin theme with their subtle crunch and nutty flavor.
Pro Tip for Mix-Ins: To prevent heavier mix-ins like chocolate chips or nuts from sinking to the bottom of your muffin cups during baking, lightly toss them with about a teaspoon of the dry flour mixture before folding them into the batter. This slight coating helps them suspend more evenly.
Expert Tips for Baking the Best Muffins Every Time
Having spent countless hours in the kitchen perfecting numerous muffin recipes, I’ve gathered some invaluable insights that consistently guarantee perfect results. Follow these tried-and-true guidelines to achieve exceptionally light, fluffy, and tender muffins every single time you bake:
- Embrace the Two-Bowl Method: It might seem like an extra dish to wash, but combining your wet and dry ingredients in separate bowls before bringing them together is a critical step for muffin success. This method ensures that the crucial leavening agents (baking powder and baking soda) are perfectly and evenly distributed throughout the flour, which is fundamental for a consistent and impressive rise. More importantly, it significantly helps in preventing the cardinal sin of muffin making: overmixing when you finally combine them.
- The Golden Rule: Do Not Overmix the Batter: This is arguably the most important commandment in the muffin baker’s handbook. Once you’ve added the dry ingredients to the wet, mix just until they are barely combined. A few small lumps in the batter are not only perfectly acceptable but often desirable, as they contribute to a more tender crumb. Stop mixing as soon as you no longer see large pockets of dry flour. Overmixing develops the gluten strands in the flour too much, which inevitably leads to muffins with a dense, tough, and rubbery texture.
- Utilize an Ice Cream Scoop for Even Filling: For uniformly sized muffins that bake evenly and boast a professional, aesthetically pleasing appearance, an ice cream scoop (or a large cookie scoop) will become your best friend. It ensures that each muffin cup receives precisely the same amount of batter, leading to consistent baking times across the entire batch and beautiful, domed tops. An added bonus: it minimizes drips and spills on your muffin tin, making cleanup significantly easier.
- Proper Muffin Tin Preparation is Paramount: Whether your preference is for paper liners or greasing the tin directly, it’s crucial to ensure each individual cup is adequately prepared. If you’re using paper liners, ensure they fit snugly into the cups. If you’re opting to grease the tin, use baking spray or a thorough coating of butter and flour to create a reliable non-stick surface, especially for any cups that might not be filled (fill empty cups with a little water to prevent burning).
- Guard Against Overbaking: Overbaking is the primary culprit behind dry, crumbly muffins. Always begin checking for doneness a few minutes before the minimum baking time specified in the recipe. The ideal state for your muffins is when a toothpick inserted into the very center comes out *mostly* clean. A few moist crumbs clinging to the toothpick are perfect; if it comes out completely clean and dry, your muffins might already be slightly overdone. Conversely, if you see wet batter, they definitely need more time. Another reliable test is to gently press the top of a muffin with your finger; if it springs back resiliently, they are likely done.
- Allow for Proper Cooling: Once baked, resist the urge to immediately remove the muffins from the tin. Allow them to cool in the pan for about 5-10 minutes. This crucial resting period allows them to set up properly and prevents them from sticking or breaking apart when you remove them. After this initial cooling, transfer them to a wire rack to cool completely. Cooling completely on a rack is important to prevent condensation from forming on the bottoms, which can lead to soggy muffins.
- Room Temperature Ingredients: For most baking recipes, including these muffins, utilizing room temperature eggs and milk is highly recommended. Ingredients at room temperature incorporate more easily and create a smoother, more homogenous, and better emulsified batter. This improved consistency ultimately contributes to a finer, more tender final texture in your baked muffins.
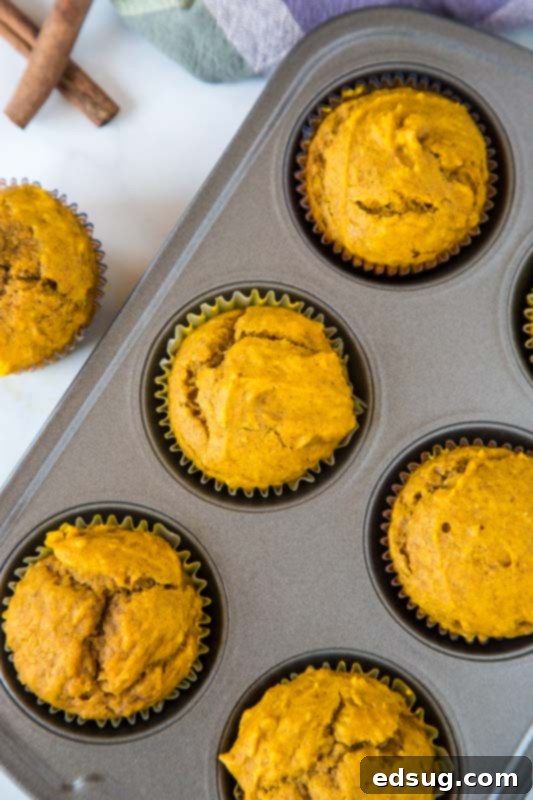
Can You Freeze Healthy Pumpkin Muffins? Absolutely!
Yes, you can absolutely freeze these healthy pumpkin muffins, and it’s a fantastic, convenient way to ensure you can enjoy them anytime you wish! Freezing muffins is a brilliant meal-prepping hack that makes busy mornings a breeze or ensures you always have a wholesome and delicious snack readily on hand. I personally make it a habit to freeze a significant portion of almost every muffin recipe I bake for future enjoyment.
To successfully freeze your muffins and maintain their delicious quality, simply follow these straightforward steps:
- Cool Completely: This is the most crucial step. It is imperative that your muffins are 100% cooled down to room temperature before you even consider freezing them. Placing warm or even slightly warm muffins directly into the freezer will inevitably create condensation inside their packaging, which will then turn into undesirable ice crystals and ultimately lead to soggy, unappetizing muffins upon thawing.
- Wrap Individually: For the very best results and to maximize their freshness, carefully wrap each cooled muffin individually in plastic wrap. This step helps to protect them effectively from dreaded freezer burn, preserving their flavor and texture. Individual wrapping also makes it incredibly easy to grab just one or two muffins at a time without having to thaw the entire batch.
- Store in an Airtight Container: After individually wrapping, place the muffins into a freezer-safe, airtight container or a heavy-duty freezer bag. This adds another critical layer of protection against freezer burn, helps to shield them from absorbing any unwanted freezer odors, and prevents them from getting squished.
- Freeze: Once properly wrapped and stored, place them in your freezer. They will maintain their excellent quality for up to 2-3 months.
When you’re ready to enjoy one of your frozen treasures, simply take a muffin out of the freezer and warm it. You can microwave it for about 30-60 seconds (the exact time will depend on the power of your microwave) until it’s warmed through and soft again. Alternatively, for a slightly crisper exterior, you can let it thaw on the counter for an hour or two, or pop it into a toaster oven for a few minutes until it’s perfectly warm and toasted.

More Delicious Pumpkin Recipes to Savor This Season
If you’ve fallen in love with these healthy pumpkin muffins and are looking for even more delightful ways to incorporate the comforting and versatile flavor of pumpkin into your baking and cooking repertoire, explore some of my other favorite pumpkin-inspired recipes:
- Pumpkin Spice Cupcakes
- Chocolate Chip Pumpkin Bread
- Pumpkin Pancakes
- Pumpkin Dump Cake
- Pumpkin Coffee Cake
- Chewy Pumpkin Chocolate Chip Cookies
- Pumpkin Dream Cake
Healthy Pumpkin Muffins
Light and fluffy pumpkin muffins filled with lots of warm fall spices, made with wholesome ingredients you’ll love. Perfect for breakfast or a healthy snack.
Author: Erin Sellin
Prep Time: 5 minutes
Cook Time: 18-20 minutes
Total Time: 25 minutes
Servings: 12 muffins
Course: Breakfast Recipes, Snack
Cuisine: American
Rating: 5 out of 5 stars (based on 2 votes)
Ingredients
- 1 cup pumpkin puree (100% pure pumpkin, not pie filling)
- 1/2 cup avocado or coconut oil (melted if using coconut oil)
- 2 large eggs
- 1/3 cup honey or maple syrup
- 1/4 cup milk (dairy or non-dairy, your preference)
- 1 teaspoon vanilla extract
- 2 cups flour (all-purpose, whole wheat, or a 1:1 blend for best texture)
- 2 teaspoons cinnamon
- 1 teaspoon pumpkin pie spice
- 1 teaspoon baking powder
- 1/2 teaspoon baking soda
- 1/2 teaspoon salt
Instructions
- Preheat oven to 350°F (175°C). Prepare a 12-cup muffin tin by lining with paper liners or greasing each cup thoroughly.
- In a large bowl, whisk together the pumpkin puree, oil, eggs, honey or maple syrup, milk, and vanilla extract until the mixture is smooth and well blended.
- In a separate medium bowl, whisk together the flour, cinnamon, pumpkin pie spice, baking powder, baking soda, and salt until all dry ingredients are evenly combined.
- Add the whisked dry mixture to the wet ingredients. Mix gently with a spatula or spoon until just combined. Be very careful not to overmix; a few small lumps are perfectly acceptable.
- Divide the batter evenly among the 12 prepared muffin cups, filling each approximately two-thirds full. Using an ice cream scoop can help ensure consistent sizes.
- Bake for 18-20 minutes, or until a toothpick inserted into the center of a muffin comes out mostly clean (some moist crumbs are fine, but no wet batter).
- Remove the muffin tin from the oven and let the muffins cool in the tin for 5-10 minutes. Then, transfer them to a wire rack to cool completely before serving or storing.
Nutrition Information
This nutrition information is an automatic calculation and should be used as an approximation only. Actual values may vary based on specific ingredients and preparation methods.
- Serving Size: 1 muffin
- Calories: 209 kcal
- Carbohydrates: 26 g
- Protein: 4 g
- Fat: 10 g
- Saturated Fat: 1 g
- Polyunsaturated Fat: 8 g
- Cholesterol: 31 mg
- Sodium: 206 mg
- Fiber: 1 g
- Sugar: 8 g
If you enjoyed making and eating this recipe, please consider leaving a comment below and sharing your rating! Your feedback is always appreciated.
I’ve created a fun and engaging community group on Facebook, and I would absolutely love for you to join us! It’s the perfect place to share your favorite recipes, ask any cooking or baking questions you might have, and stay up-to-date with all the newest recipes and exciting updates from Dinners, Dishes and Desserts. Don’t miss out on delicious inspiration!
Be sure to follow me on Instagram and tag #dinnersdishes so I can see all the wonderful creations you make using DINNERS, DISHES, AND DESSERTS recipes!
Make sure to connect with me on all my social media platforms, so you never miss a post or a new recipe!
Facebook | Twitter | Pinterest | Instagram
