Delicious Mini Key Lime Cheesecakes: The Ultimate Sweet & Tart Dessert Recipe
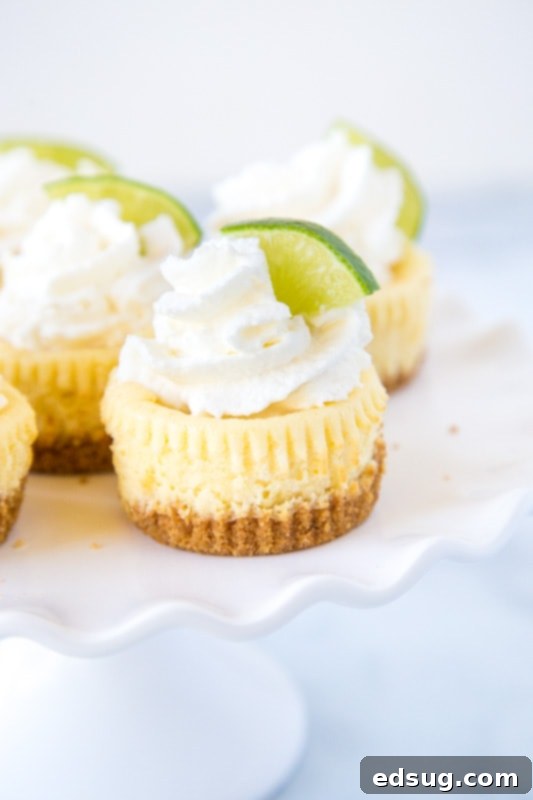
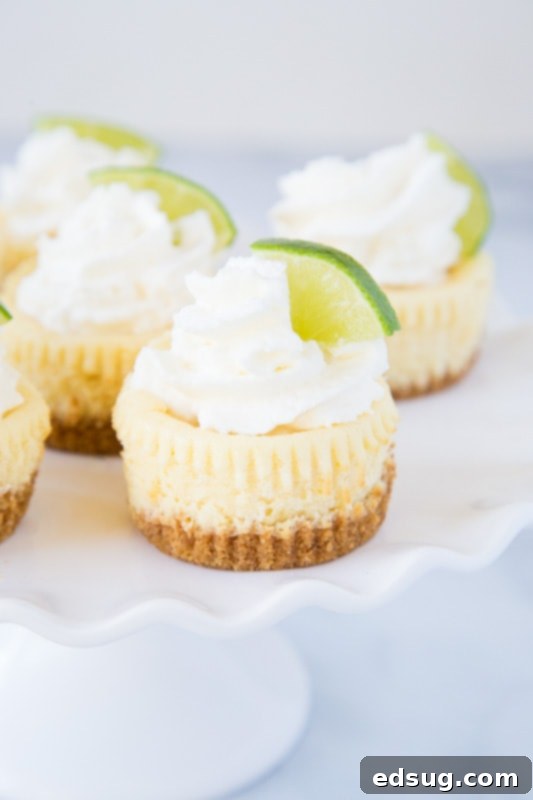
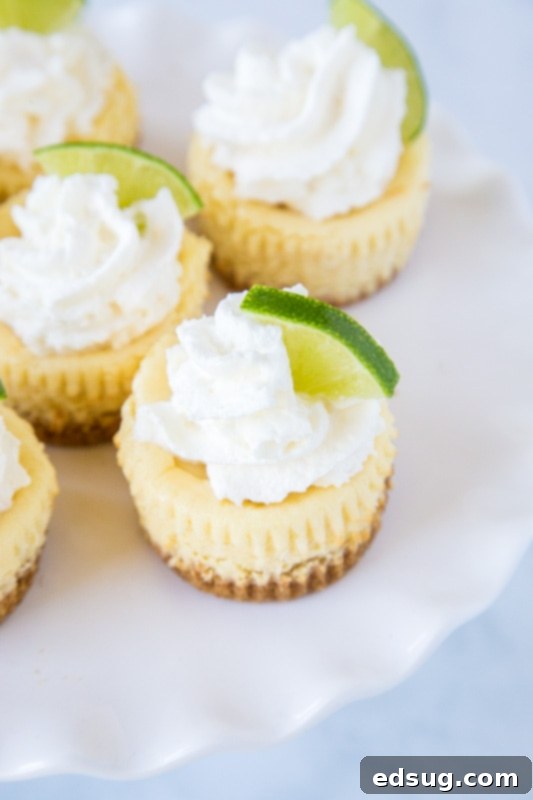
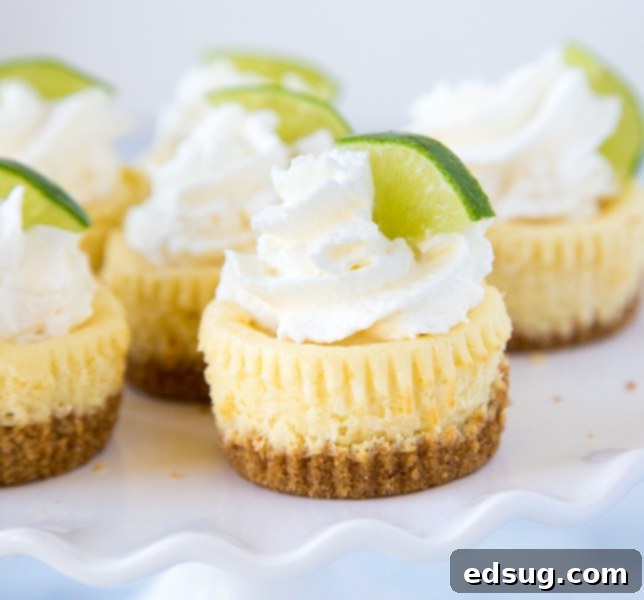
Prepare to be delighted by the vibrant, sweet, and perfectly tart flavors of these incredible Mini Key Lime Cheesecakes. If you’re a fan of classic Key Lime Pie, you’re going to adore this individual-serving twist that combines the beloved zesty lime essence with the creamy indulgence of a rich cheesecake. These bite-sized treats are not just irresistibly delicious; they’re also incredibly convenient for entertaining, offering built-in portion control and an elegant presentation.

There’s something uniquely satisfying about the sweet and tangy burst of key lime. It evokes sunshine, warm weather, and delightful culinary experiences. While a traditional Key Lime Pie is always a crowd-pleaser, these mini cheesecakes elevate the experience by offering individual servings that are both charming and practical. Whether you’re hosting a party, looking for a lighter dessert option, or simply craving a personal indulgence, these mini cheesecakes fit the bill perfectly.
You might think making cheesecakes is complicated, but this recipe is surprisingly straightforward. Unlike some no-bake cheesecake recipes that offer a quick fix, this baked version provides that authentic rich, dense, and creamy cheesecake texture that true connoisseurs crave. The extra step of turning on your oven is absolutely worth it for the superior flavor and texture you’ll achieve. This recipe is very similar to a classic cheesecake, with the simple addition of key lime juice and a touch of flour to ensure the perfect consistency despite the added liquid.
From their bright citrusy notes to their luxurious creamy texture and the satisfying crunch of the graham cracker crust, every element of these mini cheesecakes is designed to create a harmonious and unforgettable dessert experience. They are bright, sweet, tart, creamy, rich, and just downright delicious – a true symphony of flavors in every bite!
Essential Ingredients for Your Key Lime Mini Cheesecakes
Before you start baking, gather these key ingredients. A full printable recipe card with exact measurements is available at the bottom of this post.
- Graham Crackers: The foundation of our delicious crust. You’ll need fine crumbs for the best texture and cohesive base.
- Butter: Melted butter binds the graham cracker crumbs together, creating a rich and stable crust that holds its shape.
- Sugar: Both granulated sugar for the crust and filling. It perfectly balances the tartness of the key lime, ensuring a delightful sweet and sour contrast.
- Cream Cheese: The star of any cheesecake! Use full-fat, brick-style cream cheese at room temperature for the smoothest, creamiest filling. This is crucial for preventing lumps and achieving a velvety texture.
- Sour Cream: Adds an extra layer of richness and a subtle tang that complements the key lime beautifully, also contributing to a super creamy and moist texture.
- All-Purpose Flour: A small amount of flour acts as a stabilizer, helping the cheesecake set properly and preventing cracks, which is especially important with the extra liquid from the key lime juice.
- Eggs: Provide structure and richness to the cheesecake. Ensure they are at room temperature for optimal blending and to prevent curdling when added to the cream cheese mixture.
- Vanilla Extract: A touch of vanilla enhances the overall flavor profile, adding warmth and depth that beautifully marries with the citrus notes.
- Key Lime Juice: The defining ingredient! Freshly squeezed is always best if you can find key limes, but bottled key lime juice (like Nellie’s) is a fantastic and convenient alternative that delivers consistent flavor.

Step-by-Step Guide to Baking Perfect Mini Key Lime Cheesecakes
Crafting these delectable mini cheesecakes is easier than you might think. Follow these detailed steps for a flawless result every time.
- Prepare the Crust: Begin by preheating your oven to 350°F (175°C). Line a standard 12-cup muffin tin (or two, if making 24 cheesecakes) with paper cupcake liners. In a medium bowl, combine the graham cracker crumbs, granulated sugar, and melted butter. Mix until the crumbs are evenly moistened and resemble wet sand. Using a tablespoon, portion the mixture into the bottom of each muffin liner. Press the crumbs down firmly with the back of the spoon or a small glass to create a compact, even crust. Bake these crusts for just 5 minutes to help them set and become slightly golden, then remove from the oven and set aside to cool slightly while you prepare the filling.
- Create the Creamy Cheesecake Filling: In a large mixing bowl, using an electric mixer (either a stand mixer with a paddle attachment or a hand mixer), beat the softened cream cheese and granulated sugar together on medium speed. Continue mixing for 2-3 minutes, scraping down the sides of the bowl as needed, until the mixture is completely smooth and wonderfully creamy, with no lumps. This step is crucial for achieving a silky-smooth cheesecake texture. Next, add the sour cream, key lime juice, and vanilla extract. Mix on low speed until all ingredients are just well blended and incorporated. Be careful not to overmix at this stage, as incorporating too much air can negatively affect the final texture.
- Incorporate the Eggs and Flour: Gently add the eggs one at a time, mixing on low speed for about 30-60 seconds after each addition, until just combined. The key here is not to incorporate too much air into the batter, as excessive air can cause cheesecakes to puff up rapidly during baking and then dramatically sink or crack as they cool. Mini cheesecakes inherently tend to have a slight dip in the center, which is normal, but overmixing can create a larger, undesirable crater. Finally, use a spatula to gently fold in the all-purpose flour until it’s just incorporated. The flour helps to stabilize the filling and achieve that ideal creamy, dense texture, which is especially important due to the liquid content from the key lime juice.
- Bake to Perfection: Carefully scoop the cheesecake batter into the prepared muffin liners, filling each about three-quarters full. Ensure even distribution for consistent baking. Return the muffin tins to the preheated oven. Bake for approximately 25-30 minutes. You’ll know the cheesecakes are done when the edges are set and slightly puffed, and the centers have just a slight jiggle when you gently tap the pan. A small crack on the top is also an indicator that they are finished baking, showing the cheesecake has set.
- Cooling and Chilling: Once baked, remove the cheesecakes from the oven and let them cool in the muffin tin on a wire rack for about 10-15 minutes. This slow cooling helps prevent drastic temperature changes that can lead to sinking or cracking. After this initial cooling, carefully remove the cheesecakes from the muffin tin and place them directly on the wire rack to cool completely to room temperature. Once entirely cool, transfer them to an airtight container and refrigerate for at least 2-4 hours, or ideally overnight, before serving. Chilling is essential for the cheesecake to fully set, firm up, and for all the vibrant flavors to meld beautifully.
Expert Tips & Tricks for the Best Key Lime Cheesecakes
Achieving bakery-quality mini cheesecakes is simple with these helpful tips and insights:
- Room Temperature Ingredients are Key: This is arguably the most important tip for any cheesecake! Always ensure your cream cheese and eggs are at room temperature before you start. Cold ingredients don’t emulsify well, which can lead to lumpy batter and a less creamy, smooth final product. Plan ahead and take them out of the fridge at least an hour (or even two) before you intend to begin baking.
- Avoid Overmixing the Batter: As mentioned in the baking steps, once you add the eggs, mix them in just until combined. Overmixing incorporates too much air into the batter, which will cause the cheesecakes to rise rapidly and dramatically in the oven, only to fall significantly and potentially crack as they cool. To maintain that dense, smooth cheesecake texture, use a low speed and minimal mixing after the eggs are added. A slight dip in the center is normal for mini cheesecakes; a gaping hole is a sign of overmixing.
- Always Use Cupcake Liners: While you might occasionally skip liners for muffins, they are absolutely essential for mini cheesecakes, especially those with a crust. The liners prevent the crust from sticking to the pan and make it incredibly easy to remove each individual cheesecake without damage, ensuring a perfect, pristine presentation for every serving.
- Choosing the Right Key Lime Juice: Authentic key lime flavor is paramount for this recipe. Most grocery stores stock bottled Nellie’s brand Key Lime Juice, which is typically found in the juice aisle next to larger bottles of traditional lemon and lime juice. It’s an excellent, convenient choice that provides consistent flavor. Alternatively, if key limes are in season, you can sometimes find fresh ones in the grocery store and squeeze your own for the absolute freshest taste. If key lime juice is genuinely unavailable, regular lime juice can be substituted, but be aware the flavor will be less distinct, slightly less floral, and generally less intense. Adjust to your taste, perhaps adding a little less if using regular lime juice as it can sometimes be more acidic.
- Don’t Rush the Cooling Process: Sudden temperature changes are the enemy of smooth, crack-free cheesecakes. Allowing them to cool gradually, first in the pan, then on a wire rack, and finally in the refrigerator, is crucial. This slow, gentle cooling helps the cheesecake structure set without collapsing or cracking due to rapid contraction. Patience during this phase will be rewarded with perfect cheesecakes.
- Garnish for Visual Appeal and Extra Flavor: Before serving, elevate your mini cheesecakes with thoughtful garnishes. A generous dollop of freshly whipped cream is a classic pairing, adding a luscious texture. A thin slice or a sprinkle of zest from a fresh lime not only enhances their beauty but also provides an additional layer of complementary citrus flavor and aroma, making each bite even more delightful.

Baking Time and Doneness for Mini Cheesecakes
One of the many advantages of mini cheesecakes is their significantly shorter baking time compared to their larger counterparts. While a full-sized cheesecake can take an hour or more to bake, these delightful individual portions are typically ready in approximately 25-30 minutes. You also won’t need to employ the complex cooling methods often required for traditional cheesecakes, such as leaving them in the oven with the door ajar. Simply remove them from the oven once the centers are set with a slight, gentle jiggle. Allow them to cool as instructed, first in the pan, then on a wire rack, and finally transfer them to the refrigerator to thoroughly chill and firm up.
This streamlined baking process makes them a perfect dessert for busy schedules, impromptu gatherings, or when you need a delicious treat without a lengthy commitment. The next time you’re searching for a unique, easy, and impressively delicious dessert, this mini key lime cheesecake recipe is your perfect answer! They’re sweet, tart, creamy, and absolutely irresistible.
Proper Storage for Freshness and Flavor
These delectable mini cheesecakes are best stored in an airtight container in the refrigerator. Properly stored, they will remain fresh, creamy, and delicious for up to 3-4 days. While they are wonderful served chilled directly from the fridge, I highly recommend allowing them to come closer to room temperature for about 15-20 minutes before serving. This slight warming allows the nuanced, bright tartness of the key lime to really shine through and mellow slightly, making them much more flavorful and enjoyable. For longer storage, you can also freeze baked mini cheesecakes. Once completely cooled, place them in a single layer on a baking sheet to freeze until solid. Then, transfer them to a freezer-safe airtight container or bag, separating layers with parchment paper, for up to 1-2 months. Thaw them in the refrigerator overnight before serving.
Explore More Delicious Dessert Recipes
If you’re a dessert enthusiast like us, you’ll love exploring these other fantastic recipes from our collection, perfect for any occasion:
- Special K Bars: A delightful no-bake treat featuring a crunchy cereal base, a rich peanut butter layer, and a luscious chocolatey topping – a childhood favorite!
- Creamy Lemon Bars: These bars offer a perfect balance of zesty, tangy lemon filling on a buttery shortbread crust – a sunshine-filled dessert that’s bright and refreshing.
- Cherry Cobbler: Indulge in a warm, bubbly cherry filling crowned with a sweet, tender biscuit-like crust. It’s the ultimate comfort dessert, especially delicious served with a scoop of vanilla ice cream.
- No Bake Blueberry Cheesecake: A simple yet elegant cheesecake with the fresh, fruity taste of blueberries, set on a crisp crust – ideal for warmer days when you prefer not to use the oven.
- Lemonade Pie: A surprisingly simple, incredibly refreshing, and easy-to-make pie boasting a bright and creamy lemonade flavor that’s perfect for summer gatherings.

Mini Key Lime Cheesecakes
Pin Recipe
Rate Recipe
Print Recipe
Equipment
-
Kitchen Aid Stand Mixer
-
Muffin Tins
Ingredients
Crust
- 2 cups graham cracker crumbs
- 4 Tablespoons butter, melted
- 2 Tablespoons granulated sugar
For filling
- 24 oz 3 packages cream cheese, room temperature
- 1 cup granulated sugar
- 2/3 cup sour cream
- 2/3 cup key lime juice, (1/2-2/3 cup depending on taste)
- 2 teaspoons vanilla extract
- 3 whole large eggs
- 1/4 cup all-purpose flour
Instructions
-
Heat oven to 350º F (175°C). Line muffin cups with liners. This recipe makes 24 mini cheesecakes (2 standard 12-cup muffin tins).
-
To make the crust, combine graham cracker crumbs, melted butter, and granulated sugar together in a bowl. Mix until well combined and moistened. Place approximately 1 tablespoon of the crumb mixture into the bottom of each muffin liner. Press down firmly to form an even crust. Bake for 5 minutes. Remove from the oven and set aside to cool slightly.2 cups graham cracker crumbs, 4 Tablespoons butter, 2 Tablespoons granulated sugar
-
For the filling, in a large mixing bowl with an electric mixer, cream together the room temperature cream cheese and 1 cup of granulated sugar for a couple of minutes until the mixture is very smooth and free of lumps. Scrape down the sides of the bowl as necessary to ensure everything is fully incorporated.24 oz 3 packages cream cheese, room temperature, 1 cup granulated sugar
-
Add the sour cream, key lime juice (adjusting the amount between 1/2 and 2/3 cup to your taste preference for tartness), and vanilla extract. Mix on low speed until all ingredients are just combined and well blended. Avoid overmixing.2/3 cup sour cream, 2/3 cup key lime juice, 2 teaspoons vanilla extract
-
Add the large eggs one at a time, beating on low speed for approximately 1 minute after each addition until just incorporated. Do not overbeat. Then, gently stir in the all-purpose flour using a spatula until it is just combined into the mixture. This helps prevent cracks and ensures a creamy texture.3 whole large eggs, 1/4 cup all-purpose flour
-
Evenly scoop the cheesecake batter into the prepared muffin cups, filling each about three-quarters full. Return the muffin tins to the oven and bake for 25-30 minutes, or until the edges are set and the centers have a slight jiggle. The tops may show small cracks, which is normal for mini cheesecakes.
-
Remove the cheesecakes from the oven and allow them to cool in the muffin tin for 10-15 minutes. Then, carefully remove them from the pan and transfer them to a wire rack to cool completely to room temperature. Once cooled, place them in the refrigerator to chill for at least 2-4 hours, or preferably overnight, before serving.
Notes
Nutrition
Nutrition information is automatically calculated, so should only be used as an approximation.
Additional Info
Like this recipe? Leave a comment below!
Join Our Community! I’ve created a fun group on Facebook, and I would absolutely love for you to become a part of it! It’s a vibrant space where you can
share YOUR favorite recipes, ask questions, get cooking inspiration, and stay updated on all the exciting new recipes from Dinners, Dishes and Desserts. Don’t miss out on any culinary adventures!
Be sure to follow me on Instagram and
tag #dinnersdishes so I can see all the wonderful DINNERS, DISHES, AND DESSERTS
recipes YOU make and share!
Don’t want to miss a single delicious post? Be sure to follow me on my social media channels:
Facebook | Twitter | Pinterest | Instagram
