Delicious & Easy Homemade Orange Quick Bread with Zesty Glaze
Indulge in the vibrant flavor of this freshly baked Orange Bread. Each slice offers the perfect balance of sweet and tangy orange, making it an ideal treat for breakfast or a delightful snack with your favorite cup of coffee. Don’t forget the optional, glistening orange glaze to elevate it to something truly extraordinary!
There’s something incredibly comforting about a homemade quick bread, and this orange bread recipe is no exception. It’s a beautifully simple, no-yeast bread that comes together quickly, filling your kitchen with an intoxicating citrus aroma. We achieve that bright, authentic orange flavor by using both fresh orange juice and plenty of orange zest, ensuring every bite is bursting with sweet and tart notes. While delicious on its own, a drizzle of our optional orange glaze takes this humble loaf from wonderful to absolutely unforgettable.

Why You’ll Love This Easy Orange Bread
Quick breads are a personal favorite for many reasons, primarily their ease of preparation and the incredible depth of flavor they offer. Unlike yeast breads that require proofing and kneading, quick breads rely on baking powder and baking soda for leavening, making them perfect for busy mornings or spontaneous baking sessions. This particular orange bread recipe stands out for its bright, refreshing taste that can instantly lift your spirits.
If you’re a fan of citrus flavors, this bread will surely become a staple in your home. It reminds me of my popular Lemon Poppy Seed Bread, but with its own distinct sunshine-filled personality. One of the greatest advantages of baking quick breads is their excellent freezer-friendliness. You can easily prepare several mini loaves or double the recipe to always have a delightful treat on hand for unexpected guests, a thoughtful homemade gift, or simply for your own enjoyment whenever the craving strikes.
Key Ingredients for Perfect Orange Bread
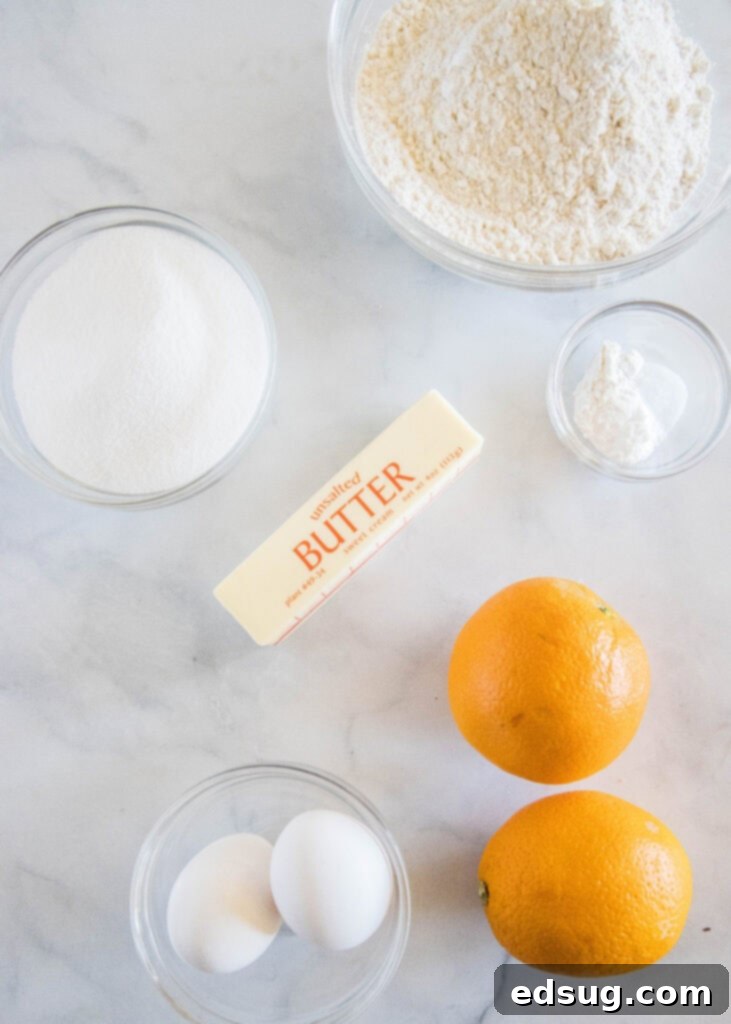
For the best results, always measure accurately and use good quality ingredients. You’ll find the complete, printable recipe card with precise measurements at the very bottom of this post.
- Unsalted Butter: Make sure it’s softened to room temperature. This is crucial for creaming with sugar, which incorporates air and creates a light, tender crumb.
- Granulated Sugar: Provides sweetness and helps create that wonderful texture when creamed with butter.
- Eggs: Large eggs, also at room temperature, bind the ingredients together and add richness. Adding them one at a time ensures proper emulsification.
- Oranges: The star of the show! You’ll need both the fresh juice of 2-3 medium oranges (about 1/2 cup) and the finely grated zest. The zest holds most of the intense orange oil, delivering a concentrated burst of flavor.
- All-Purpose Flour: The structural base of the bread. Measure by spooning it into the measuring cup and leveling it off, rather than scooping, to avoid a dense bread.
- Baking Powder & Baking Soda: These are your leavening agents, working together to give the bread its rise and light texture. Ensure they are fresh for optimal results.
- Salt: A pinch of salt balances the sweetness and enhances all the other flavors in the bread.
The Optional Orange Glaze
While the bread is absolutely delicious on its own, a simple orange glaze adds an extra layer of sweetness and a beautiful finish. It’s incredibly easy to whip up:
- Powdered Sugar: Also known as confectioners’ sugar, it creates a smooth, pourable glaze.
- Orange Juice: Freshly squeezed orange juice is best here to maintain the bright citrus flavor.
- Orange Zest: A touch more zest in the glaze amplifies the orange essence and adds tiny flecks of color.
How To Make The Best Fresh Orange Bread
Baking this orange quick bread is a straightforward process, perfect for bakers of all skill levels. Follow these steps carefully for a moist, flavorful loaf every time:
- Prepare Your Pan and Oven: Start by preheating your oven to 350°F (175°C) and generously greasing or lining a 9×5-inch loaf pan. This prevents sticking and ensures your beautiful bread comes out easily.
- Cream Butter and Sugar: In a large mixing bowl, combine the room temperature unsalted butter and granulated sugar. Using an electric mixer, cream them together on medium speed until the mixture is light, fluffy, and pale in color. This usually takes about 2 minutes and is a crucial step for incorporating air into the batter, leading to a tender bread.
- Incorporate Eggs: Add the eggs one at a time, beating well after each addition until fully incorporated. Scrape down the sides of the bowl as needed to ensure everything is evenly mixed.
- Add Citrus Wet Ingredients: Pour in the fresh orange juice and vibrant orange zest. Mix until just combined. The batter might look a little curdled at this point due to the acidity of the juice, but don’t worry, it will come together once the dry ingredients are added.
- Combine Dry Ingredients: In a separate bowl, whisk together the all-purpose flour, baking powder, baking soda, and salt. This ensures the leavening agents and salt are evenly distributed throughout the flour, preventing pockets of unmixed ingredients.
- Mix Wet and Dry: Gradually add the dry ingredient mixture to the wet ingredients. Mix on low speed or by hand with a spatula until the flour has *just* disappeared. Be careful not to overmix! Overmixing develops gluten, which can lead to a tough, dry bread. A few streaks of flour are better than an overmixed batter. The batter will be quite thick.
- Bake to Perfection: Spread the thick batter evenly into your prepared loaf pan. Bake for approximately 50-60 minutes. To check for doneness, gently touch the top of the bread – it should spring back slightly. Alternatively, insert a wooden skewer or toothpick into the center; it should come out clean. If the top starts to brown too quickly, you can loosely tent it with aluminum foil.
- Cooling Process: Once baked, remove the loaf from the oven and let it cool in the pan for about 10 minutes. This allows the bread to set before you attempt to move it. After 10 minutes, carefully invert the loaf onto a wire rack to cool completely. Cooling on a wire rack allows air circulation, preventing the bottom from becoming soggy.
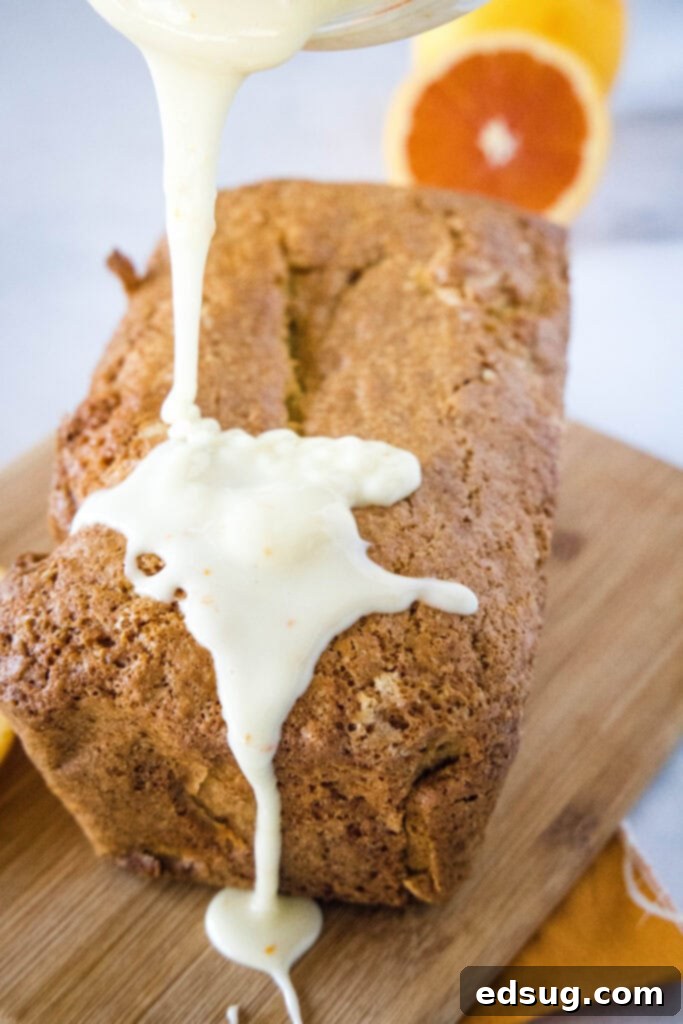
- Glaze (Optional): If you plan to add the orange glaze, wait until the bread has cooled completely. This prevents the glaze from melting and running off. Simply whisk together the powdered sugar, orange juice, and orange zest until smooth, then drizzle it generously over the cooled bread.
Tips for the Best Orange Bread
- Room Temperature Ingredients: This is key! Softened butter and room temperature eggs emulsify better with other ingredients, creating a smoother batter and a more uniform texture in the final product.
- Fresh Oranges are a Must: Do not use bottled orange juice or pre-packaged zest if you want the best flavor. Fresh oranges provide the brightest, most aromatic citrus notes.
- Don’t Overmix: As mentioned in the instructions, overmixing leads to a tough bread. Mix only until the dry ingredients are just incorporated.
- Proper Pan Preparation: Always grease and flour your loaf pan, or use parchment paper, to ensure easy removal. Nothing is worse than a stuck loaf!
- Test for Doneness: The toothpick test is reliable. If it comes out with wet batter, it needs more time. A few moist crumbs are okay.
- Cool Completely Before Glazing: Patience is a virtue here. Glazing a warm loaf will result in a thin, runny glaze.
Serving Suggestions for Orange Bread
This delightful orange bread is incredibly versatile and can be enjoyed in many ways:
- Breakfast Treat: A slice with your morning coffee or tea is pure bliss.
- Afternoon Snack: Perfect with a glass of milk or a light fruit salad.
- Dessert: Serve a slice warmed with a dollop of whipped cream or a scoop of vanilla ice cream for a simple, elegant dessert.
- Gift Idea: Wrap a cooled loaf in cellophane with a pretty ribbon for a thoughtful homemade gift.
How Long Does Orange Bread Last?
Proper storage is essential to keep your orange bread fresh and delicious:
- Room Temperature: Tightly wrapped in plastic wrap or stored in an airtight container, it will stay fresh for about 5-7 days. Keep it away from direct sunlight or heat sources.
- Refrigeration: For a slightly longer shelf life, store it in the fridge where it can last for up to 10 days. Again, ensure it’s tightly wrapped to prevent it from drying out or absorbing refrigerator odors.
- Freezing: This is an excellent option for long-term storage, extending its freshness for 3-4 months.
Can I Leave The Orange Glaze Off?
Absolutely! The orange bread is wonderfully flavorful even without the glaze. If you prefer a less sweet option, are watching your sugar intake, or simply don’t have the ingredients on hand, feel free to omit the glaze entirely. It’s a matter of personal preference, and the bread will still be moist and delicious.

How To Freeze Quick Breads
Freezing quick breads is a fantastic way to enjoy them later. There are a couple of methods you can use, depending on how you plan to serve them:
Freezing a Whole Loaf:
- Cool Completely: This is the most critical step. Ensure your orange bread is completely cooled to room temperature. Freezing warm bread will create condensation, leading to ice crystals and a soggy texture upon thawing.
- Wrap Thoroughly: Wrap the cooled loaf tightly in several layers of plastic wrap, ensuring no air is exposed. Then, add a layer of aluminum foil or place it in a freezer-safe bag. This double layer helps prevent freezer burn and keeps the bread fresh.
- Freeze: Place the wrapped loaf in the freezer. It will maintain its quality for about 3-4 months.
- Thawing: When you’re ready to enjoy it, simply transfer the frozen loaf to the refrigerator overnight, or leave it on the counter at room temperature for several hours until thawed.
- Glaze After Thawing: Ideally, apply the glaze *after* the bread has thawed and is ready to serve. While the glaze will freeze fine, it might release some moisture during the thawing process, affecting its texture and appearance. If you must glaze before freezing, understand it might not be as pristine upon thawing.
Freezing Individual Slices:
This method is perfect for grab-and-go portions and minimizes waste.
- Slice the Bread: Once the bread is completely cooled, slice it into your desired serving sizes.
- Flash Freeze: Arrange the individual slices in a single layer on a baking sheet. Place the baking sheet in the freezer for 1-2 hours, or until the slices are solid. This prevents them from sticking together when stored.
- Store: Once the slices are frozen solid, you can stack them or reassemble them into a “loaf” shape. Wrap them tightly in plastic wrap, then place them in a freezer-safe airtight container or bag.
- Thawing Individual Slices: You can take out just one or two slices at a time. Thaw them on the counter for a short while, or gently warm them in the microwave or toaster oven for a quick, delicious treat.

More Delicious Quick Bread Recipes To Try
If you’ve fallen in love with the simplicity and deliciousness of quick breads, you’re in for a treat! Here are some other fantastic recipes from my collection that you might enjoy:
- Peanut Butter Banana Bread: A delightful twist on a classic, combining nutty and fruity flavors.
- Chocolate Zucchini Bread: A surprisingly moist and rich bread, perfect for using up garden zucchini.
- Strawberry Bread: Sweet, fruity, and perfect for spring and summer gatherings.
- Cranberry Orange Bread: Another wonderful citrus combination, especially popular during the holidays.
- Chocolate Chip Pumpkin Bread: A comforting fall favorite with warm spices and melty chocolate.
- Apple Pie Bread: All the flavors of apple pie in a convenient loaf form.
- Coconut Lime Bread: A tropical escape in every bite, bright and refreshing.
- Blueberry Banana Bread: The ultimate comfort bread, combining two beloved fruits.

Fresh Orange Bread
Erin Sellin
10 minutes
1 hour
1 hour 10 minutes
10
Pin Recipe
Rate Recipe
Print Recipe
Ingredients
Orange Bread
- 1/2 cup unsalted butter, softened
- 1 cup granulated sugar
- 2 whole large eggs
- 3 tablespoons orange zest
- 1/2 cup orange juice
- 2 cups all-purpose flour
- 1 teaspoon baking powder
- 1 teaspoon baking soda
- 1/2 teaspoon salt
Orange Glaze (optional)
- 1 cup powdered sugar
- 2 tablespoons orange juice
- 1 tablespoon orange zest
Instructions
-
Preheat oven to 350º F. Grease or line a 9 X 5 -nch loaf pan. Set aside
-
Using an electric mixer, cream butter and sugar together until light and fluffy, about 2 minutes.
-
Beat in eggs, one at a time, until they are fully incorporated.
-
Pour in orange juice and zest and mix until well combined.
-
Add flour, baking powder, baking soda, and salt; mix until the flour just disappears and is blended. The batter will be thick.
-
Spread into prepared loaf pan. Bake for 50-60 minutes, until it is cooked through. You want it to gently spring back when you touch it and a tester to come out clean.
-
Remove from oven and let it cool for 10 minutes before removing to a wire rack to cool completely.
-
If you are making glaze, wait until bread has completely cooked and then mix everything together until it smooth and you can drizzle it over bread.
Nutrition
Nutrition information is automatically calculated, so should only be used as an approximation.
Additional Info
Erin Sellin
10 minutes
1 hour
1 hour 10 minutes
Bread Recipes
American
10
316
Like this recipe? Leave a comment below!
I’d love for you to join our fun and growing community on Facebook! It’s a fantastic place where you can
share YOUR favorite recipes, ask questions, and stay updated on all the new delicious creations from Dinners, Dishes and Desserts (so you’ll never miss a new recipe)!
Be sure to follow me on Instagram and
tag #dinnersdishes so I can see all the wonderful DINNERS, DISHES, AND DESSERTS
recipes YOU make!
Don’t forget to follow me on my social media channels, so you
never miss a post filled with culinary inspiration!
Facebook | Twitter | Pinterest | Instagram
